My Fairy Sisters Misty and Fay needed a brother. You knew that and you told me – and I am so thankful!
So I sat down to draw him up and write the pattern. I’m really not sure why I had been nervous to try before… I mean, it didn’t take long at all and look at his shorts and his little feathered hat! 🥰 Anyways, thanks for the gentle kick in my butt and I am happy to report that Fairy Boy is now available in my shop, woohoo!
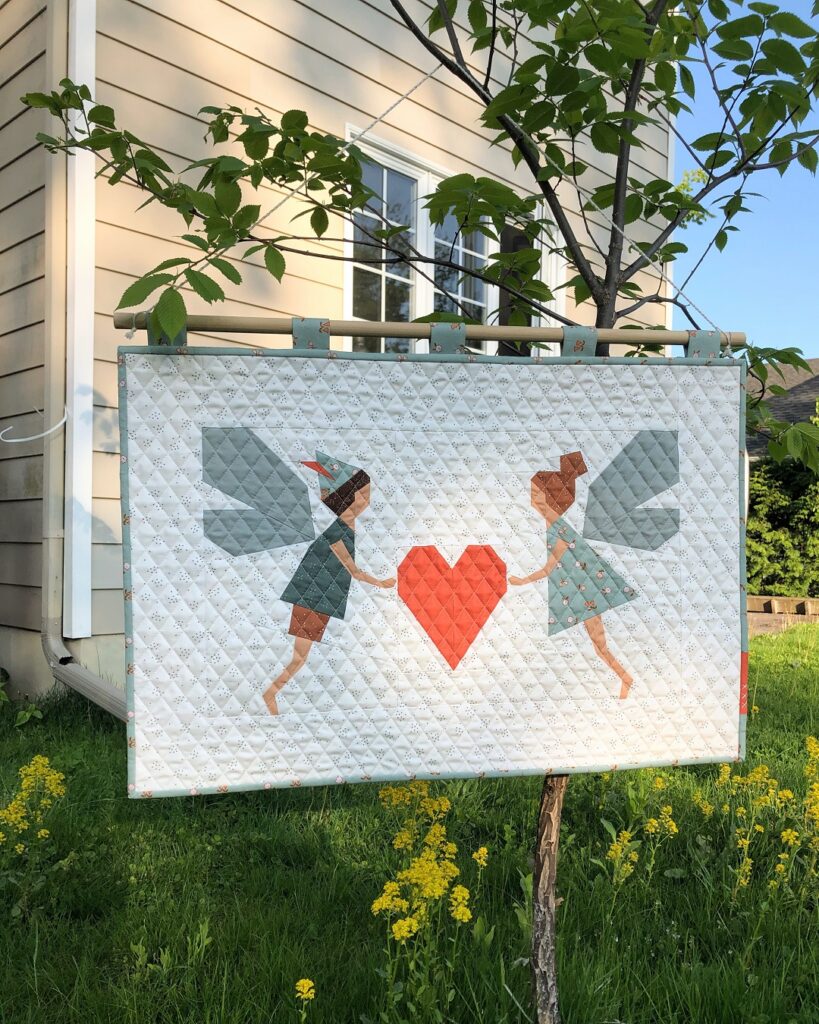
But besides the sweet balloon that Finch is holding, I couldn’t help trying to see if I could come up with more options how the heart block can be used. What do you think about this one? Isn’t it lovely?!
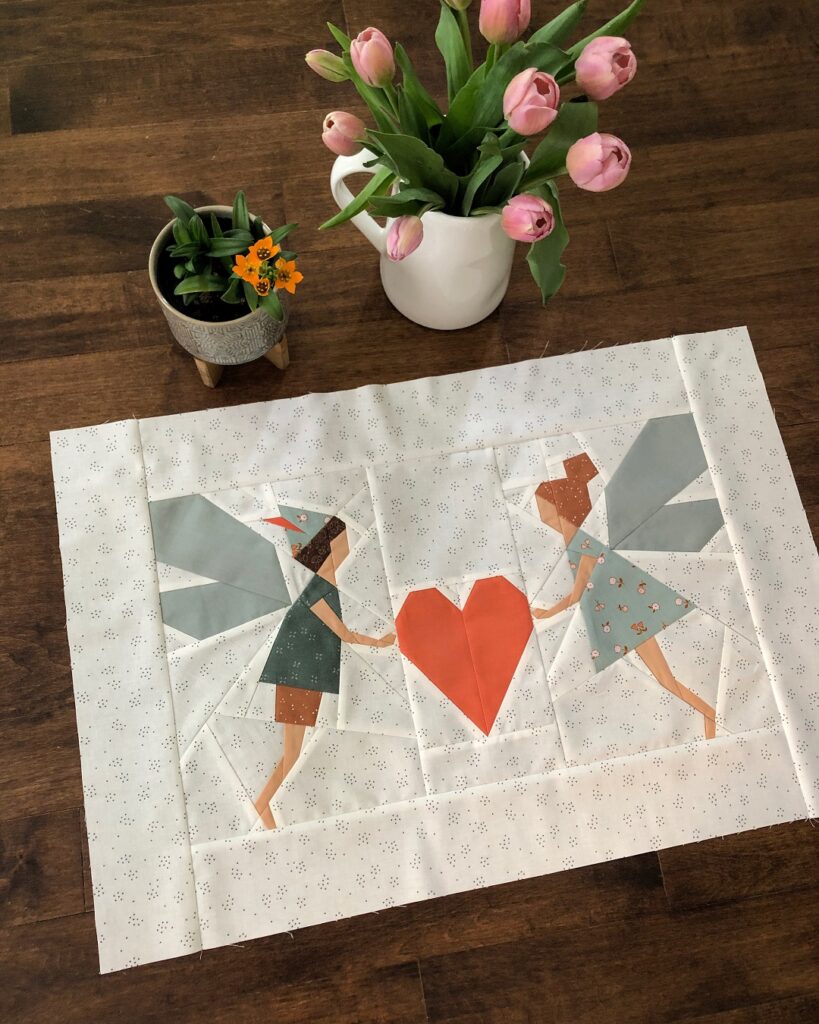
I can think of so many reasons to make this mini quilt: Hang it up in a little one’s nursery! Make it as a wedding gift for a newly wed couple! Or even as a welcome sign in the entrance area of your home. I’m sure you could think of even more ideas!
But wherever your sweet mini quilt might end up, let me first take you through the steps of making it! Shall we? Ok, let’s go!
A few notes before we start
- Finished quilt size: 18″ x 27″ or 27″ x 41″
- The mini quilt above combines elements from 2 different quilt patterns:
- Fairy girl: Fairy Sisters (get the pdf or printed booklet)
- Fairy boy and heart: Fairy Boy (get the pdf)
- Both patterns are also available as a bundle: Fairy Folks (get the pdf)
- The fabric requirements for the quilt top are mostly those of Fairy Sisters: 1 yd of background fabric for the smaller size / 2yds for the larger size, plus your favourite scraps for the fairies and the heart.
Cutting instructions
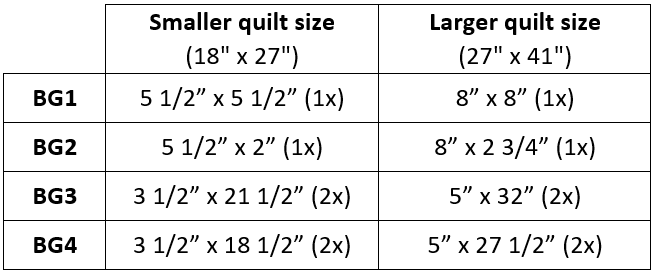
Instead of the background pieces listed in the Fairy Sisters and Fairy Boy patterns, prepare the following background pieces:
Piecing your fairies and heart quilt top
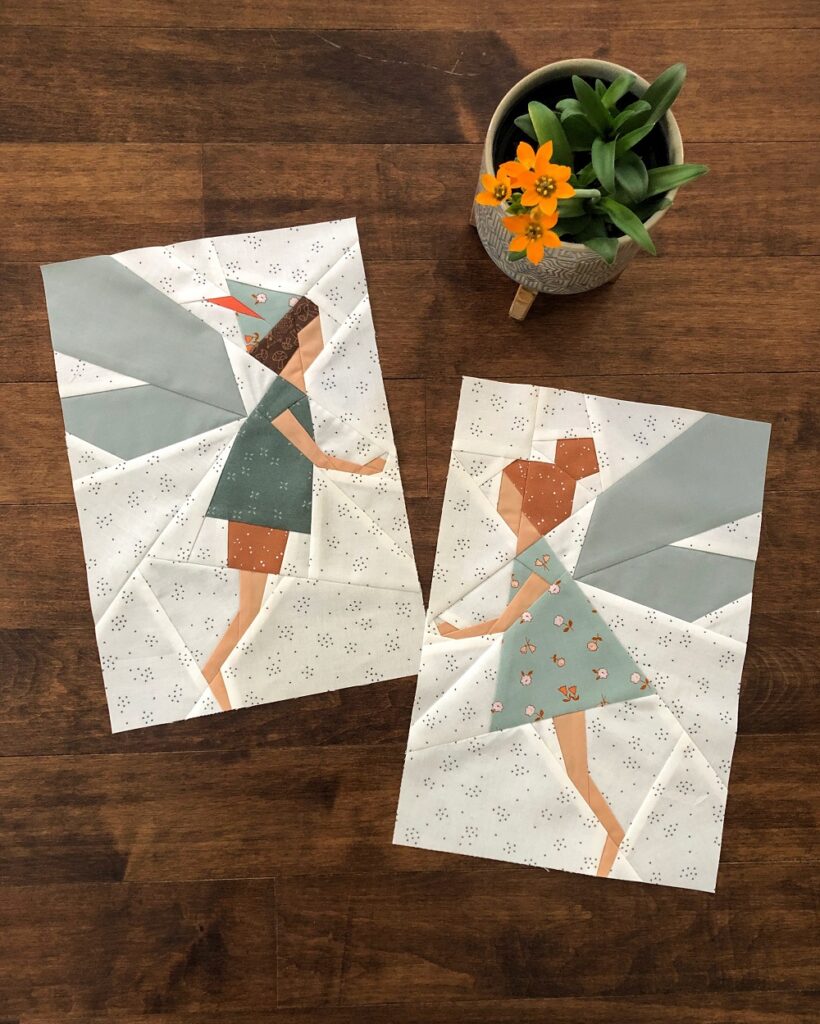
- Using your assorted scraps, your off-cuts and remaining background fabric, make the following blocks (all of the smaller or larger size included in each pattern):
- a heart block
- a fairy boy block
- a left-facing fairy girl block
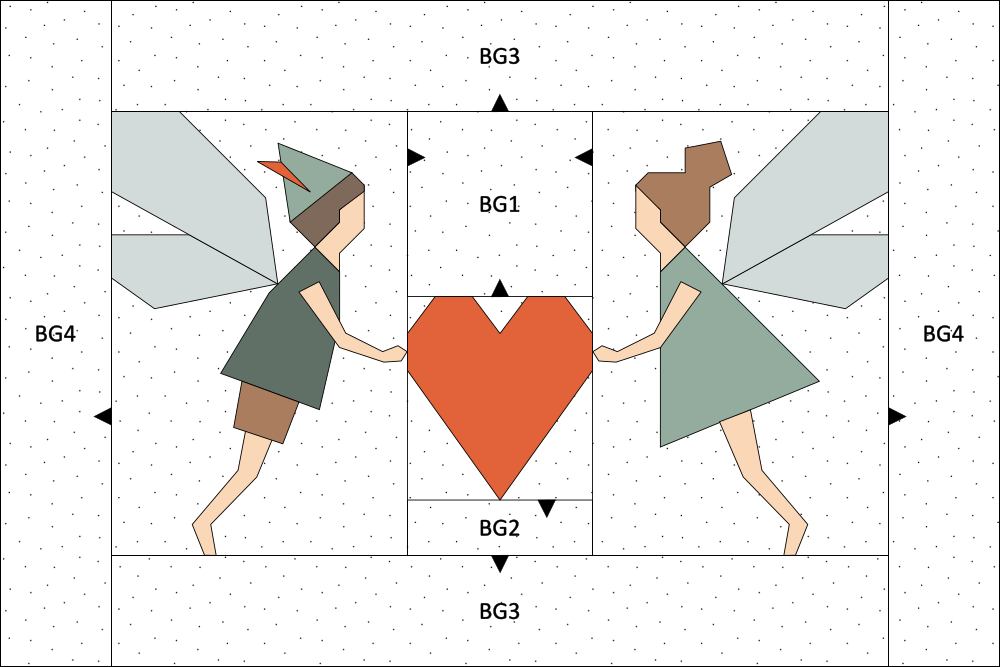
Refer to the diagram below to assemble your quilt top.
- RST, sew your BG1 and BG2 pieces to the top and bottom of your heart block and press your seams towards the BG1 and BG2 pieces.
- RST, sew your fairy blocks to the left and right of your heart unit from step 2 and press your seams towards the heart unit.
- RST, sew your BG3 pieces to the top and bottom of your unit from step 3 and press your seams towards the BG3 pieces.
- RST, sew your BG4 pieces to the left and right of your unit from step 4 and press your seams towards the BG4 pieces.
- Finish (baste, quilt and bind) as desired.

And now just find a sweet spot to hang your fairies and heart mini quilt! If you like my rustic dowel and fabric loops as a finish for a wall hanging, you might like this tutorial.
Happy sewing!


Can I buy these pdfs with American dollars? Not sure how to do it!
Yes, you can! The prices will be converted automatically during the checkout process (the exact rates depend on your credit card provider).