I am a passionate quilter, but sometimes I branch out into other sewing projects. And because there was another baby born last month, another cuddly toy was needed. This time I chose to make a dragon stuffie. As some of you might know, I have always had a soft spot for these magical creatures, so the choice was an easy one.
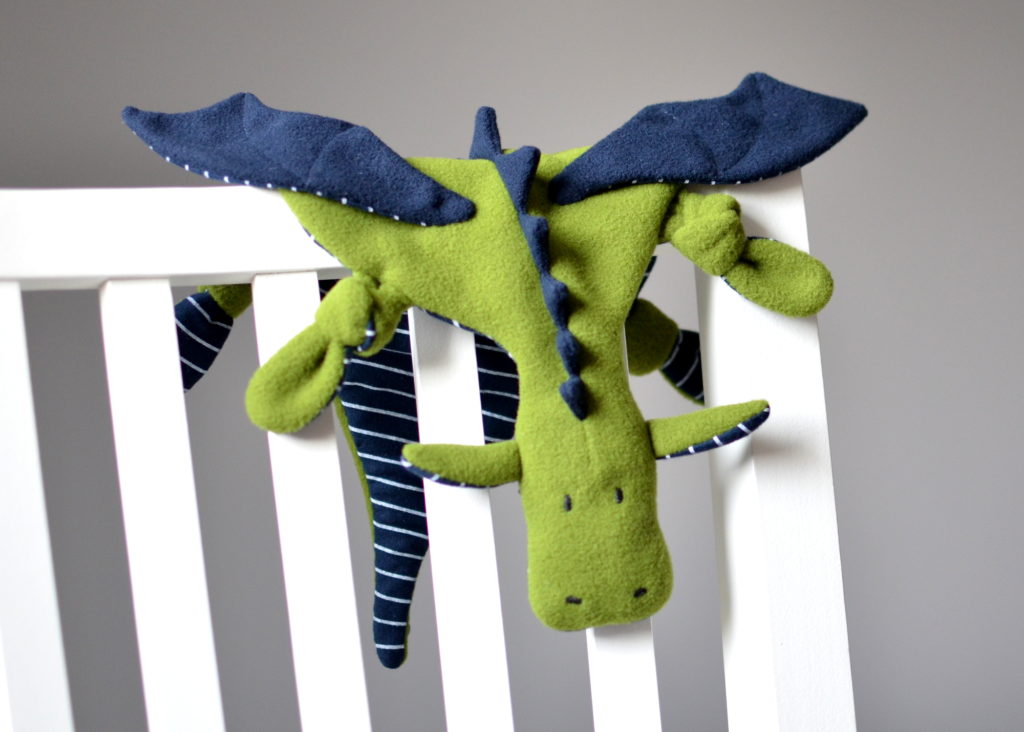
The dragon stuffie
On my hunt for some extra cuddly materials, I went through my fleece and jersey remnants and found some green and navy scraps from previous kids hat projects.
And just as I was about to start sketching some design ideas, I came across this adorable red and white striped pacifier holder by von Lange Hand on Pinterest (you can find the pattern here).
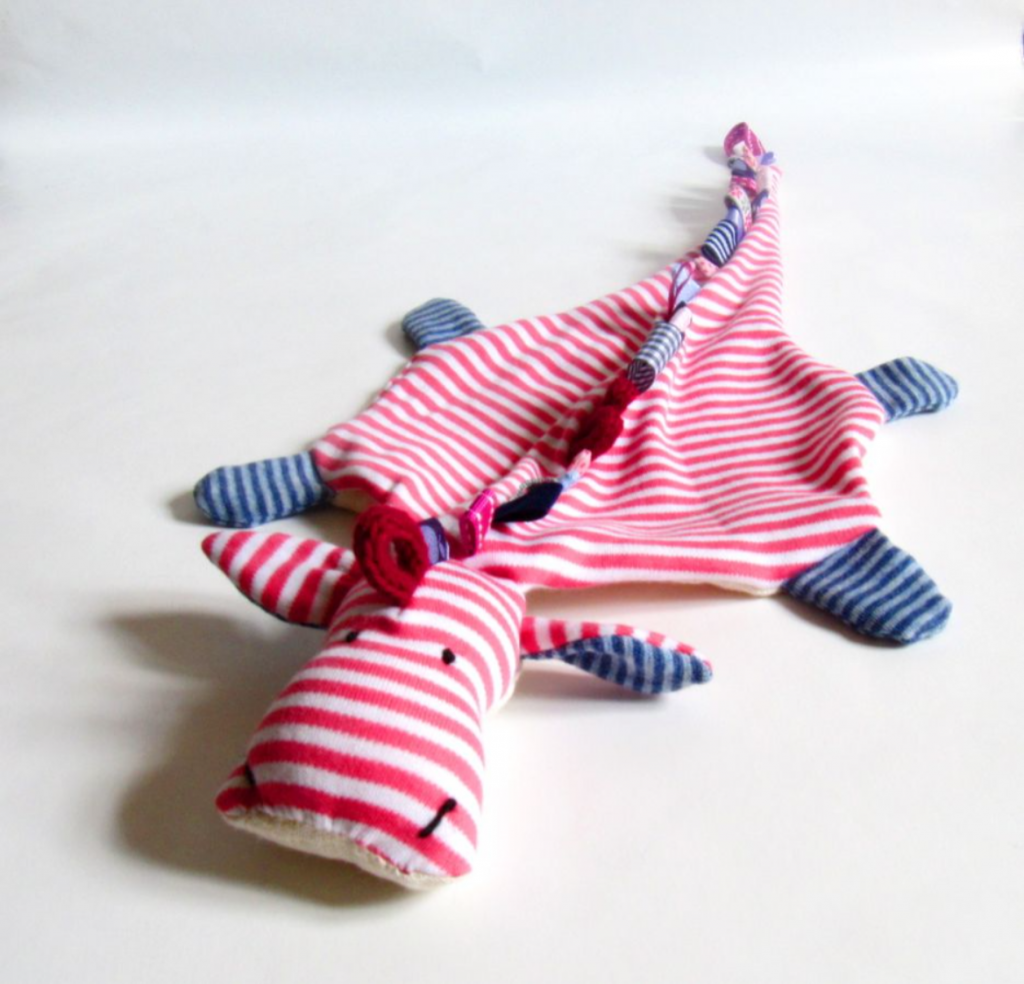
I am not very good at following instructions though, so I made my own version. Since I don’t know the dimensions of the pattern I am not sure how close I got to the original in terms of size, but I’d say the proportions are VERY similar, especially the head. I changed up a few details though.
Firstly, I went for knotted paws. I have used them in another stuffie project not too long ago (Pepe’s little bear) and find them just so cute! As I learned from last time it is easy to underestimate the length of material that goes into the knot, so this time I made sure they were long enough for easy knotting… 😋 I also used the same striped jersey for the belly as for Pepe’s little bear.
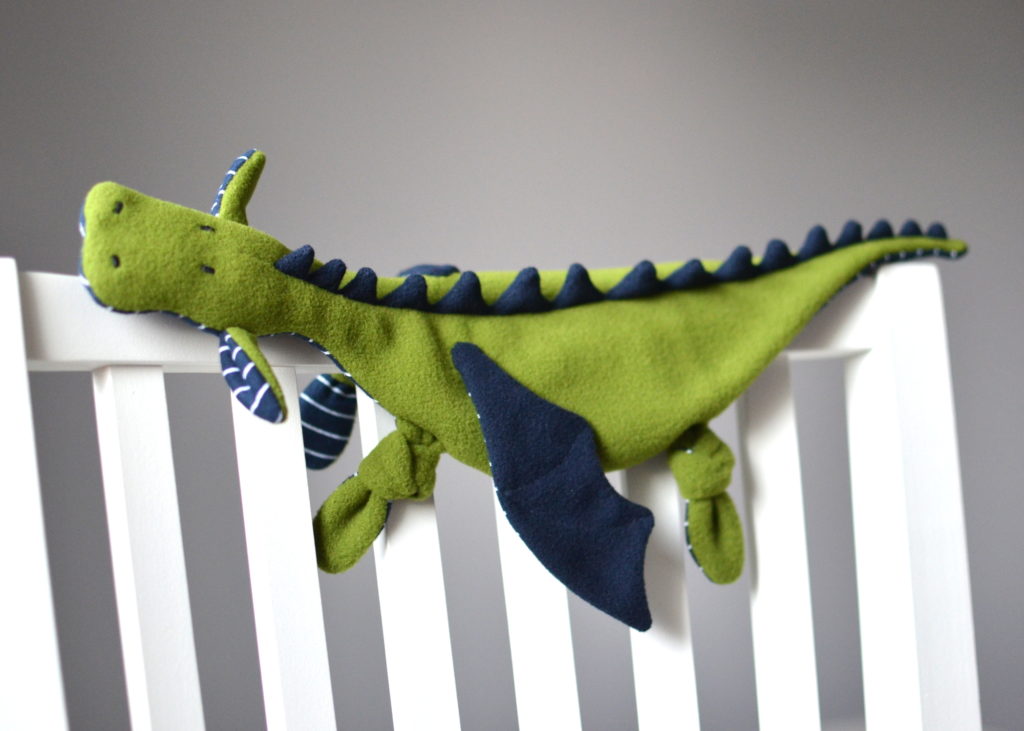
The second modification I went for was to replace the ribbons by a row of pointy spikes. Because I didn’t want to deal with a bunch of individual pieces, I measured the required length from head to tail and drafted a zig zag line with larger spikes in the middle and smaller spikes towards the ends. I sewed two pieces of fleece right sides together, then flipped the unit right sides out and sewed it between the two halves of the dragon back. I LOVE how the spine turned out but it was a pretty finnicky endeavour. So next time I would maybe simply cut that same shape out of a piece of thick felt.
And finally, I added a nice pair of wings. Because duh! Same approach: two pieces sewn right sides together with a little opening to flip. Turned. Closed. Then I top-stitched two curved lines to create the wing segments.
Then I assembled all the pieces of my dragon stuffie. The head got a little bit of padding, the rest of the dragon’s body stayed empty, so overall it’s a really flabby fellow. But a cute one, isn’t he?! 🤗 So, sweet little Jakob, I hope you’ll like your new friend!

Some more goodies
The initial idea to sew a dragon stuffie came from these two fabrics that my husband Paul found a few months ago. Beer-drinking knights might not be the first thing that comes to your mind when thinking of babies, but I think they’re a great motif for a bib – so that’s what I made as well to go into the little welcome package. 😉

And an apron for Jakob’s sister
I also wanted to add something for Victoria, Jakob’s older sister, before sending the parcel. Pre-Christmas season in Germany is also Plätzchen season and assuming that the 5-year-old lady enjoys baking I chose to make a little apron. The dimensions are mostly identical to Yannick’s apron plus some extra length of course. The tiny strawberry print is maybe not exactly a winter theme but I just liked the pattern so much. For an extra girly touch I also added some pink scallops to the front pocket and I find they also make for a really charming detail!

Congratulations to the whole family again to the arrival of the youngest one!! 💛

I’m sadly seeing this for the first time a few days after Makerist has shut down. Is there another way to access the pattern? I’m a beginner in sewing, but I’d love to make this for my husband! He loves dragons and I know he’d love it!
Hi Mallory,
Oh no, I didn’t know that – how sad!
Von Lange Hand has their own website too (https://vonlangehand.de/), but I am not sure if you can get English instructions through there or only German. You might have to contact the shop owner.
Good luck!
Astrid
Did you use the pattern at all? Or completely make your own? I love the shape of yours and the pics on the pattern don’t give me the same feel. Also, the link to the knotted foot you previously did wasn’t working for me. How much extra do you add?
No, I did not use the pattern but made my own version based on the photos I found on Pinterest. I do not remember exactly how long I made the legs before knotting, just that I underestimated how much length goes into the knot. Maybe try 6″ or so? You can always cut it shorter after, if needed.
Good luck!
Astrid
PS: I fixed the link, thanks for letting me know.
Thank you for the beautiful pics and the clues for completing this absolutely beautiful project. You are a truly a perfectionist!
Thank you for the compliment! <3
Hey, can I have a question? I see that you’ve made one more alteration – the head and the bodice is made from one piece together – but still only head is stuffed. Did you somehow ‘blocked’ stuffing inside the head? I think your version is a lot prittier too, more dragon realistic in shape. I hope i will manage to make something simillar.
Oh, thank you so much! Honestly, I’m not sure if I remember correctly. I believe I stuffed the head with a few layers of quilt batting (cut to the shape of the head), rather than loose fluff. And I may also have secured it to the seam allowance inside with a few stitches to prevent it from moving around. Not sure, that’s how I would approach it now 🙂
Thanks, that’s very helpful!
I loved your dragon! I made my version yesterday adding a tail. You are very talented
I am glad you had fun with it, thank you! 🙂
Bonjour, je découvre votre dragon qui me plaît beaucoup, avez vous fait un patron ? Si oui peut on vous l’acheter ?
Merci pour votre retour Dominique
Le patron n’est pas le mien, mais vous pouvez le trouver ici: https://www.makerist.com/patterns/pacifier-dragon-tutorial-with-pattern
Will there be a dragon pattern soon please!
I am not sure… I partially copied something I saw on Pinterest and I think making a pattern could be problematic. If I can find the original I’ll send you the link!
I agree! I just found out that I’m going to be a Nana for the very first time & my daughter & son-in-law are wanting to do an “enchanted” DnD nursery! I want this pattern! Lol!
Hi Syrie,
Please follow the link above the photo with the red striped dragon to get to the pattern 🙂
I did purchase the pattern from Makerist, but I would really like to add the wings you did & know how long to make the legs, so that they can also be knotted. We just found out this week that our new little is going to have some birth-defects, only three fingers on each hand & one leg is 30% the length of his “normal” leg. I want to make this a dragon that will reflect his physique, (one leg shorter than the other) but I would like to know the length that you made the others, so that THEY can be knotted. Also, DO you have a template or pattern for the wings? Thank you!
Hi Syrie,
I am so sorry to hear! Unfortunately I do no longer have any sketches from that project. It was a one-time make, gifted a few years ago. I also do not know how my dimensions would compare to the pattern you purchased. What I do remember: the legs I made were similar to fingers of an adult glove. The knot takes up more length then you might expect, so I recommend making them extra-long. Then make the knot and wait with trimming until you sew them into the side seams of your dragon. For the wings, I sewed the top and bottom layer together, leaving an opening to turn. After flipping I top stitched along the edge all the way around and added those two curved seams across. I attached them to the dragon with a few hand stitches after the rest of the body was complete.
I hope that helps!!
All the best and good luck!
Astrid
The link is broken again!! Would it be possible to fix it or send me the pattern please? I’d love to make this for a friend who just had her first baby <3 thank you so much!
Thanks for letting me know, the link has been fixed 🙂
Would you give your dragon pattern to me? It’s so beautiful and I want to sew it as a birth present. That would be so nice! It’s so cute an I like it much more than the original one 🙈
Hi Mary,
Thank you so much for your compliments! Unfortunately, I did not keep my sketches from a few years ago. And even if I still had them I wouldn’t feel comfortable sharing them since the design is so similar to my inspiration from von Lange Hand. I would suggest you get her pattern and customize it with your own details 🙂
Thank you soooo much, Astrid. You are exceptionally talented.
Victoria loves her new apron already, and, I am certain, Jakob will fall in love with his dragon friend once he starts exploring the world around him. 🙂
Truly four very special, unique and wonderful pieces.
Awe, you guys are so welcome!! 🤗 It is always a pleasure to make little things for special people!