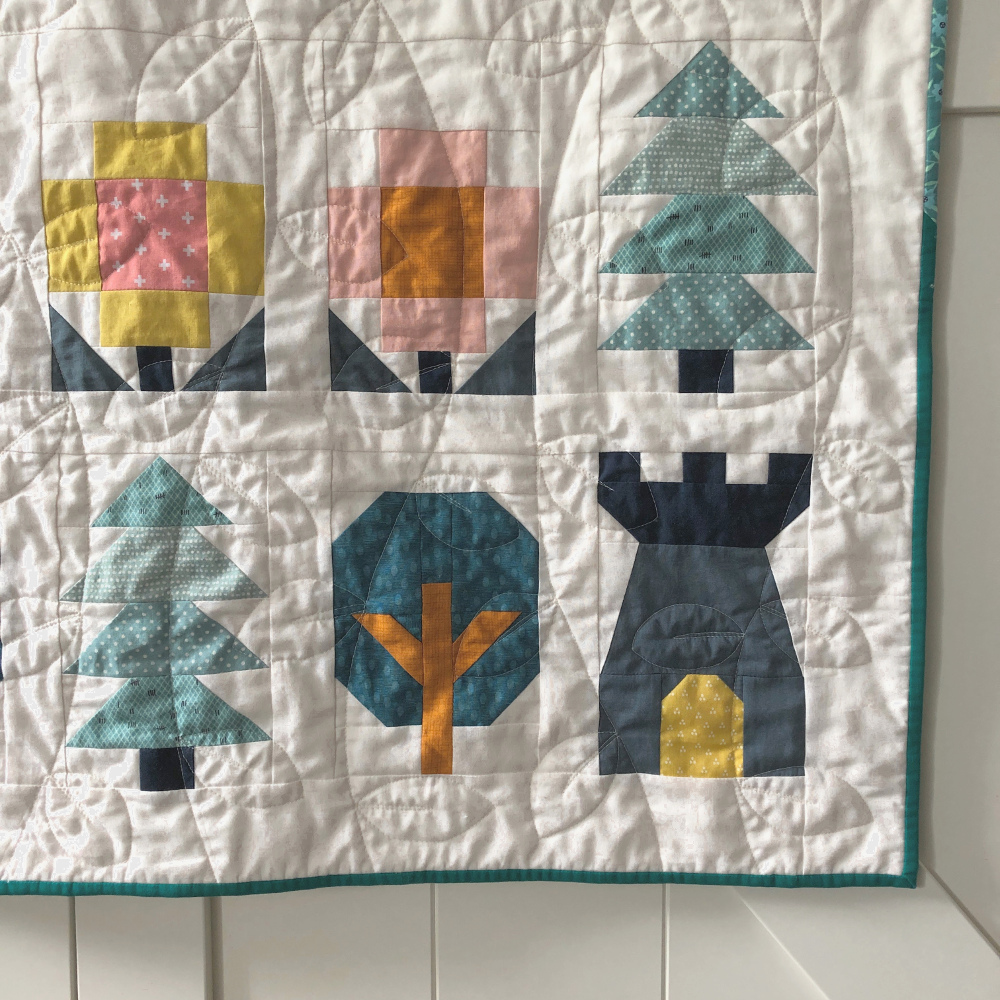
Look what I finally finished last night!!!
No, let me take that back! I’m not saying “finally” – I had no deadline and I chose not to rush myself through the process and not feel stressed about it. But I can still be happy that my baby Little Kingdom quilt is done, right?!

If you read my previous post, you know that I had been working on this version of Little Kingdom for a little while already. But hey! That’s okay, I love quilting – even if I only get to enjoy it in small doses these days.

The first block I made was the castle. It got the centre spot of the quilt.

But it didn’t take long and in my little kingdom grew a rose garden, oak and pine trees and watchtowers were built.

And eventually the whole quilt top came together.

For the longest time I had no clue what to use for the backing. I was thinking of maybe a large scale floral, but didn’t come across anything that I liked enough. And just when I was getting ready to simply chose a solid for the back I found these gorgeous butterflies and dragonflies. Not only do I adore the design, the colours could also not be more complementing to the fabrics in the front! It’s a sheet from H&M, from the kids bedding section, in case you’re curious. This has become one of my regular sources for quilt backs – I like the quality, the price point of course, and the fact that I don’t have to piece the back.

And look how those bugs are hovering around my quilted vines! Since I had already quilted wavy lines on my twin size Little Kingdom quilt, I had planned to do straight lines on this one – either vertically or as a diagonal grid. But then some of you suggested vines and I couldn’t help it. Now I wanted vines – just like any true enchanted castle deserves! I was aware that this would not be an easy task as my machine is not equipped for free motion quilting and I also don’t have a long-arm. But Walkie (aka my walking foot) and I have a very trusted relationship and as a team I thought we should be able to do this (read: I’m stubborn).

So after a really quick sketch on paper I marked my design all over my quilt with my hera marker and got stitching.

And slowly, one vine grew and then another. And after three evening sessions I was done – and felt amazing! I’m still glad it was only a baby size but I am so happy about the whimsical touch the quilting adds to my Little Kingdom! And look at that texture!


I had hoped that I would be able to “simply” quilt along the vines adding the leaves as I passed each of them. My plan also included to do parts of the leaves in reverse gear to reduce the number of times I would need to pivot the quilt. Out of the first ten leaves or so, I unpicked and re-did three though, and eventually decided to quilt everything in forward mode. So yes, in the end I fully rotated the entire quilt for every single leave, but it still seemed like the better approach.
And talking about experiments, this was also my first time going for a scrappy binding – if you can even truly call it “scrappy” with only two different binding fabrics. I knew I wanted to add some more Kona Enchanted. I love how this more saturated colour makes the castle roof pop and wanted a bit more of this hue in the quilt. But then I also had this teal floral… It is one of my all-time favourites and I still remember buying it during my first visit at Quilty Pleasures in Ottawa when I was choosing fabrics for my first quilt ever. But it wasn’t enough for the entire binding, so I only used it for the doors of the pink towers and a bit less than half the binding. And I absolutely love the combination of the two!


Although I have made it a habit ages ago to label all my quilts, I still tend to forget about this detail until I’m almost done binding. This time was no exception. But I DID remember before it was too late, ha!


Anyway, thanks for bearing with my self-admiration here! I think the whole process just took so long that I found it even more satisfying than normal to see everything come together in the end!
If you like this baby layout of Little Kingdom, here are the fabric requirements!
The layout below finishes at about 43″ x 51.5″.


(The trees and flowers are from the Tiny Town quilt pattern by Pen+Paper Patterns.)
Can’t wait to see your versions! Happy sewing!


Hello!
What did the final dimensions of this lovely quilt turn out to be? Thank you!
Hi Alexandra,
It finished at 43″ x 51.5″, I just added the info to the post. Thank you!
Do you have the fabric swatches you use for the enchanted castle quilt?
Hi Whitney!
Unfortunately I do not have swatches. They were mostly scraps, some from years ago. But I’m sure you can find similar colours if you try! 🙂