Hi there!
So I glad I didn’t scare you away with having a small dose of foundation paper piecing (FPP) in my pattern! And I’m sure you’ll find that the basics of FPP are far easier than you might have expected! So don’t worry, I’ll take you through the process step by step!
Ready? Ok!
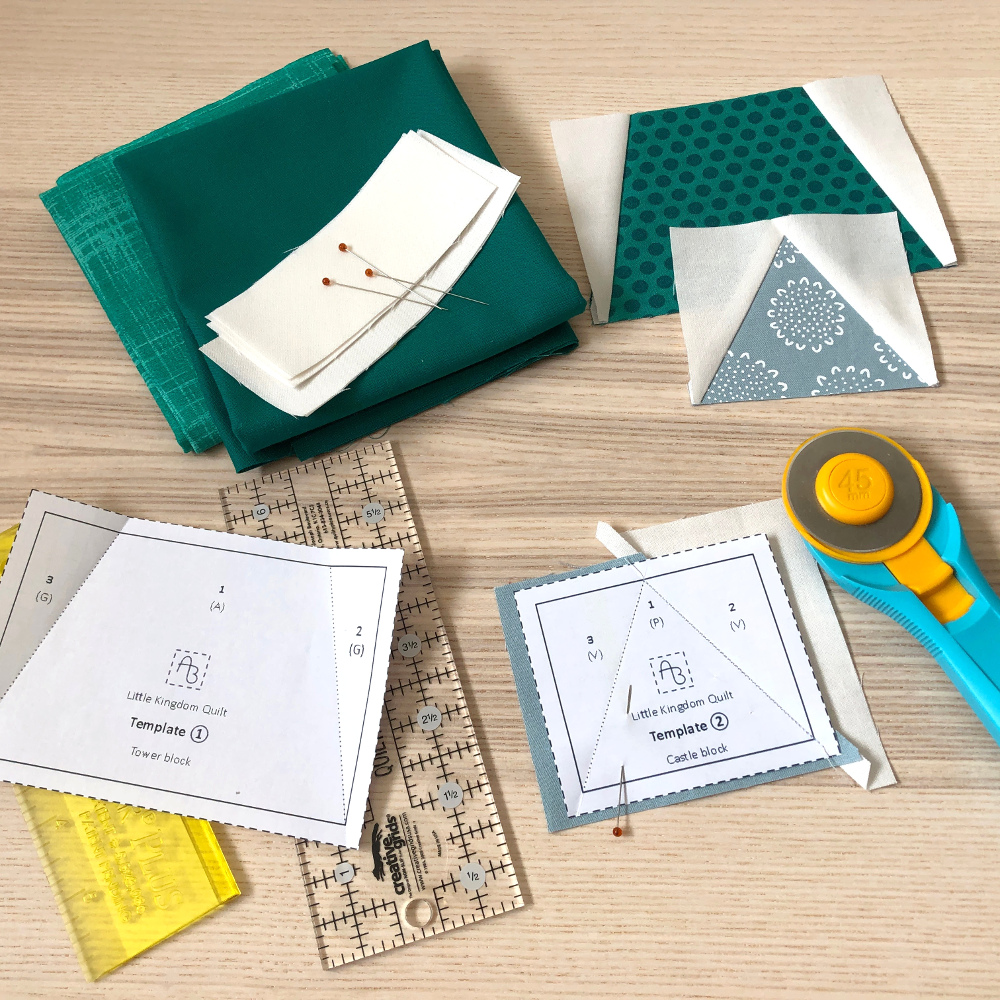
There are a few things you want to get ready before you start sewing:
- Templates:
Print out your templates. You’ll need one Template ① for each tower block and two Template ② for each castle block. Cut them out along the dashed lines and pre-fold them along the dotted lines.
(Tip: If using a thinner quality paper or special FPP paper to print your templates, it will be easier to remove the paper pieces from your fabric later. If you only have regular printer paper at hand, don’t worry! You will be fine, too. The shapes are very simple for FPP. Just be extra careful when ripping the paper away from the fabric!) - Fabric:
Fabric rectangles A/O/M/V as stated in the pattern (A/G/P/V if you have an older version). - Pins:
Some people prefer using a glue stick or tape to temporarily attach their fabric pieces to the corresponding paper templates, but I suggest using two standard pins. - Sewing machine:
After your sections are finished, you’ll rip your templates along the sewn lines and remove the paper pieces. In order to achieve both a strong seam and a good perforation that rips easily, decrease your stitch length to around 1.5! - Iron:
The seams of the paper-pieced block sections will be pressed with the paper still in place. So make sure your iron is on a “no steam” setting!
And that’s all! Let’s start sewing!
The pictures below will show the process for the castle roof, but the middle section of the tower works identically…
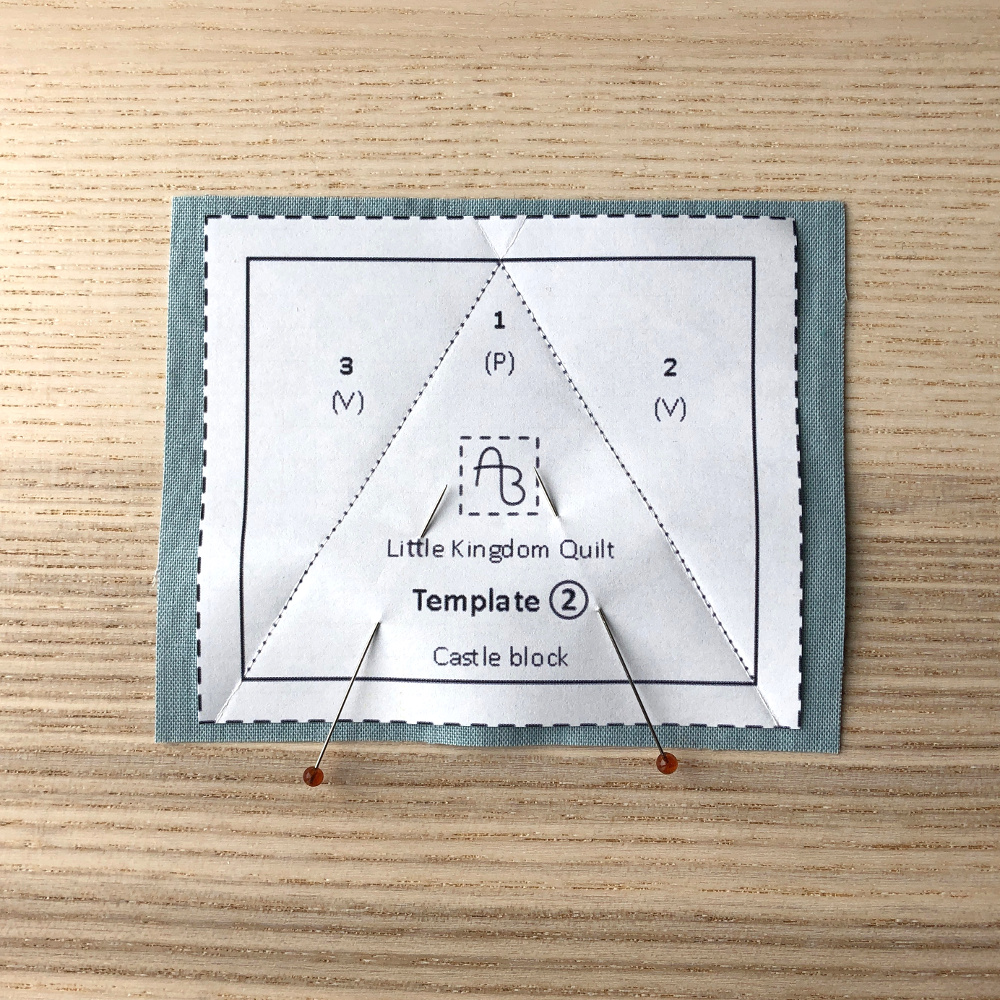
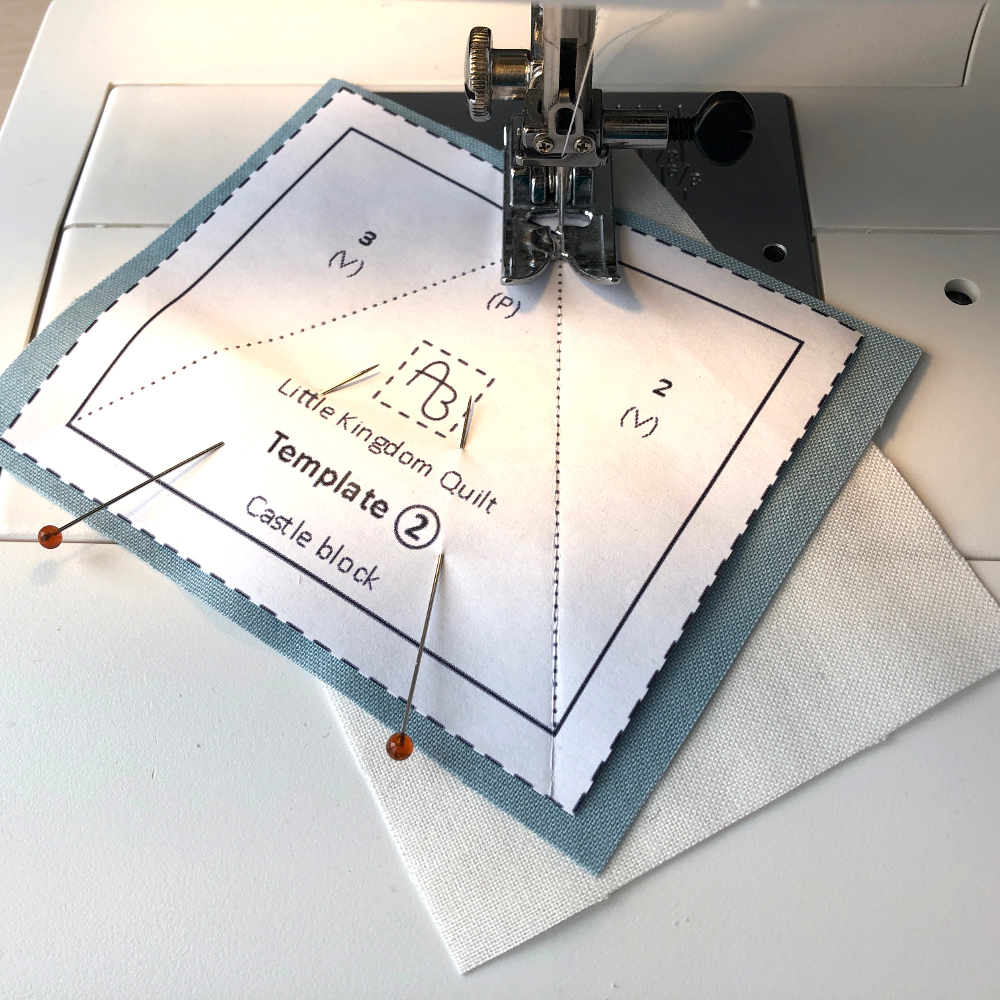
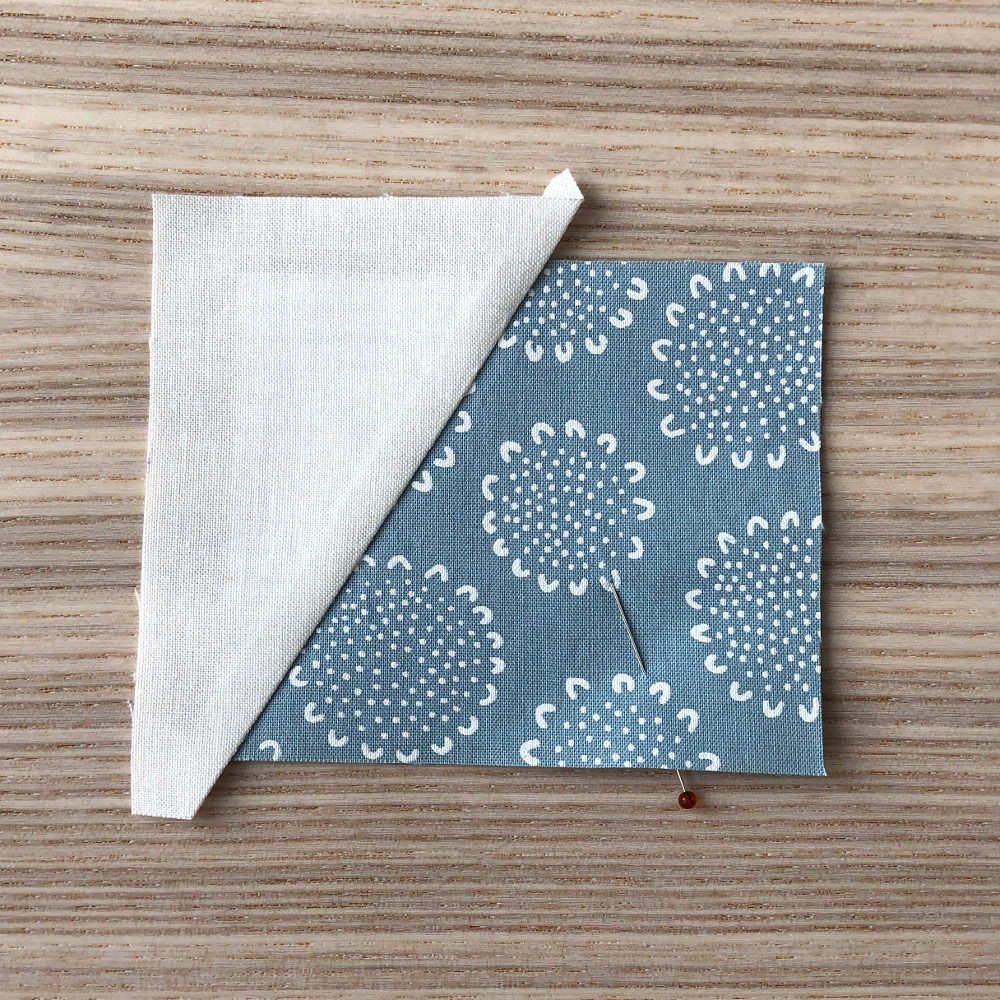
First, put your M piece (castle roof) in front of you (P piece if you have an older version of the pattern), right side down (ignore if using solids). Centre Template ② on your P piece and secure it with two pins. Be careful not to cross the dotted lines and leave enough room to pass with your presser foot!
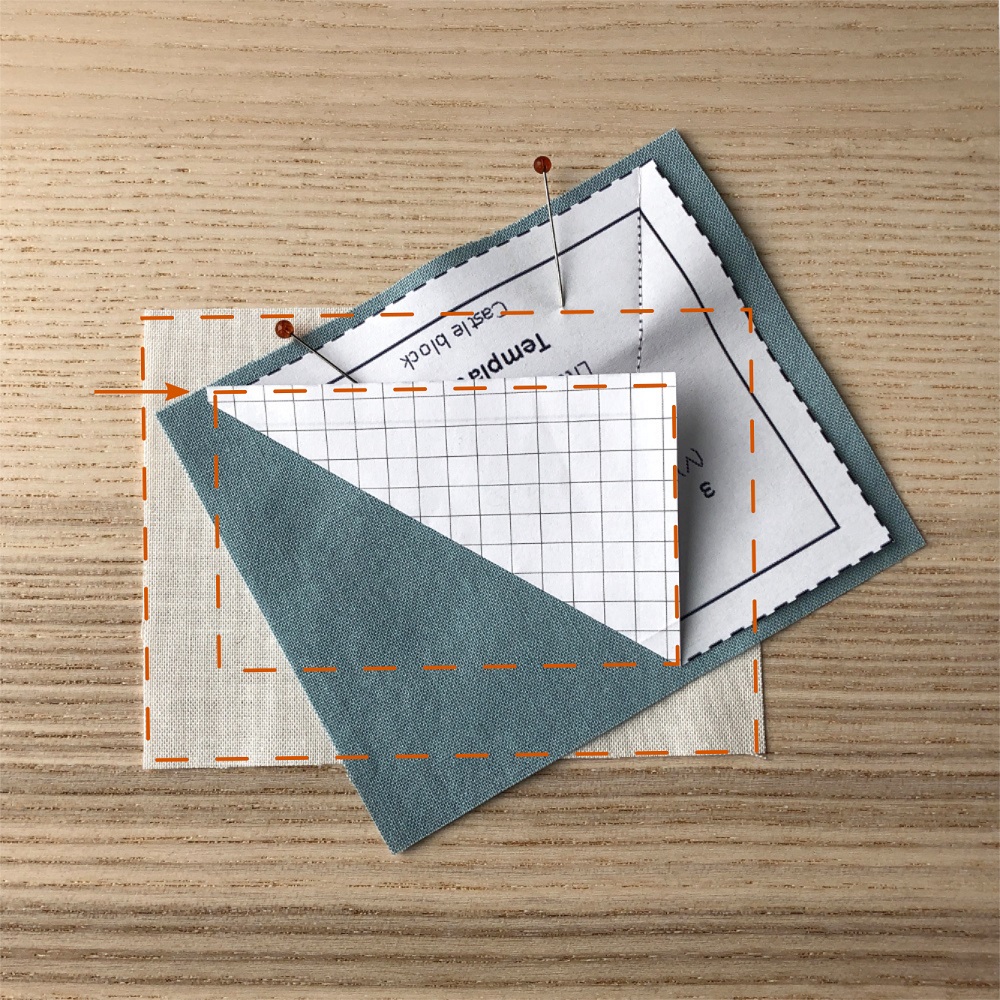
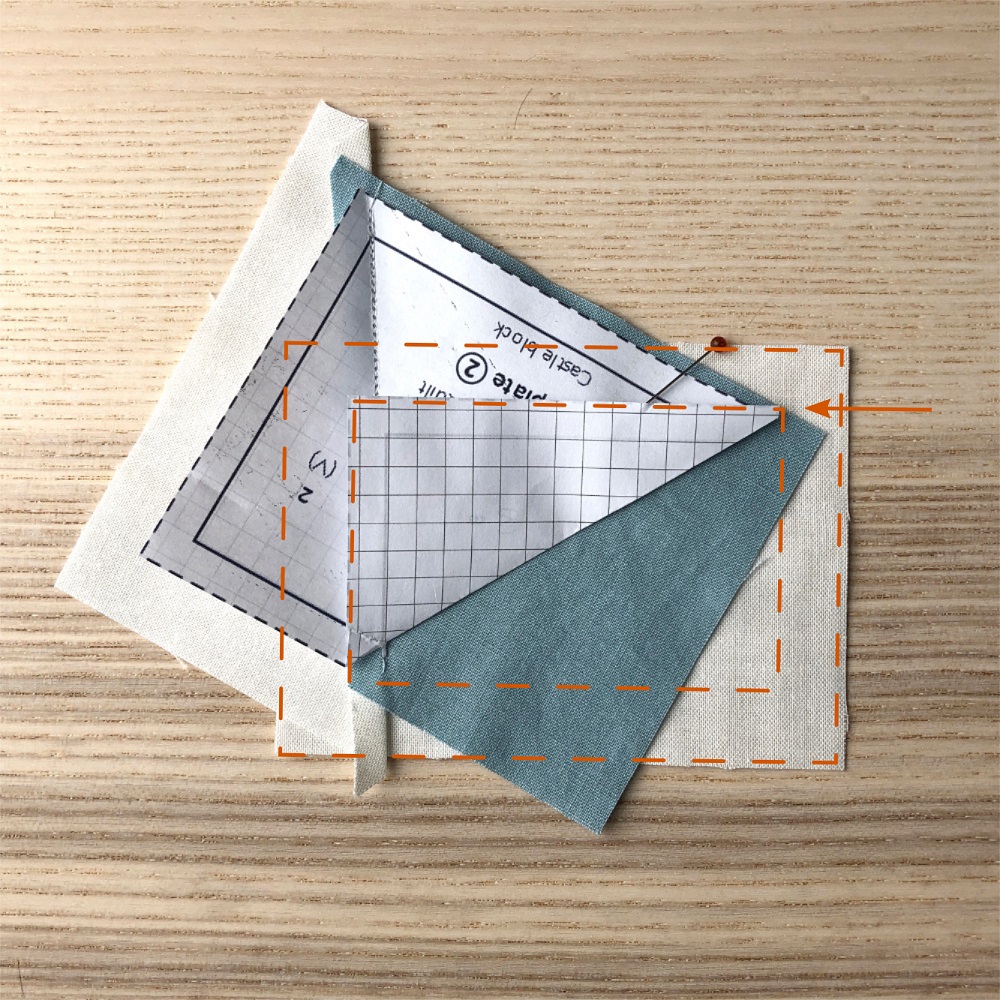
Fold the right triangle (marked with a “2”) up and place your fabric sandwich on one of your V pieces (right side up), centering the folded section of your paper template on your V piece (see orange dashed rectangles) and the edge of your template running parallel to the fabric grain (see arrow). I find this to be the most critical step in FPP, so take your time to position the pieces accurately!
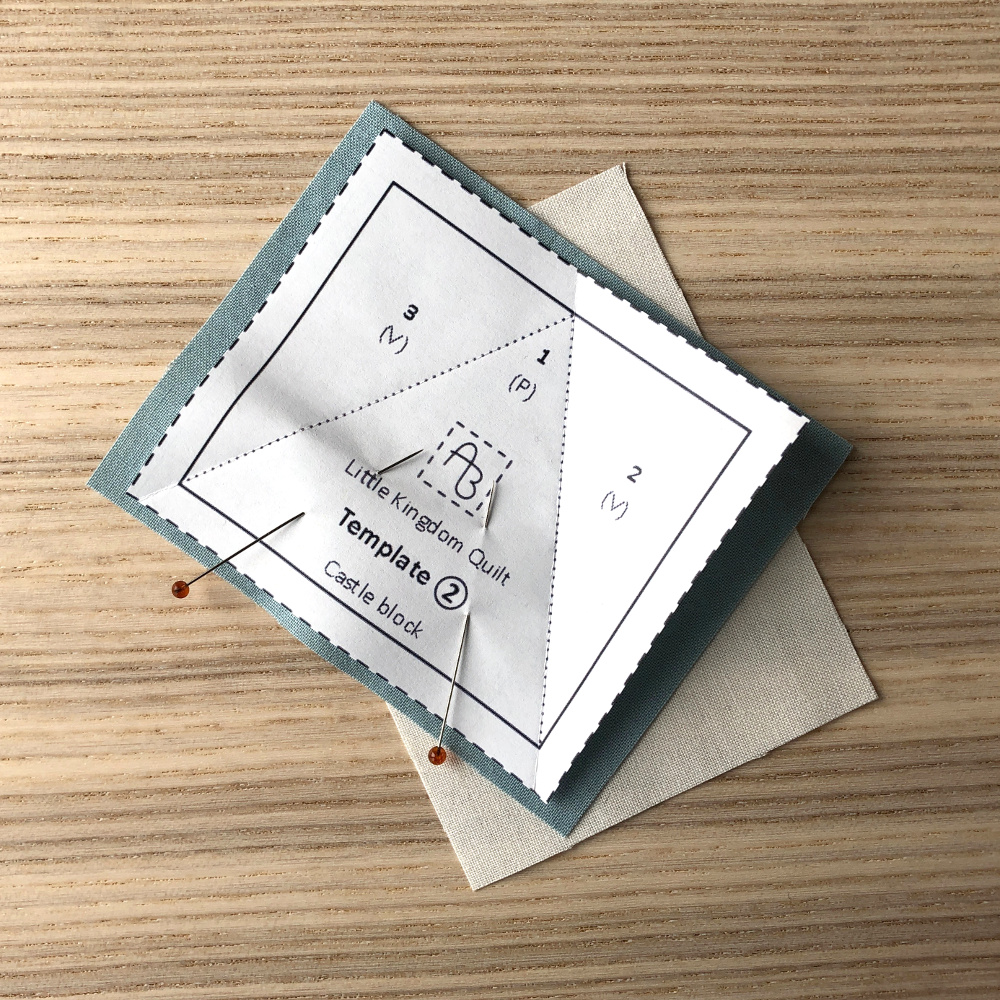
Careful not to shift the fabrics against each other, fold the “2” triangle back down and sew along the dotted line, through all layers.
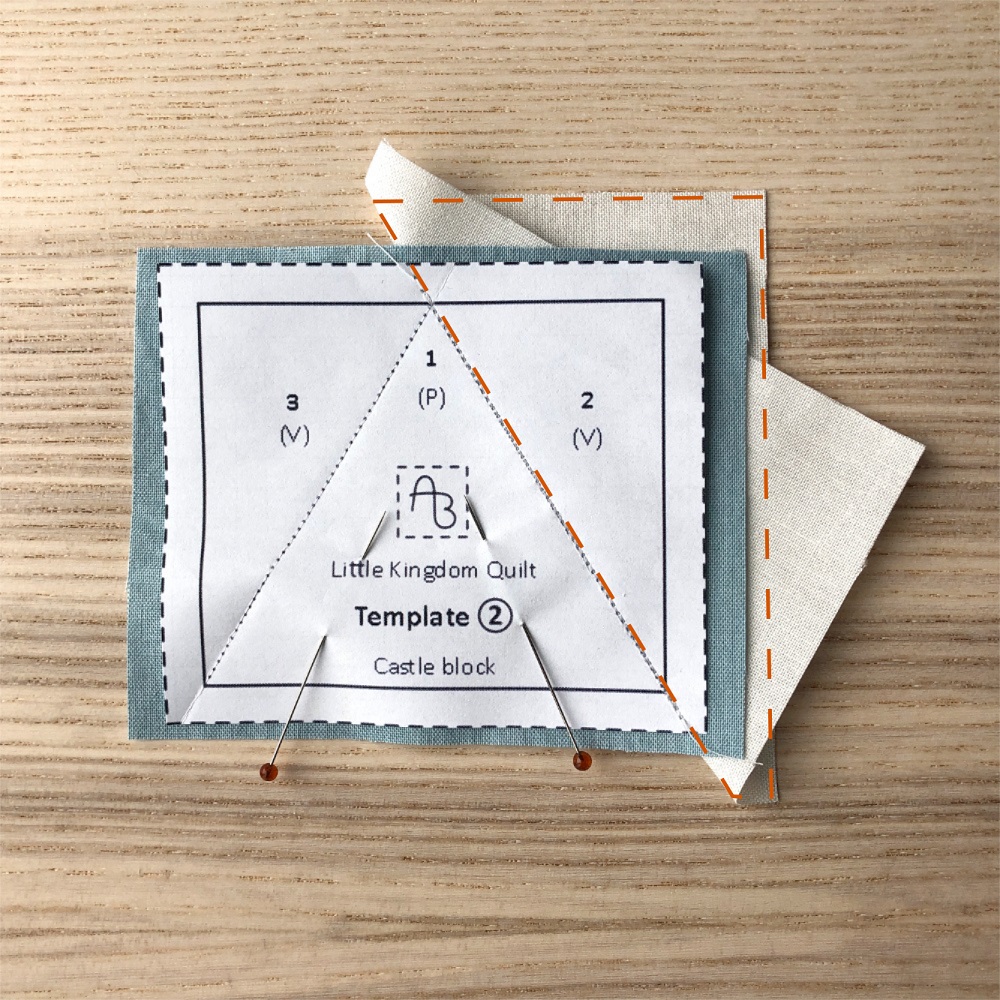
In order to check if the V piece was attached correctly, open up your V piece along the seam and confirm that it completely covers the back of triangle “2” (see orange dashed line). If not, take your seam ripper and sew that seam again…
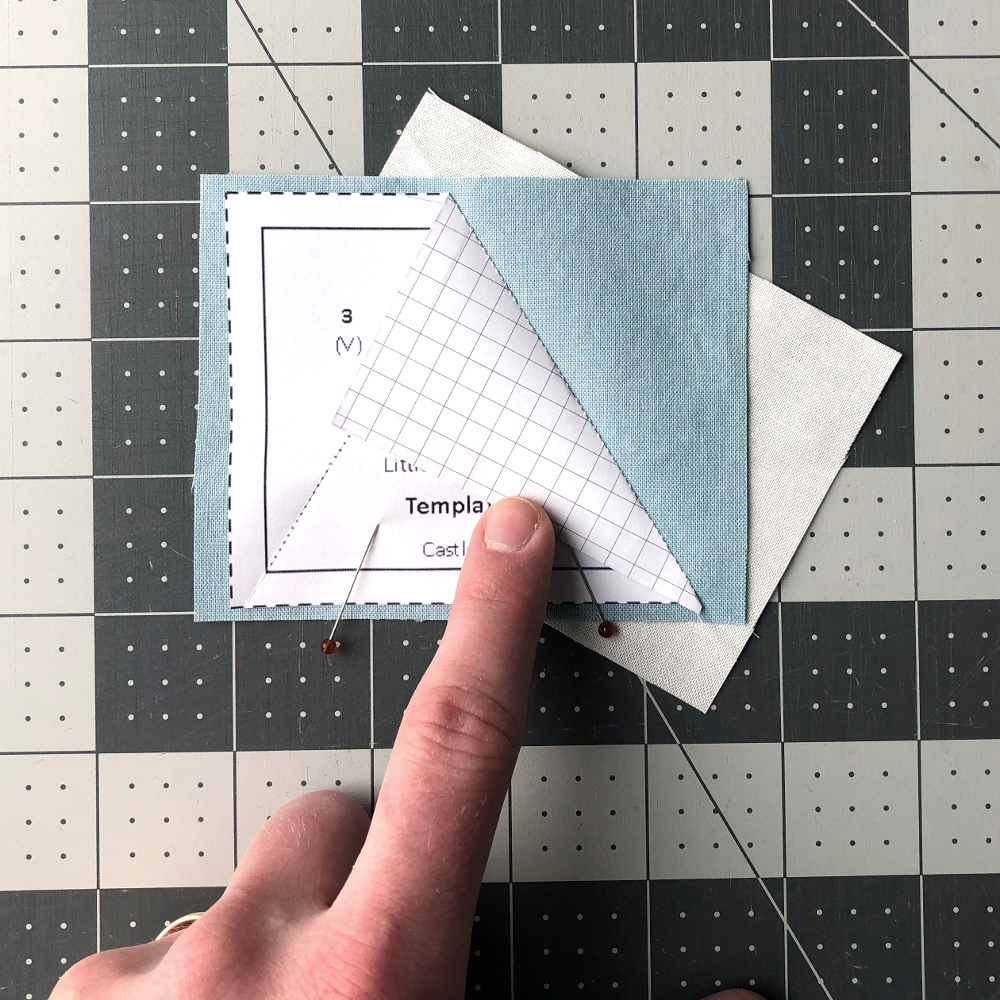
If that is the case, fold the V piece back, fold up the “2” triangle and trim 1/4″ away from your seam.
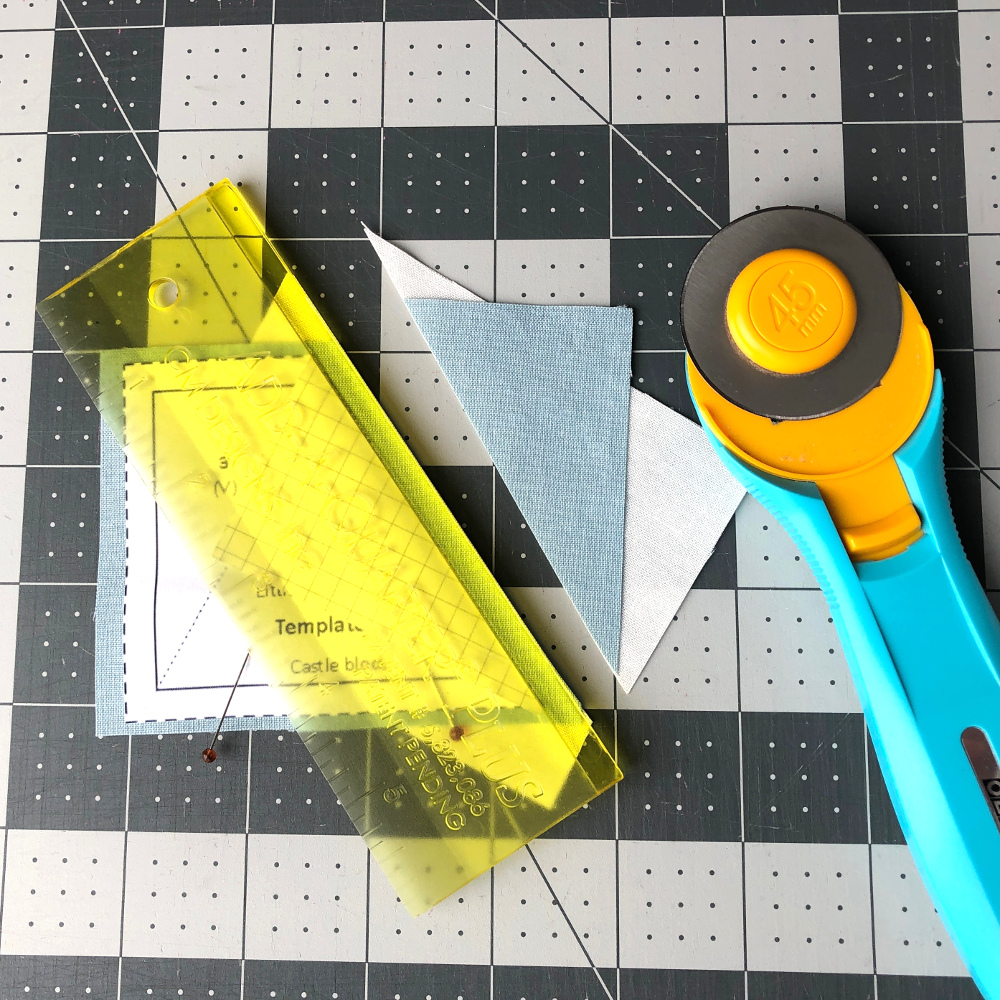
I like using my add-a-quarter ruler for this step, but any other ruler will do the job equally fine.
Press your first V piece to the side with a dry iron, being careful not to melt the head of your pin (you could also remove it at this point). You see?! Your section is already starting to look like a castle roof, or maybe half a castle roof…! 😉
Repeat the same process for the “3” triangle and the second V piece.
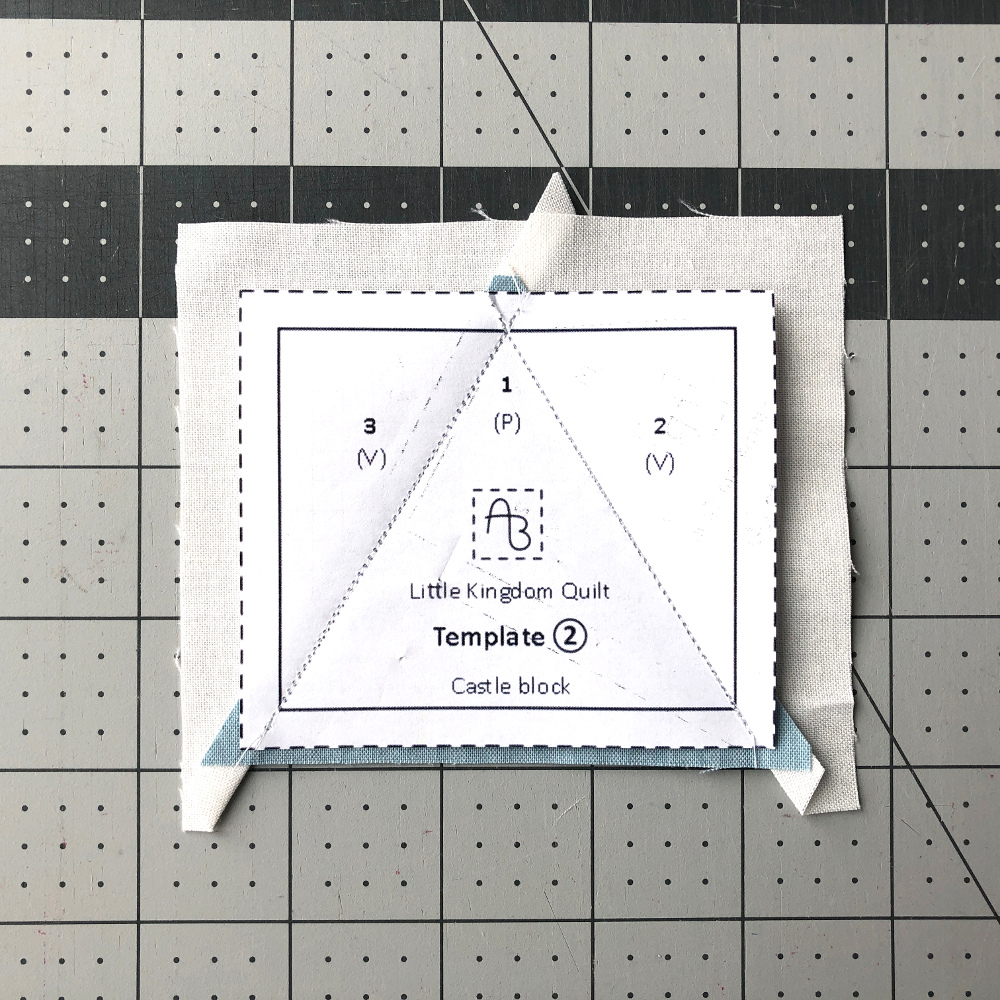
After pressing, trim all around Template ②, along the edge of the paper.
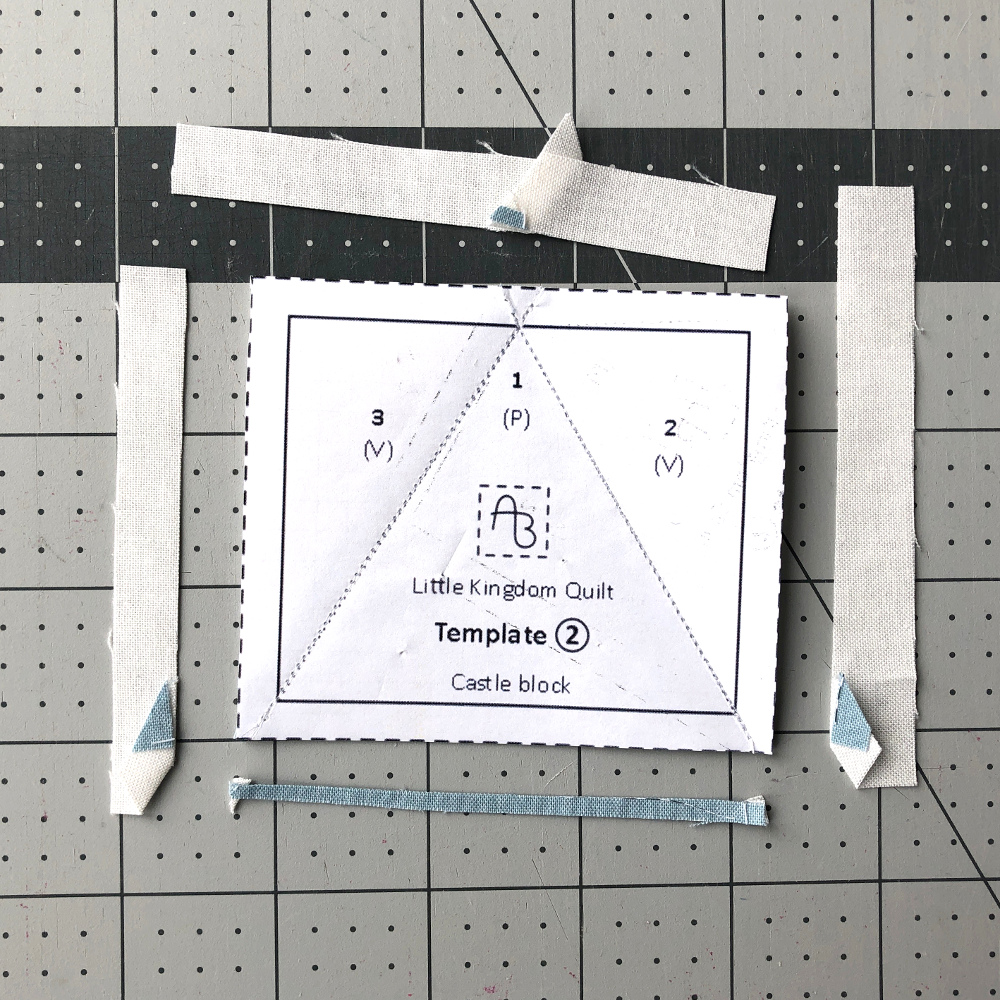
Carefully rip your paper along the perforations and remove the paper pieces without stretching your fabric unit.
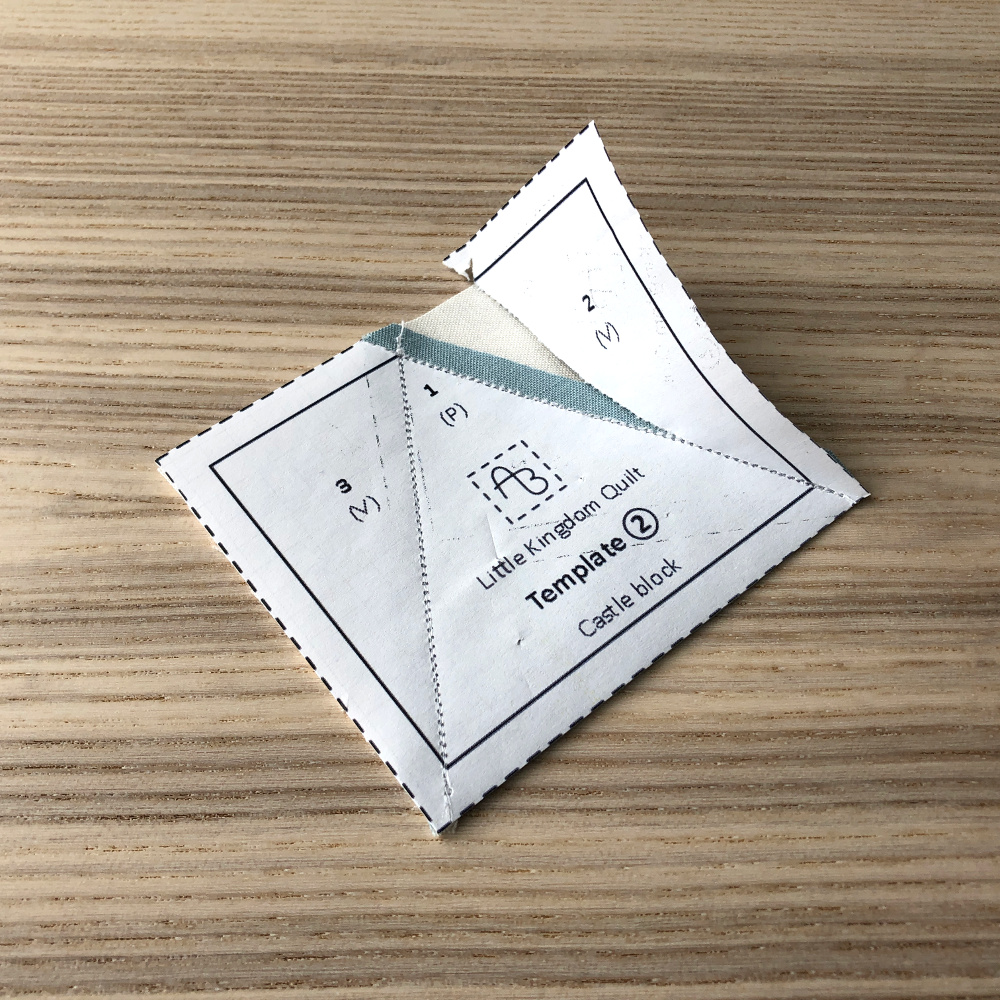
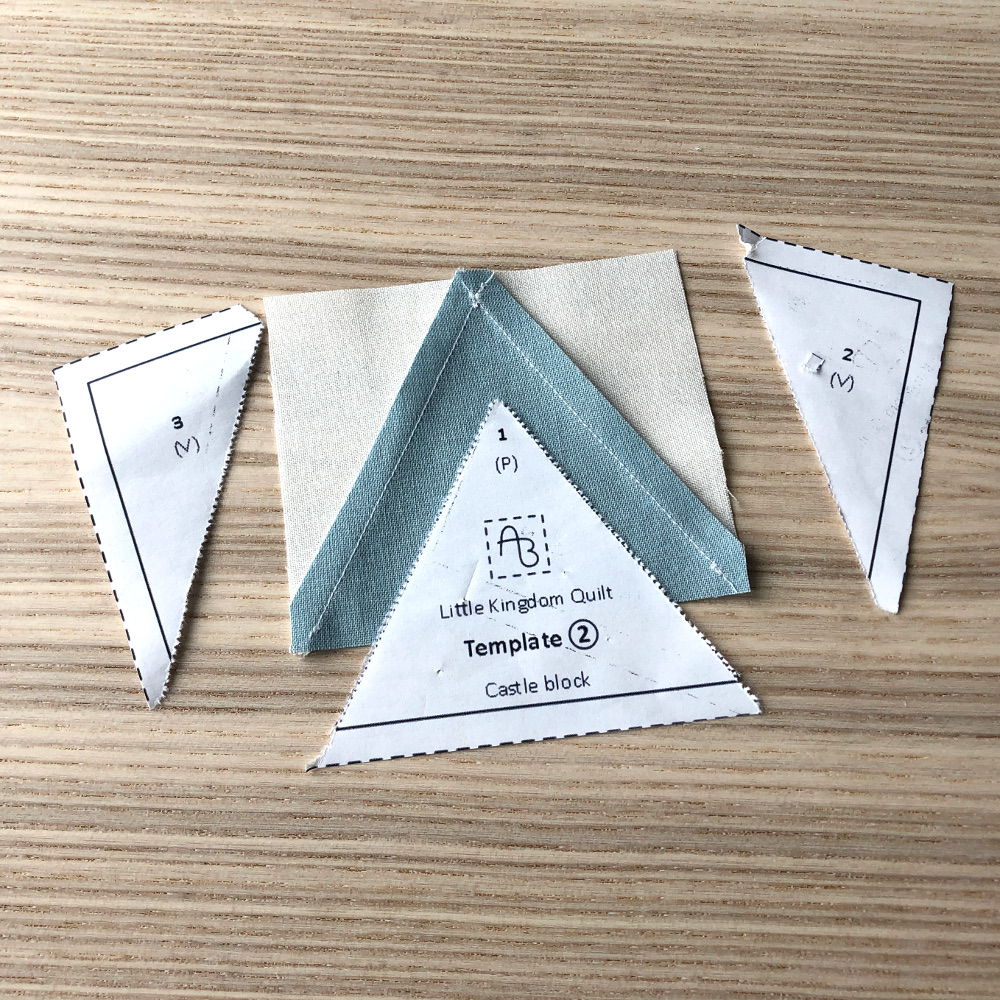
Turn over and – tadah! – your castle roof section is finished and can be attached to the tower base. Continue with step 2 of the pattern.
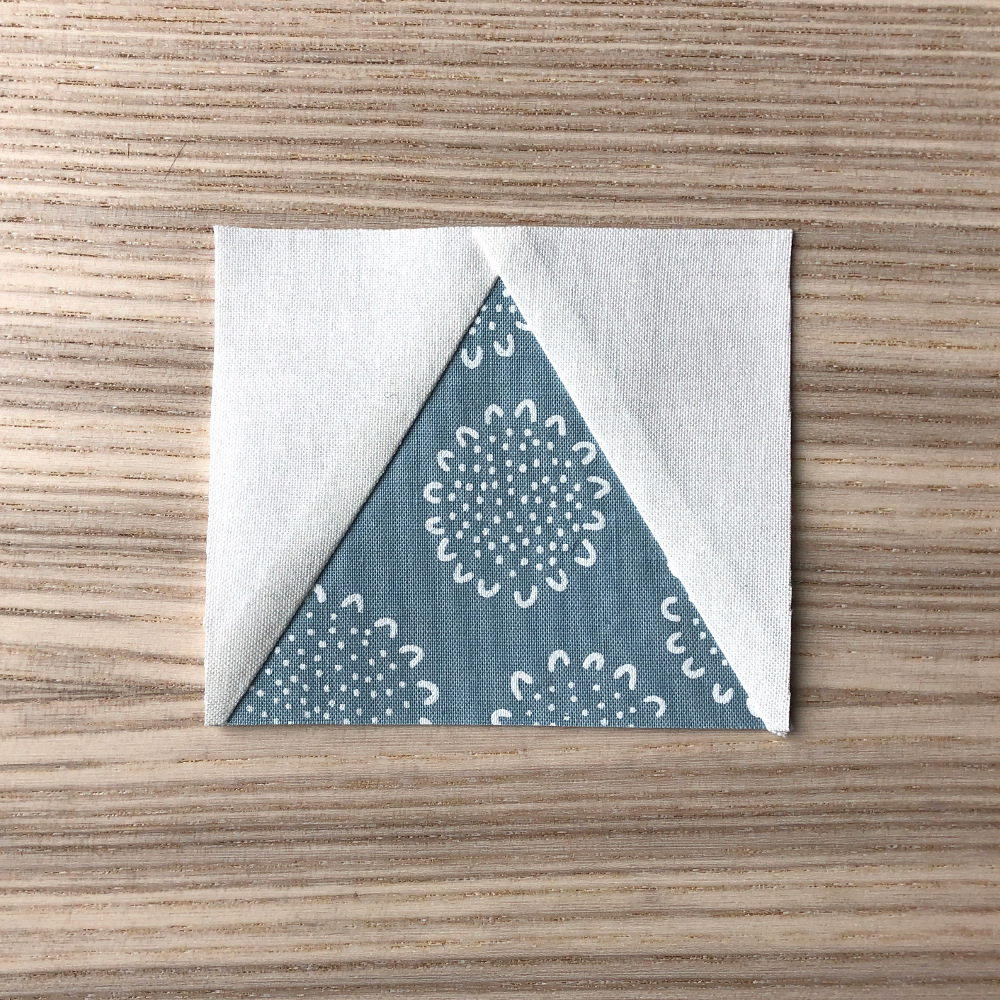
I hope you enjoyed this little FPP tutorial! Let me know in the comments!


Your tutorial is great. I have always had trouble doing PP. It is like backing up a trailer, everything is in reverse!
Oh, I am so glad to hear. Thanks for letting me know! <3