Boo, I have a surprise for you! Voilà a free tutorial on how you can use a jumbo version of my Little Kingdom castle block to make a 40″ x 40″ baby quilt. And even better, it’s a haunted castle, also perfect as a fun and cute Halloween-themed wall hanging!
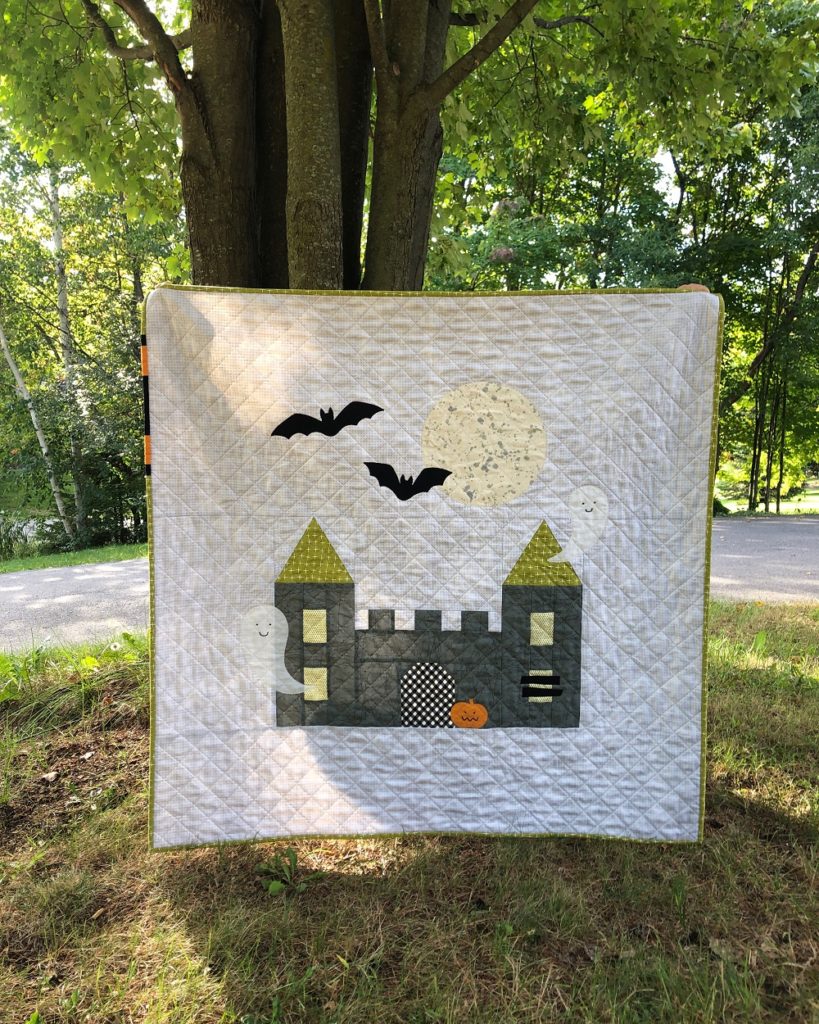
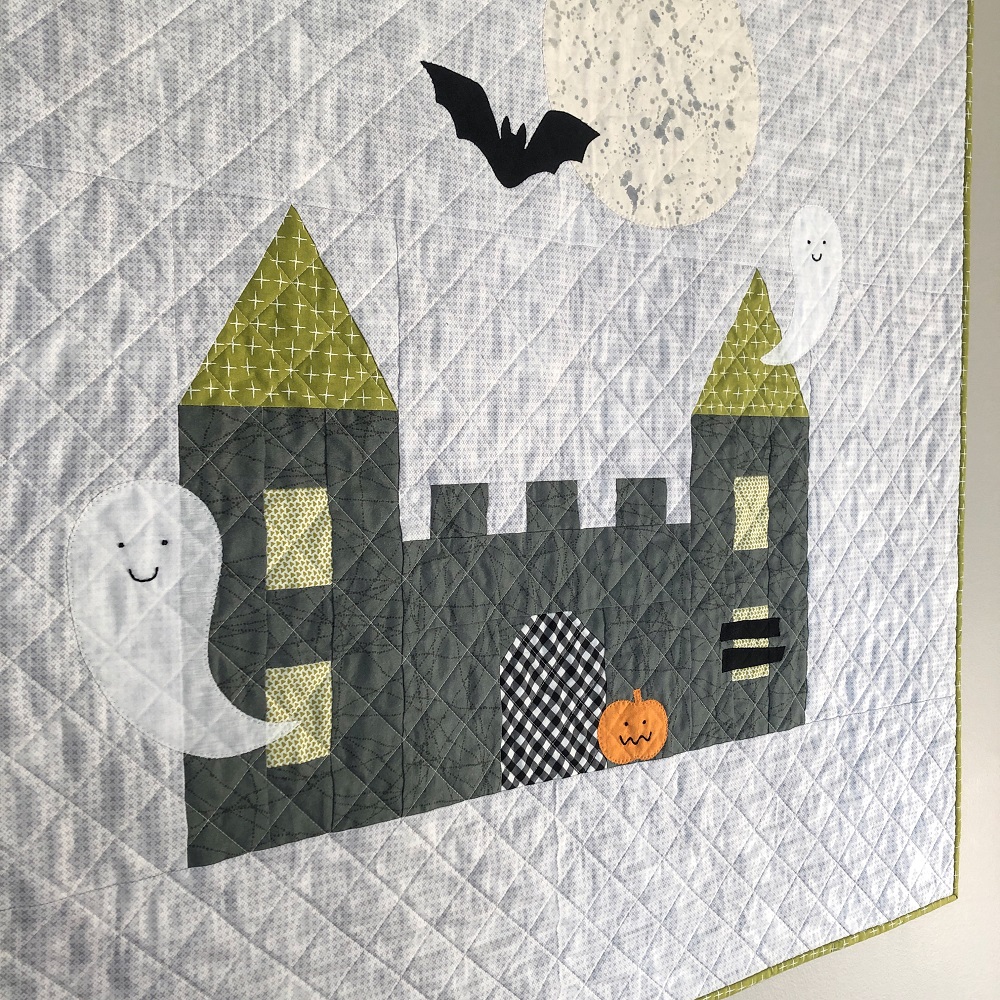
The original idea is from a year ago when I made this spooky pillow. I really like how it turned out, especially those semi-sheer ghosts still make me smile each time!
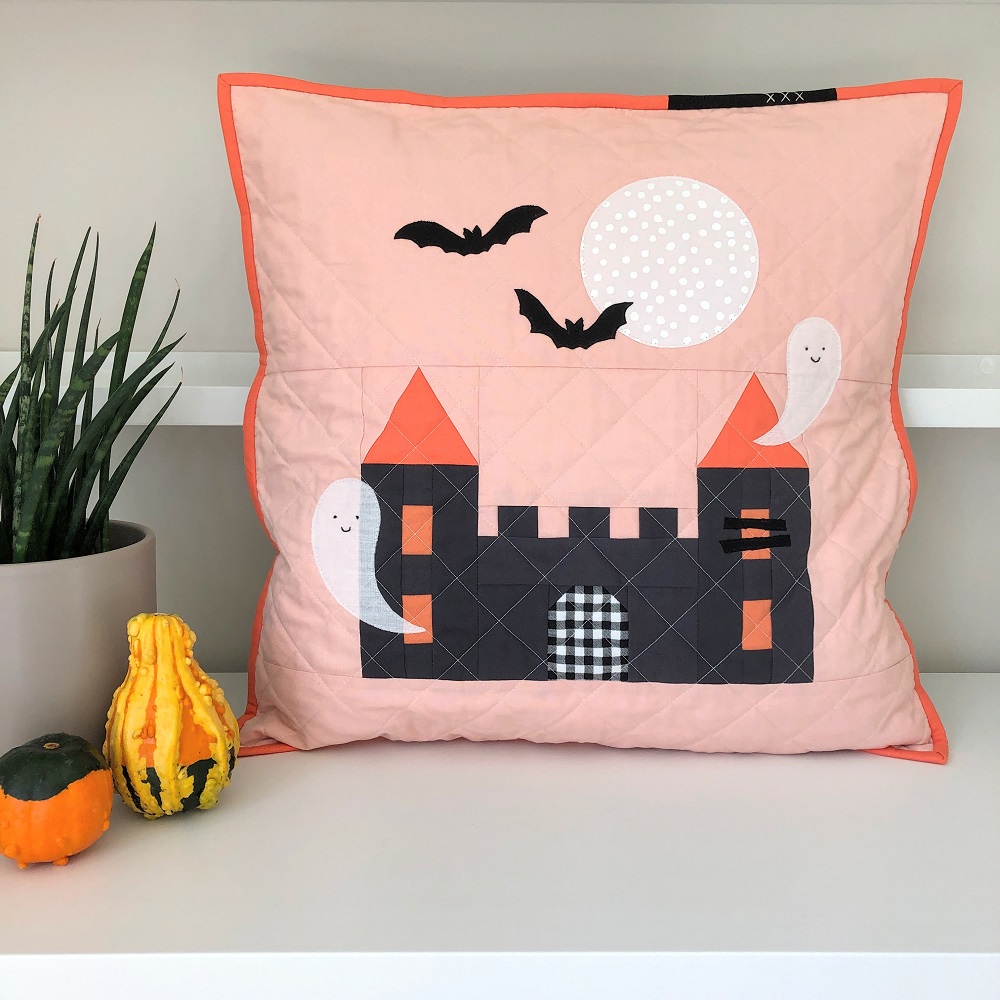
I finished this pillow just in time for Halloween though and didn’t get to provide you with a tutorial. Also, some of the appliqué pieces (especially the bats!) were really intricate – which gave me the idea to try again on a larger scale. And now I finally took the time to stitch it up… and was shocked how quickly it went! I cut and pieced the entire quilt top in an hour and a half! That’s definitely a record for me.
I also do believe that I enjoy tiny piecing a little more than some of you. So if you are more into “reasonably sized” pieces and quick finishes, this project is perfect for you! Let me share what I did, so you can make your own haunted castle quilt!
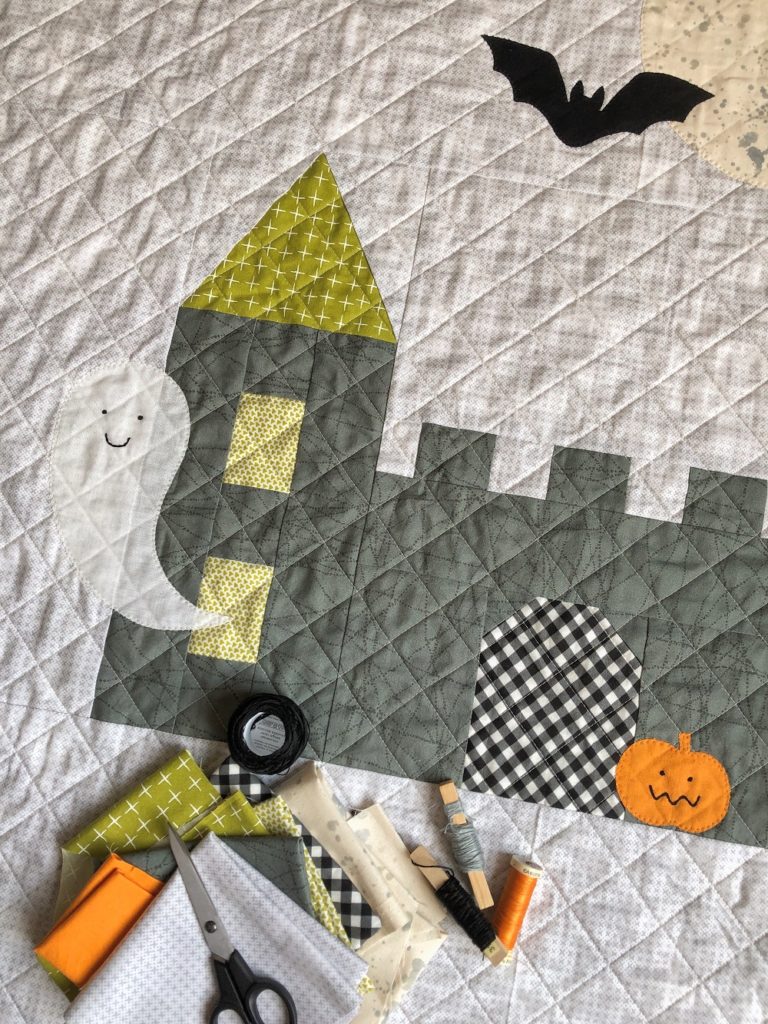
Material requirements
This is what you’ll need for your jumbo castle Halloween quilt:
- Background fabric: 1 1/4 yd
- Main castle fabric: 1 FQ
- Castle roofs, windows, door: scraps
- Gauze (or sheer white cotton) for the ghosts
- And more scraps for the other Halloween details 🙂
- Double-sided fusible interfacing (for example Steam-A-Seam 2)
- Embroidery thread to add faces and other details
Piecing your jumbo castle quilt top
Because they are the largest pieces, start by cutting the following background pieces:

Now for the castle block itself. There is no secret magic to scaling a quilt block up or down, but to save you the math, here are the dimensions of all the pieces required to make a castle that’s doubled in height and width as compared to the original Little Kingdom pattern:
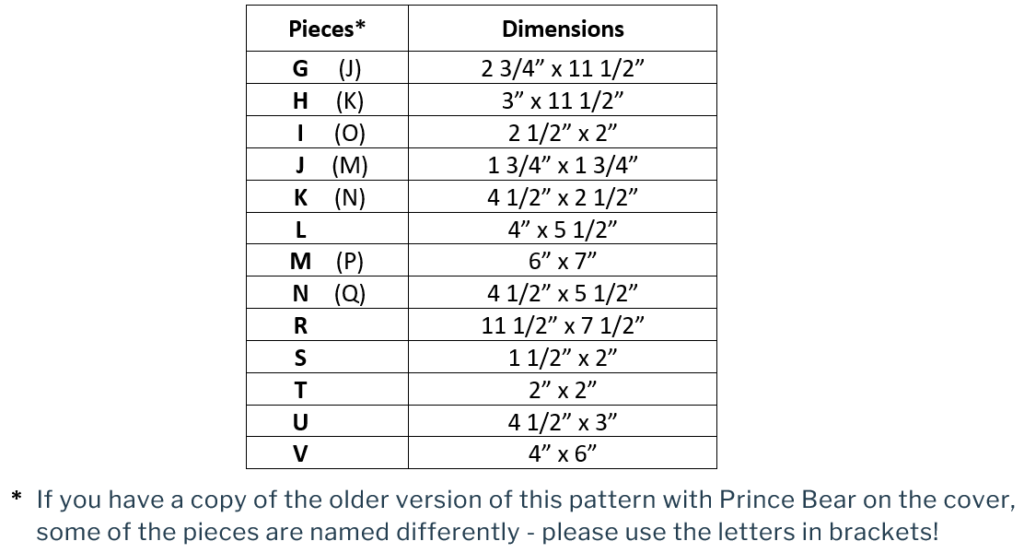
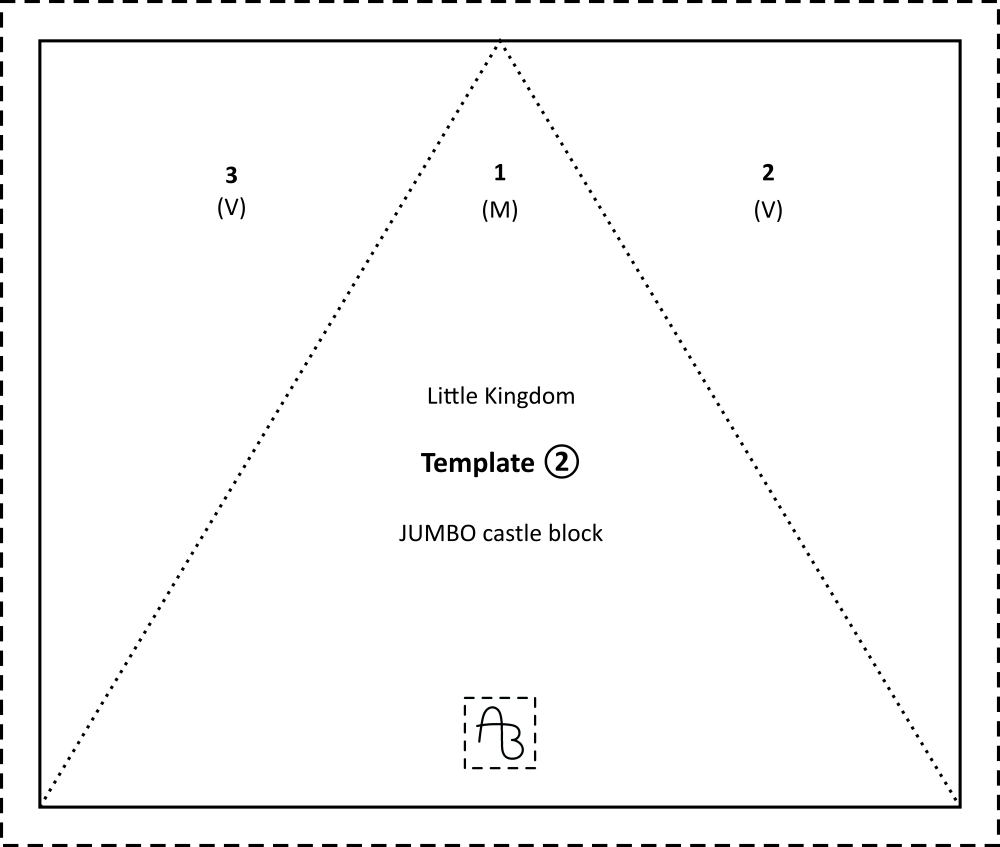
Now simply cut your castle and remaining background pieces using these dimensions instead of those listed in the pattern, then sew your block as described in the Little Kingdom pattern. A downloadable pdf with an FPP template for your jumbo castle roofs can be found here:
Once your castle block is completed (without the background strips and borders from the pattern), add the four background pieces (BG1, BG2 and BG3):
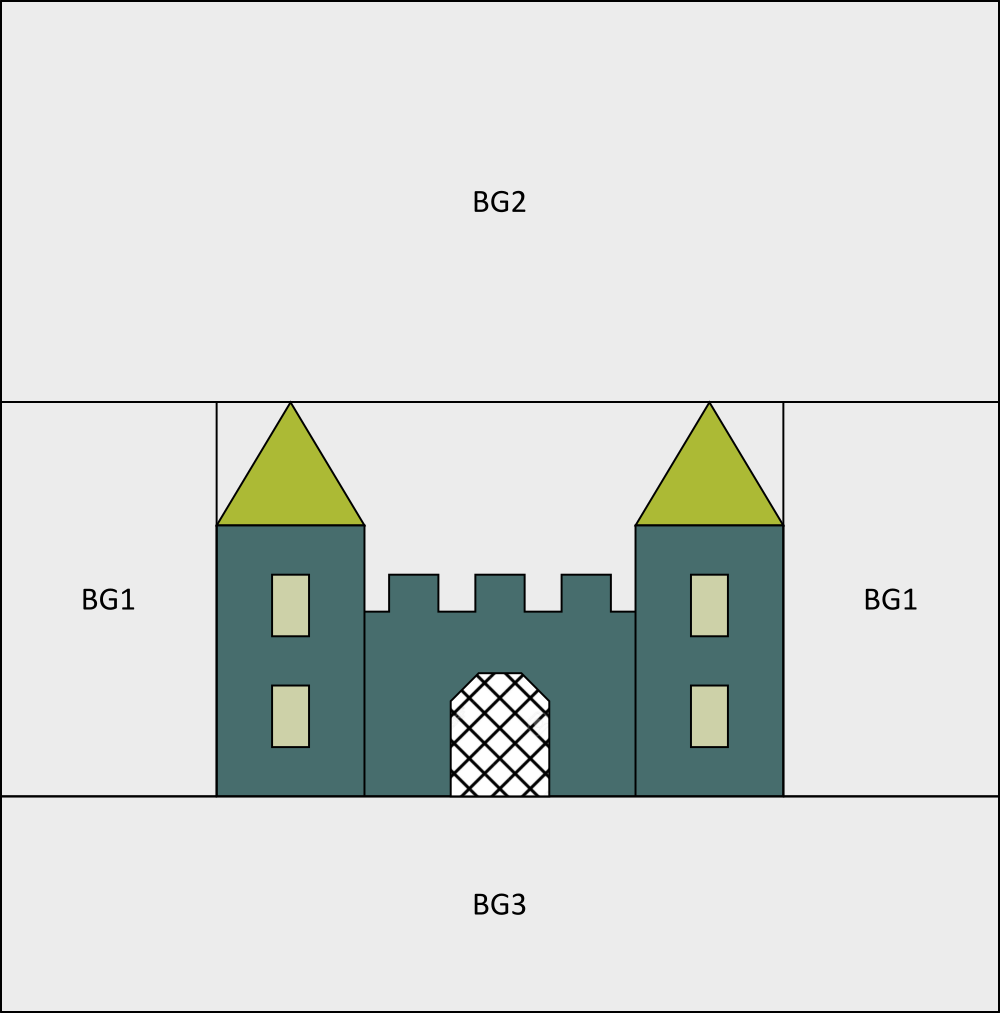
And tadah – your jumbo castle quilt top is done!
Now this would already make for a really quick and adorable baby quilt, but adding some Halloween-themed details really lifts it to the next level!
I grew up in Germany where Halloween doesn’t play a big role at all, so all the spookiness of this time of year is still a fairly new experience to me. Maybe that’s why I enjoy pumpkin carving, dress-up and preparing creepy snacks just as much as our kids? Or maybe it’s just me… 😛 Anyway, gimme all the (cute) ghosts and bats and pumpkins – and I’ll be happy!
Adding the Halloween appliqué details
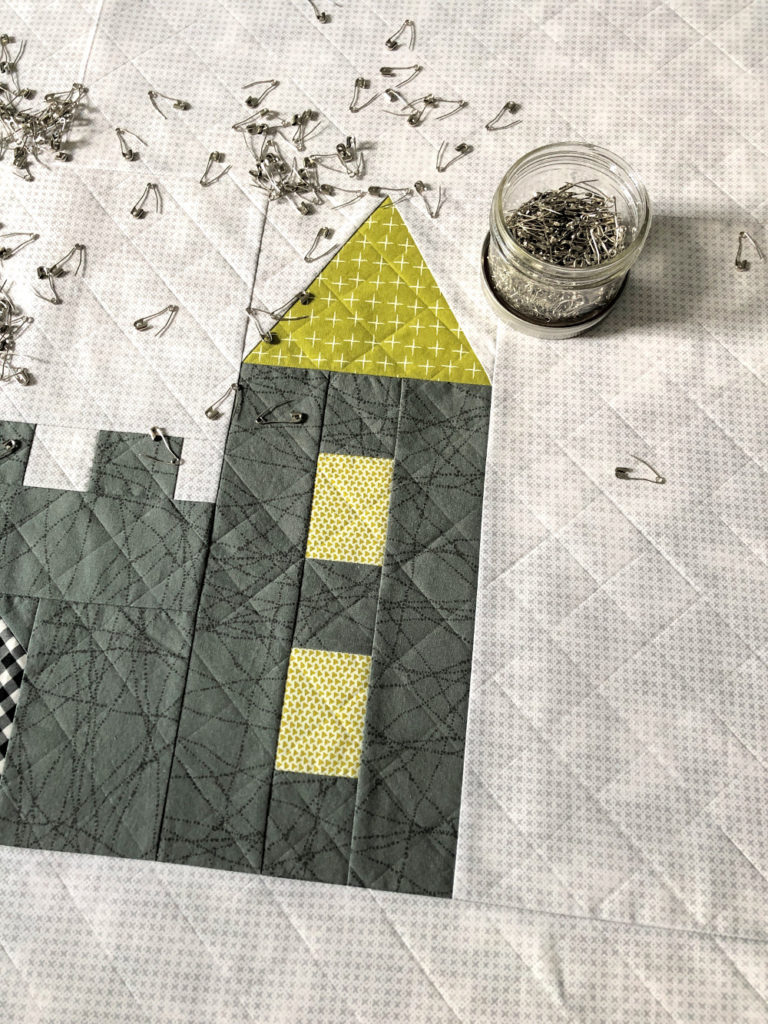
But to come back to our project… I pieced and quilted my whole jumbo castle quilt with a simple 1.5″ diagonal grid before adding the appliquéd details. That way I didn’t have to worry about stitching any of my ghosts straight through the face. But if you prefer adding your appliqués to your quilt top prior to quilting, you can of course do that too! In that case I would recommend stabilizing your quilt top from behind while stitching down their edges.
You can make up your own Halloween details (and I would love to see them!), but in case you appreciate some assistance, here’s a downloadable pdf template for the pumpkin, ghosts and bats I used:
In addition to the shapes included in that file, I found a salad bowl of about 9″ in diameter and traced a circle to be my moon. And I found the most perfect scrap from my astronaut girl wall hanging. Don’t those ink splashes look just like moon craters?!
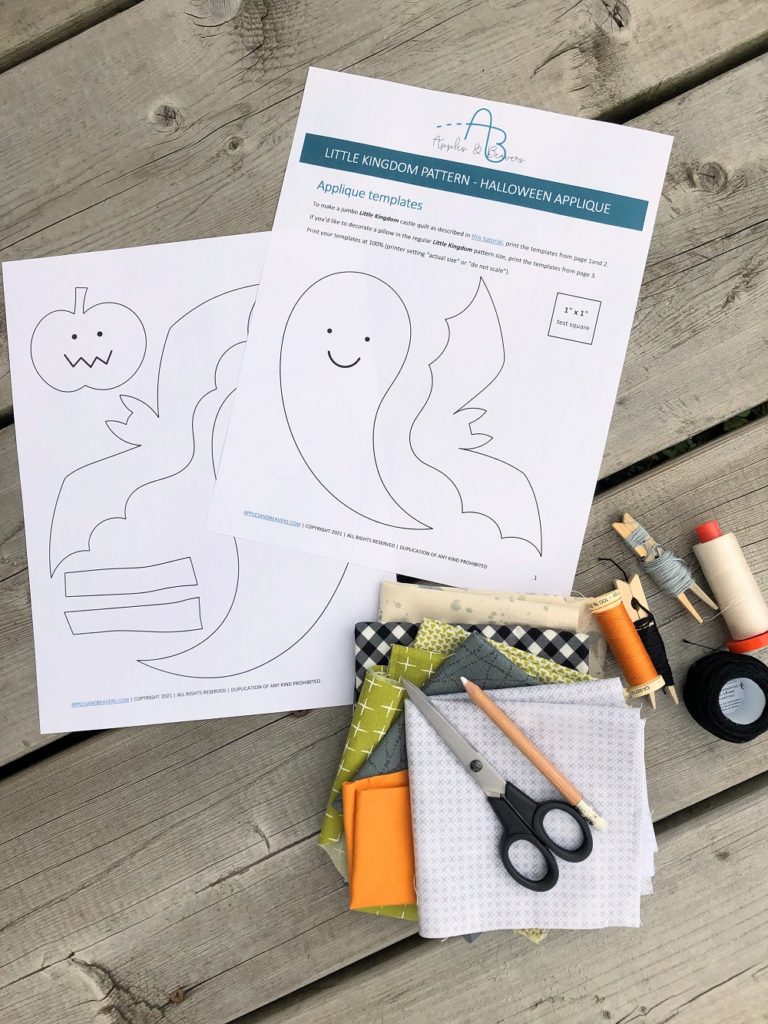
Transfer your appliqué pieces to your double-sided fusible interfacing and fuse it to your quilt (finished quilt or quilt top) according to the instructions of the product you’re using. Once your Halloween pieces are pressed in place, outline them with a simple contour stitch for raw edge appliqué or secure their edges with a small zig zag or blanket stitch.
To finish off your little Halloween buddies, add faces using embroidery thread. You could even add more spooky details like a spiderweb between the castle battlements. Or how cute would a little spider be roping herself down in one of the windows?!
Some details of my jumbo castle quilt
Now that you know all about the how-to, I’d like to take a moment to reflect on some of my favourite details of this quilt.
I really like the soft pink/coral hues of my Halloween pillow from last year, but I wanted to try out a new colour palette this time. So I went for cool greys and toxic green with black and white accents. And a minimal dose of the mandatory Halloween orange for my little Jack O’Lantern. He’s the only new addition to the moon, the bats, the boarded window and the ghosts which are almost identical in both projects.
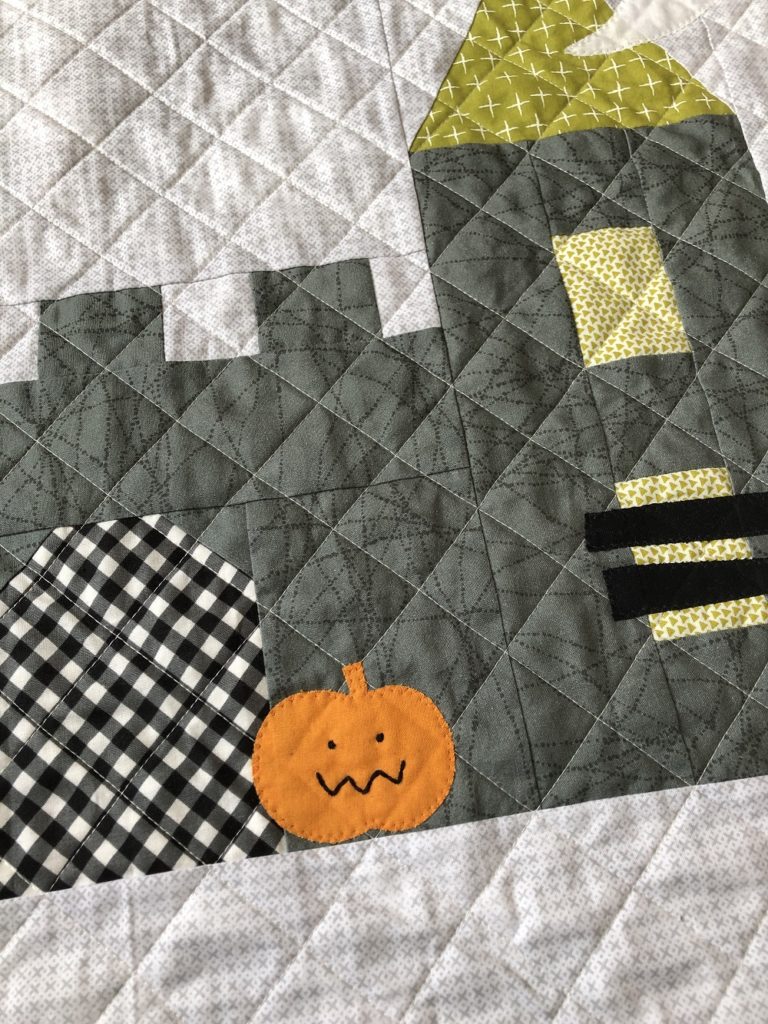
There is not a lot of contrast between the ghosts and the background, but the little “x” print and the castle contours still show through enough, I think. To secure the appliqué edges a bit better, I went for a small zig zag stitch this time around.
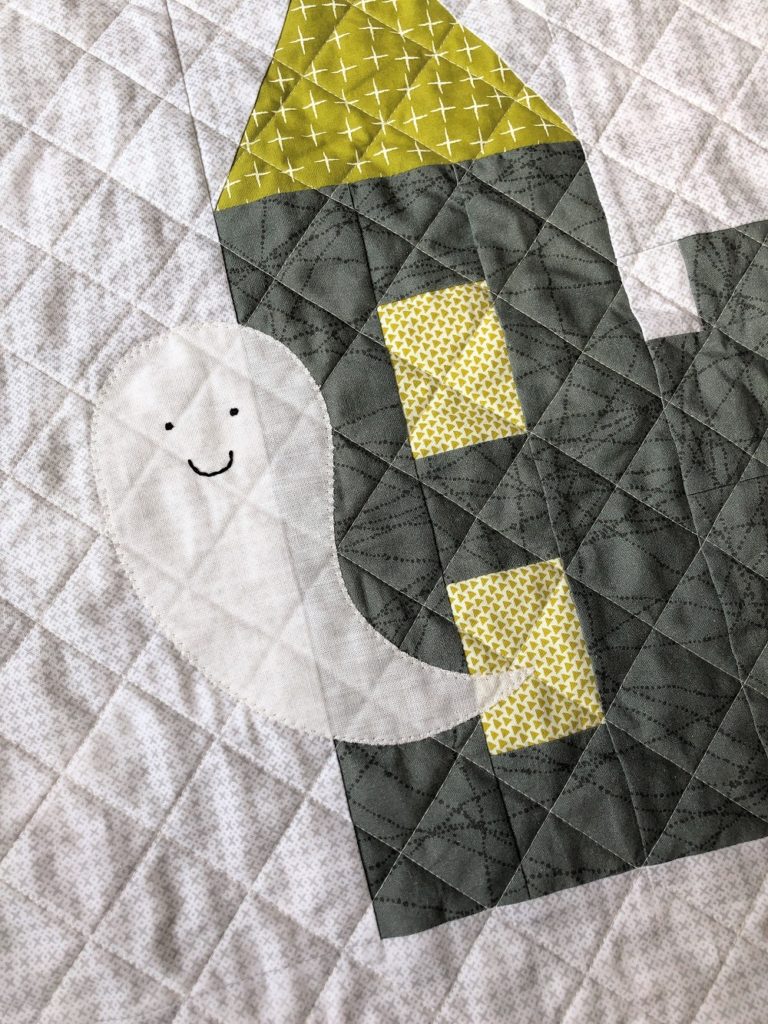
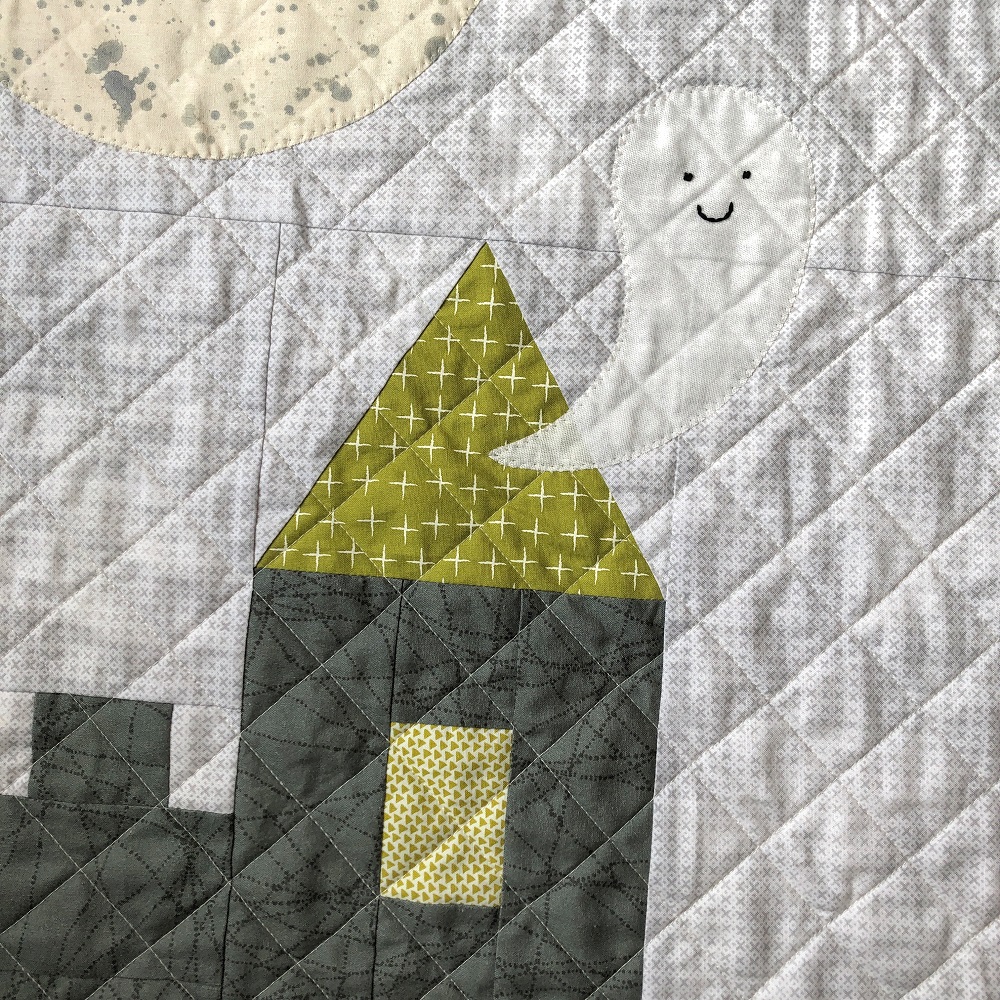
For an extra cozy baby blanket, I backed my quilt with a black and white houndstooth flannel. And I also used a black and white gingham print for the door again. I really like how it looks like an iron gate!
And for the binding I used the same green as the castle roofs and finished it with big black hand stitches. Nuria from @fabricstork inspired me to also add a small contrasting section as an interesting accent. So fun – and also a great way to incorporate some more black and orange besides the pumpkin!
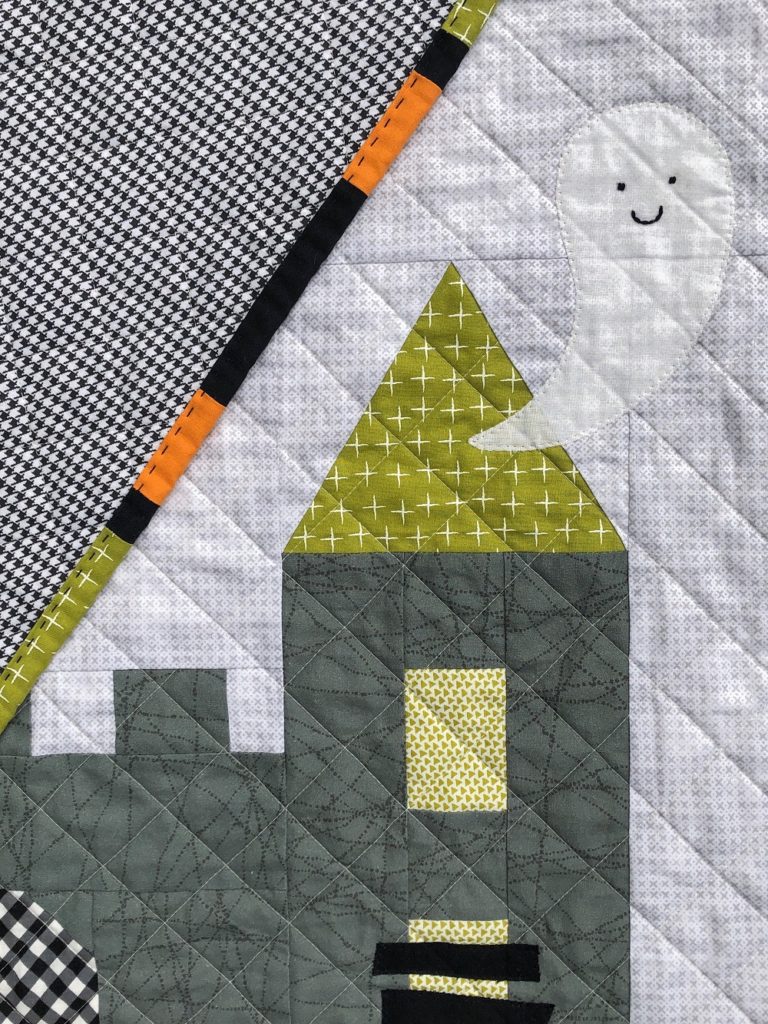
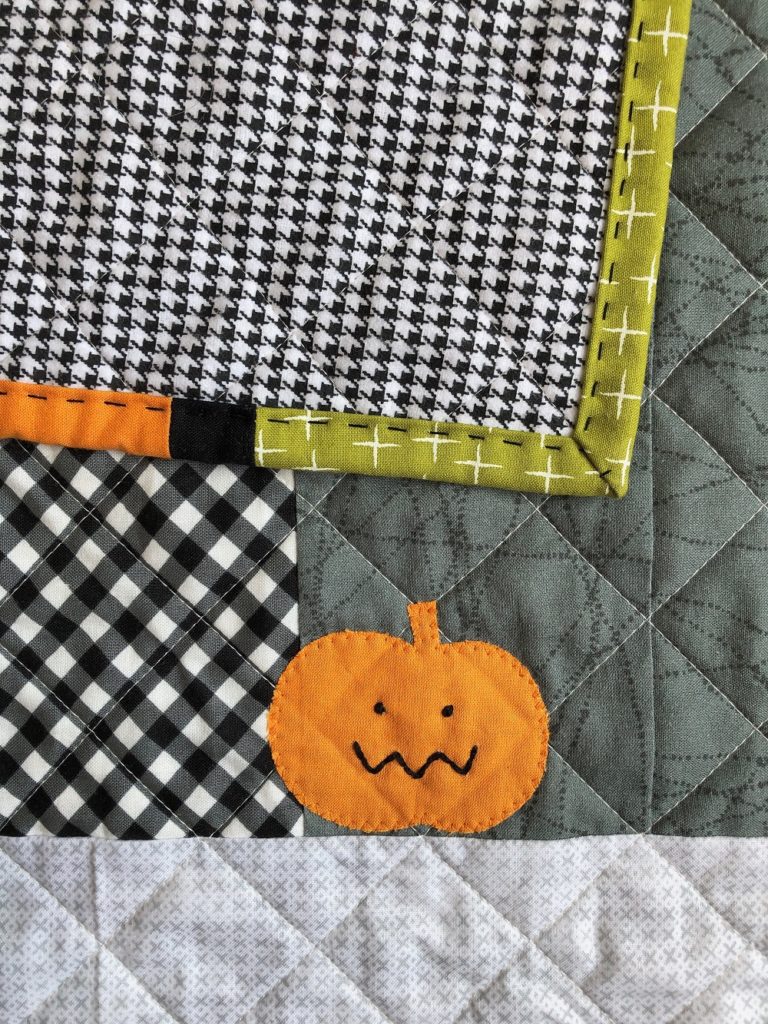
So far my version. I hope you enjoyed this tutorial and I can’t wait to see your jumbo castle quilts! Be sure to share your projects on social media using the hashtags #JumboCastleQuilt or #LittleKingdomQuilt!

Your patterns make me ridiculously happy. And these tutorials on how to make them more awesome just blow my mind. Thank you so much!
I just purchased all of the patterns for the twin size Dragon Dreams. How could this double sized castle fit into the Dragon Dreams twin size village? I’m sure I could figure out the sashing & placement, but I wanted to check with you first in case you already had some tips & tricks ready.
Thanks again!
Hi Betsy!
Thank you so much for your sweet feedback! <3
Unfortunately, I do not have any specific tips and tricks ready. I do remember a student in a Dragon Dreams class from last year incorporate a jumbo castle, essentially by adding it into the dd piece, so the dragon would kinda curl around the castle. She did adjust the background pieces a bit to make it fit, but it was still a crib quilt with very similar dimensions. But maybe you could use this idea as a starting point and then add a little forest around the scene to make your quilt bigger?
Good luck!
Astrid
Hello Astrid, Just today looked at your site applesandbeavers.com
I love your patterns. Thanks for the free Halloween pattern. I have younger great nieces and nephews that will love it.
Hi Joanne,
I’m so glad to hear! Have fun sewing for the littles!
I cannot explain how much I love this… This is absolutely one of my favorite quilts of all-time! I cannot wait to make one! I wish I had your skill at putting colors and patterns together; that’s my Achilles’ heel for sure!
Oh wow, thank you so much for that compliment! It means a lot to me!
Wishing you lots of fun making your own version! 👻✂️🧵
I looooved the pillow last time and the big castle is as awesome! Thanks for giving us all the information and the templates. xo
Awe, thanks Melanie! I’m glad you like these spooky projects! Have fun making your own version! 💛