Of course we also need to add some Fairy Sisters to Dragon Dreams! Duh! 🙂
The integration of the patterns is not complicated, but the way the seams between the different dragon section are running requires one partial seam when adding the fairy section. Just as a heads-up, no stress! You’ll see below! 🙂

A few notes before we start
- Finished quilt size: 40″ x 50″ (identical to Dragon Dreams)
- You will need the following patterns:
- Dragon Dreams (get the pdf or printed booklet)
- Fairy Sisters (get the pdf or printed booklet) and/or Fairy Boy (get the pdf)
Both patterns are also available as a bundle: Fairy Folks (get the pdf)
- The fabric requirements for the quilt top are mostly those of Dragon Dreams, but you’ll probably need about 2 yd of background fabric. And of course some extra scraps for the fairy details.
Cutting instructions
- Cut all the pieces from the Dragon Dreams pattern with the following exceptions:
- Instead of a dd piece, cut a dd* piece: 14 1/2″ x 15 1/4″
- no ee piece is required.
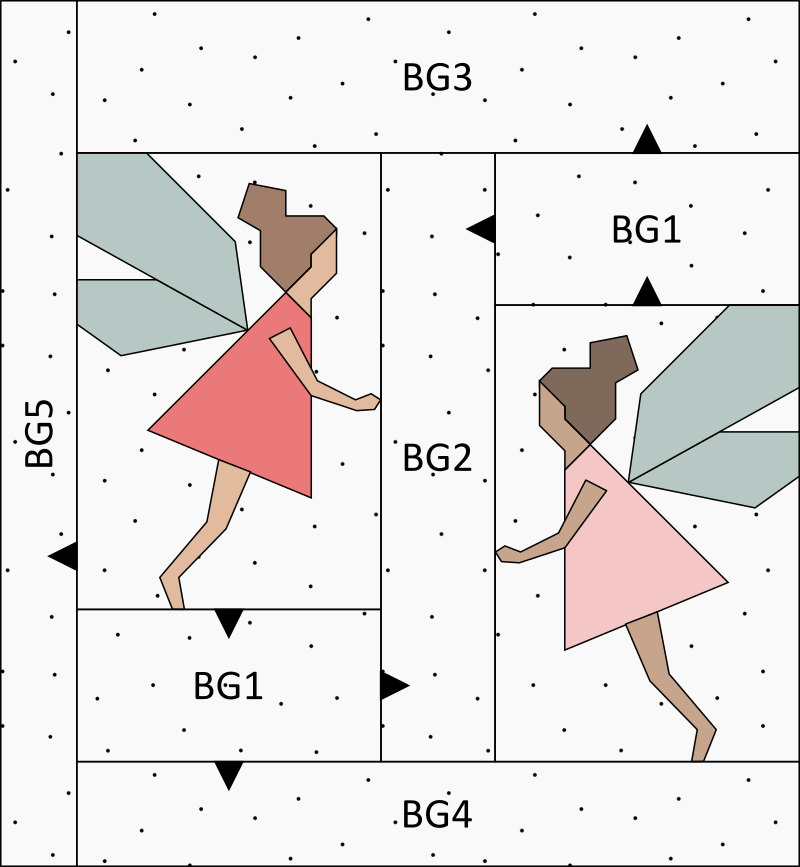
- For the fairy section, prepare the following background pieces:
- BG1: 4 1/2″ x 8 1/2″ (2x)
- BG2: 3 1/2″ x 16 1/2″ (1x)
- BG3: 4 1/2″ x 19 1/2″ (1x)
- BG4: 3 1/4″ x 19 1/2″ (1x)
- BG3: 2 1/2″ x 23 1/4″ (1x)
Making your dragon sections
- Following steps 1-74 of the Dragon Dreams pattern, make all your dragon sections.
Keep your background fabric off-cuts. You’ll be able to use some of them when piecing the fairy blocks.
Making your fairy section
Follow these steps to make the fairy section shown below (see pressing symbols in diagram):
- Make a right- and a left-facing fairy block using the smaller (8″ x 12″) templates of your Fairy Sisters and/or Fairy Boy patterns.
- Add your BG1 pieces to the bottom of the right-facing fairy block and the top of your left-facing fairy block and press your seams towards the BG1 pieces.
- Join your two units from step 3 with the BG2 in between.
- Add your BG3 and BG4 pieces to the top and bottom of your unit from step 4 and press your seams towards the BG3 and BG4 pieces.
- Add your BG5 piece to the left of your unit from step 5.
Assembling your dragon and fairies quilt top
For the following steps it will be helpful to refer to Fig. 31 of the Dragon Dreams pattern.
- RST, sew your (vertical) dd* piece to the top of your head section (instead of a dd piece).
- Follow step 77 of the Dragon Dreams pattern.
- RST, sew your vertical wing section to the bottom left of your unit from step 8, leaving a few inches unsewn (see green markings in diagram below). This is the partial seam I mentioned in the beginning.
- Follow step 78 and 80 of the Dragon Dreams pattern.
- RST, sew your head unit from step 7 to the left of your unit from step 10.
(Please note: If you’d like to add a crown or Santa hat, just make sure to adjust the height of your dd* piece, so that it ends flush with the vertical wing section.)
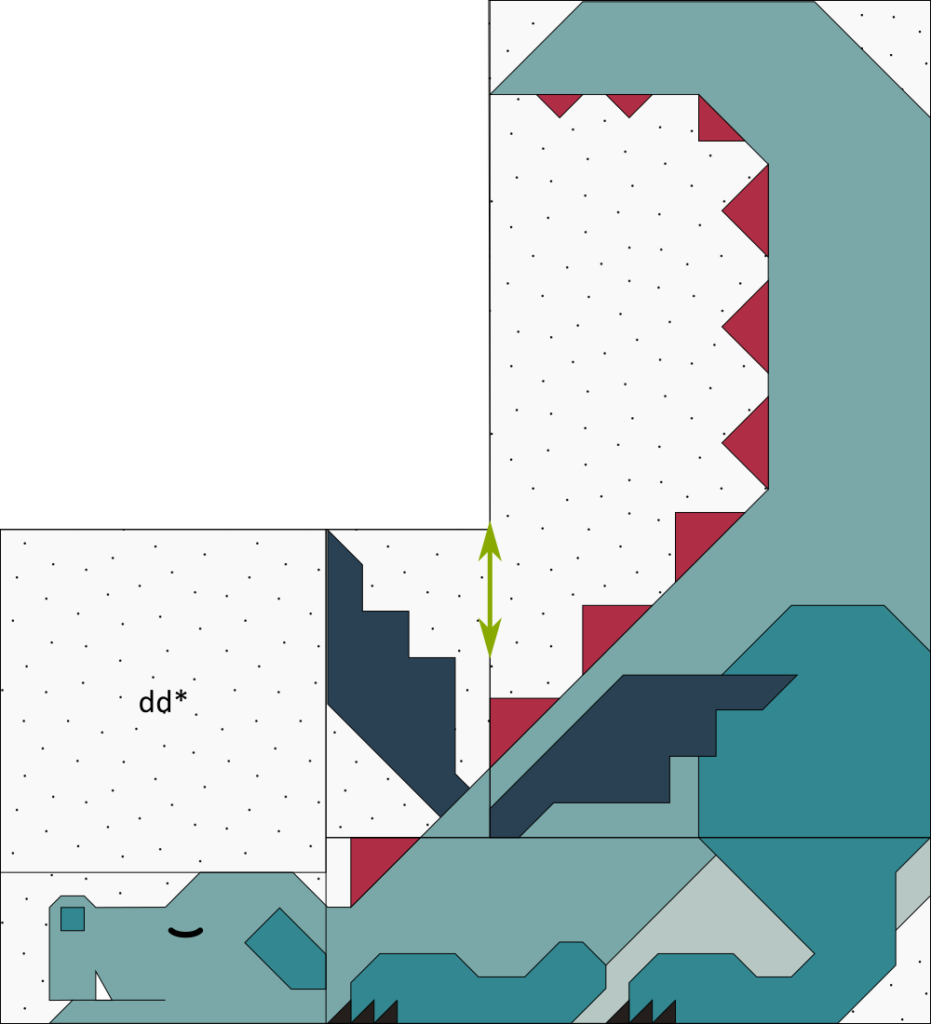
- RST, sew your fairy section from step 5 to the top of the [dragon head + vertical wing] section and press your seam towards the BG4 piece (this is why we needed the partial seam).
- Complete and continue the vertical seam highlighted in green in the diagram below.
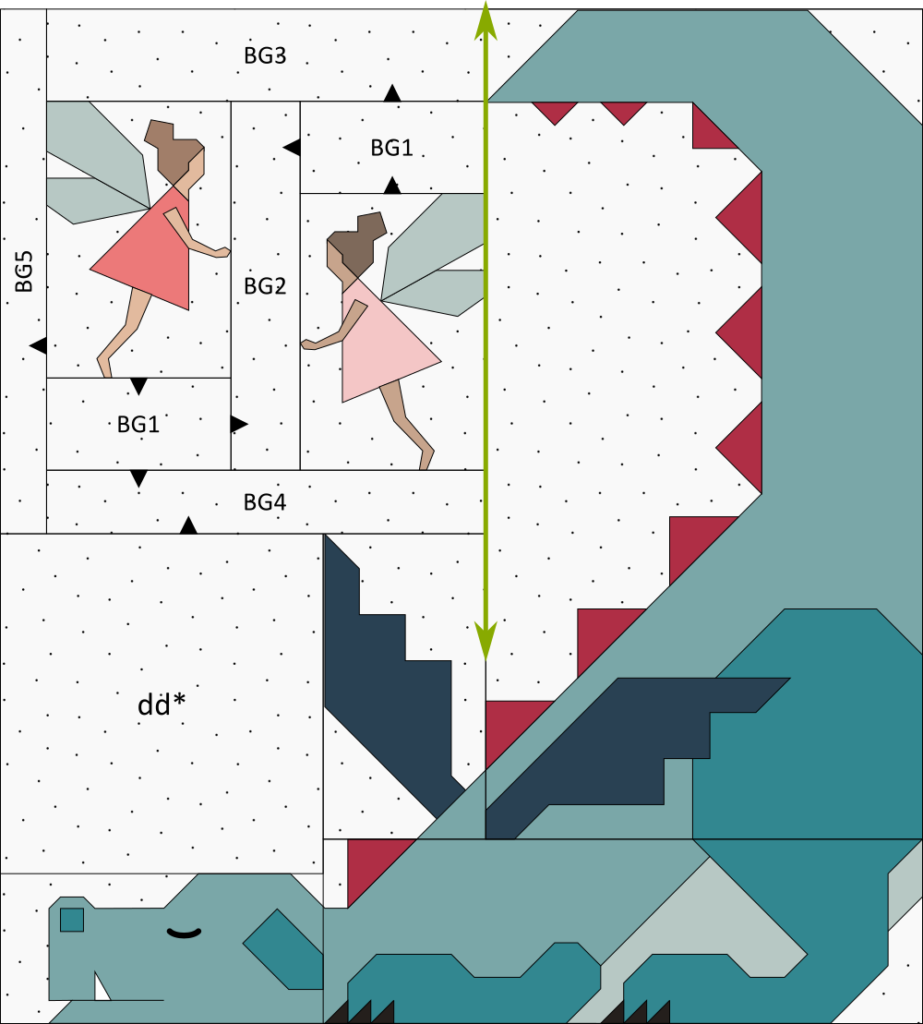
- RST, sew your ff piece to the top of your unit from step 13.
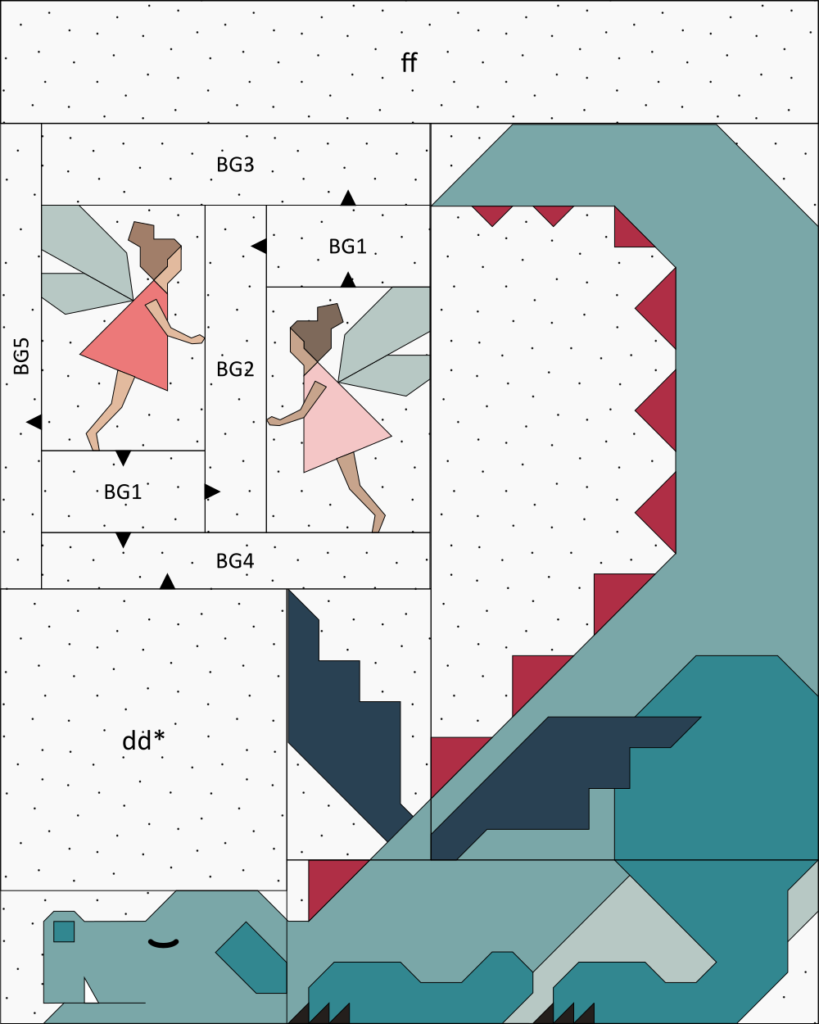
- Finish (baste, quilt and bind) your quilt top as desired.
And ta-dah! You did it!
This is what it would look like with a boy and a girl fairy.
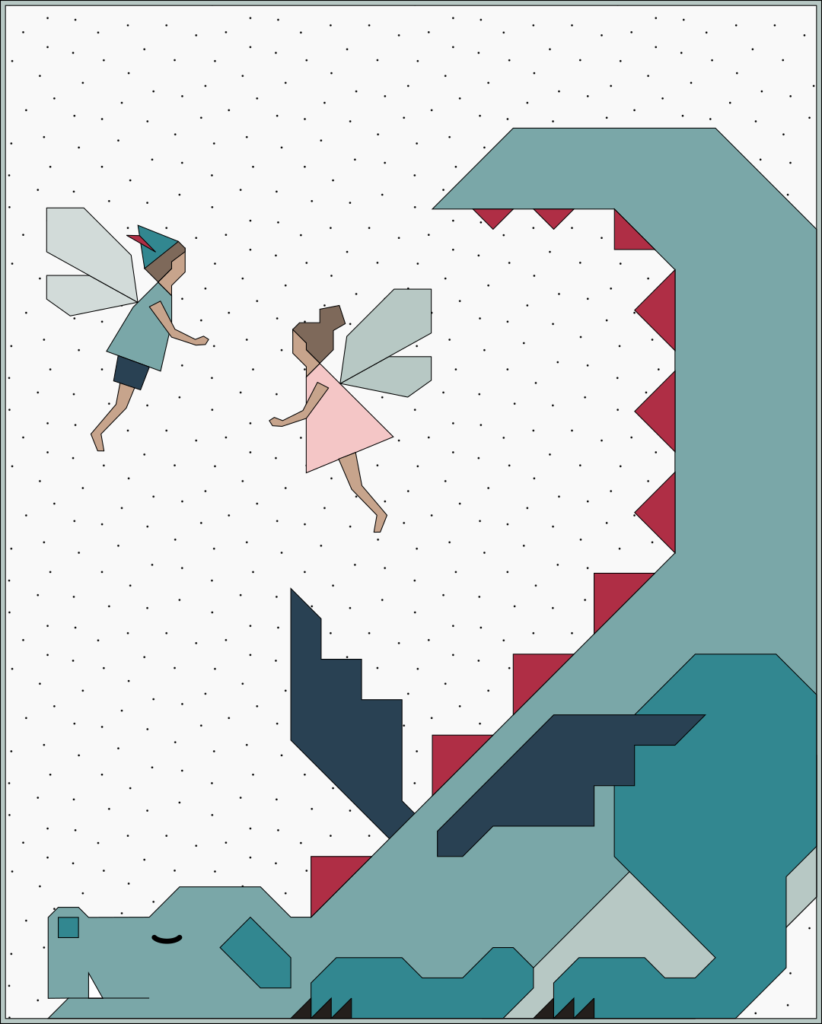
If you only want to add one fairy, I suggest placing her somewhere within the contours of the original dd piece. If you keep her to the left of the seam between dd and ee (see Fig. 1 of the pattern), you can even avoid the partial seam and just follow the general assembly instructions from the Dragon Dreams pattern.
What other combos would you like to see? Let me know!
