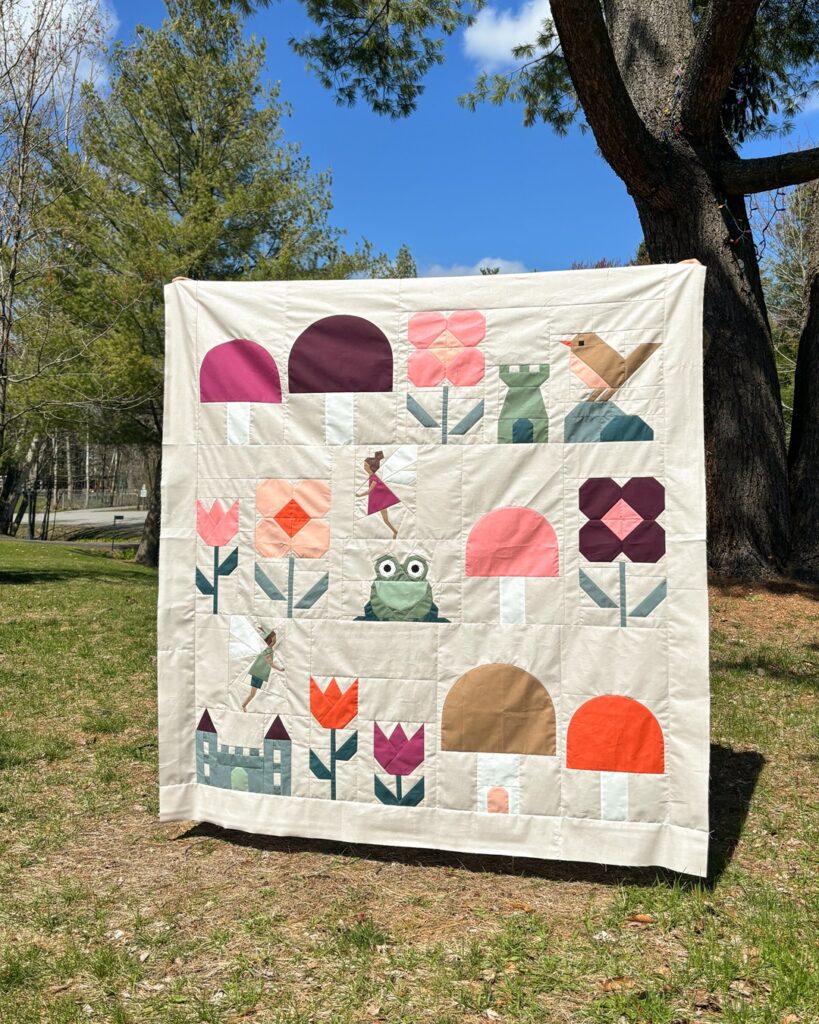
I am so proud of the Fairy Meadow quilt I made during my recent Pattern Blender workshop! Look how sweet!
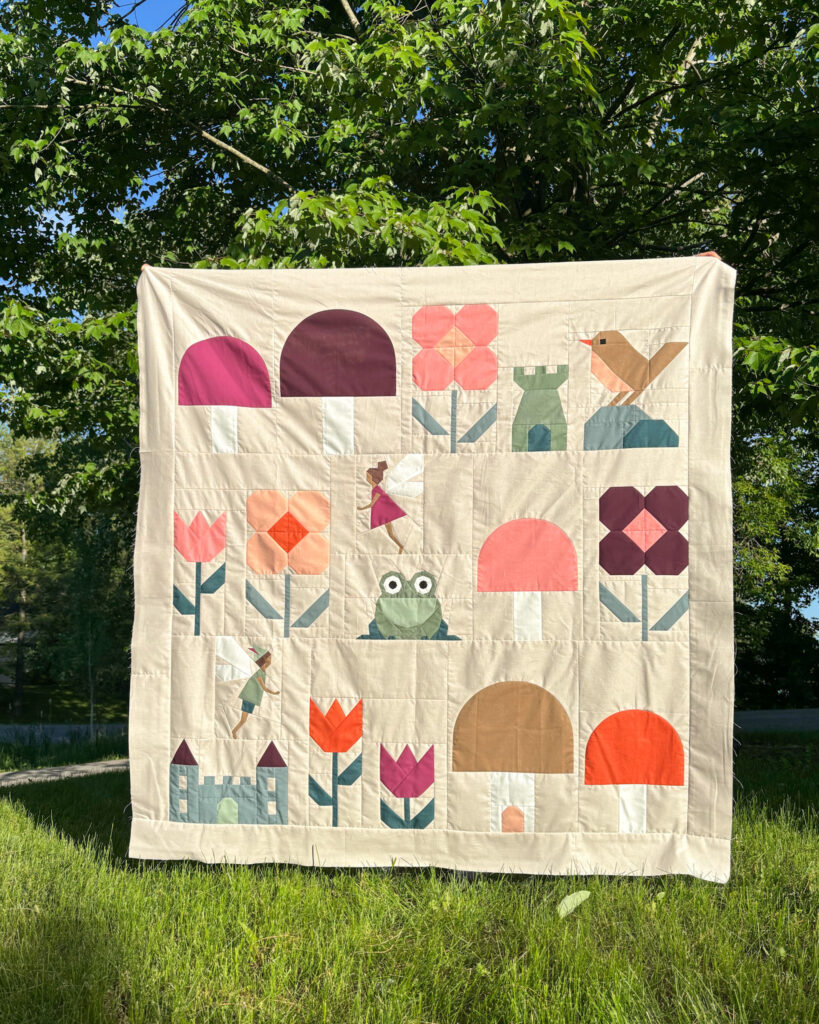
Today I’d like to share how I went about this project and maybe inspire you to make your own version.
My quilt measures about 55″ x 56″ and I used a total of 8 patterns (mostly my own), which are linked under each photo*. Some of the blocks are slight modifications of the original patterns. Please take note of the additional info on those adaptations!
* Please note: Due to the higher popularity, I linked to the pdf version of each pattern. If you are interested in a printed booklet instead (available for most, but not all of my patterns), please find them here.
The inspiration behind this quilt
As long as I can remember I have had a soft spot for fairies and their little world amidst flowers and mushrooms. As an adult this love surfaced again through “Ben and Holly’s Little Kingdom”, a British TV show I used to watch with our kids when they were smaller. I highly recommend checking it out if you don’t know this gem. The dialogues and especially the subtle rivalry between the fairies and elves are just hilarious! With this quilt, I wanted to create such a sweet and magical Fairy Meadow scene, while also including their little homes and critter friends.
My thought process for the layout and construction
Because all the blocks I was planning to use varied in size, I chose to go for a row-based rather than grid-based layout.
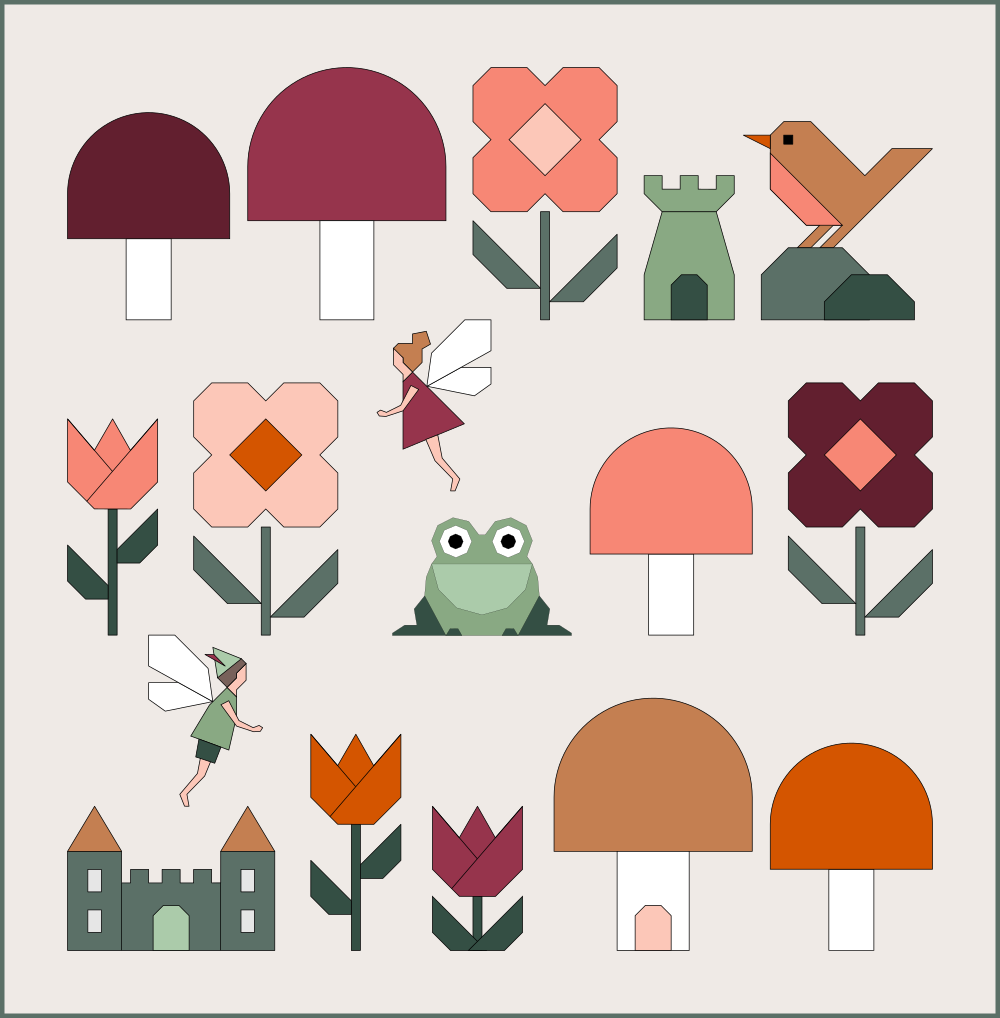
The overall quilt construction and dimensions are based on the smaller throw size of my Fungi Friends pattern: All the blocks are laid out in a way to form three 18″ high rows (unfinished dimensions). I added vertical sashing strips between the blocks and some additional background pieces to fill in all the gaps. Because the blocks differ in width, it was a bit tricky to size the sashing strips correctly to ensure that all three rows were of the same width in the end. I also didn’t want the fairies’ feet and wings to touch any flowers or critters. I changed the number of mushrooms and flowers a few times and moved them around until I found the perfect layout.
The different elements of my Fairy Meadow quilt
I went through several mock-up iterations before cutting into any of my fabrics. What can I say – I like to plan ahead. Sometimes down to the small details. Below is the final version, which I then referred to throughout the entire process of stitching up my Fairy Meadow quilt.
The mushrooms
Because there are so many different pieces from so many different patters, I chose to make them block by block. In order to use my background fabric as efficiently as possible, I started by cutting the borders and the mushroom blocks from my Fungi Friends pattern first. The off-cuts were perfect to use up while making the FPP blocks later on.
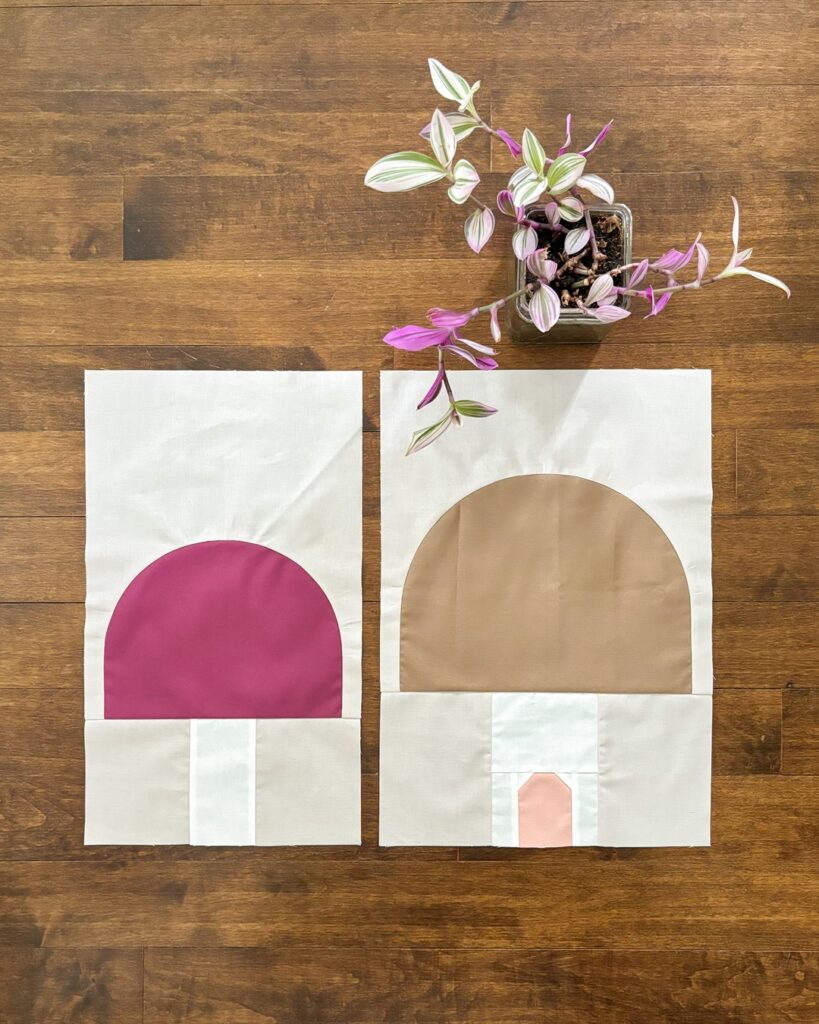
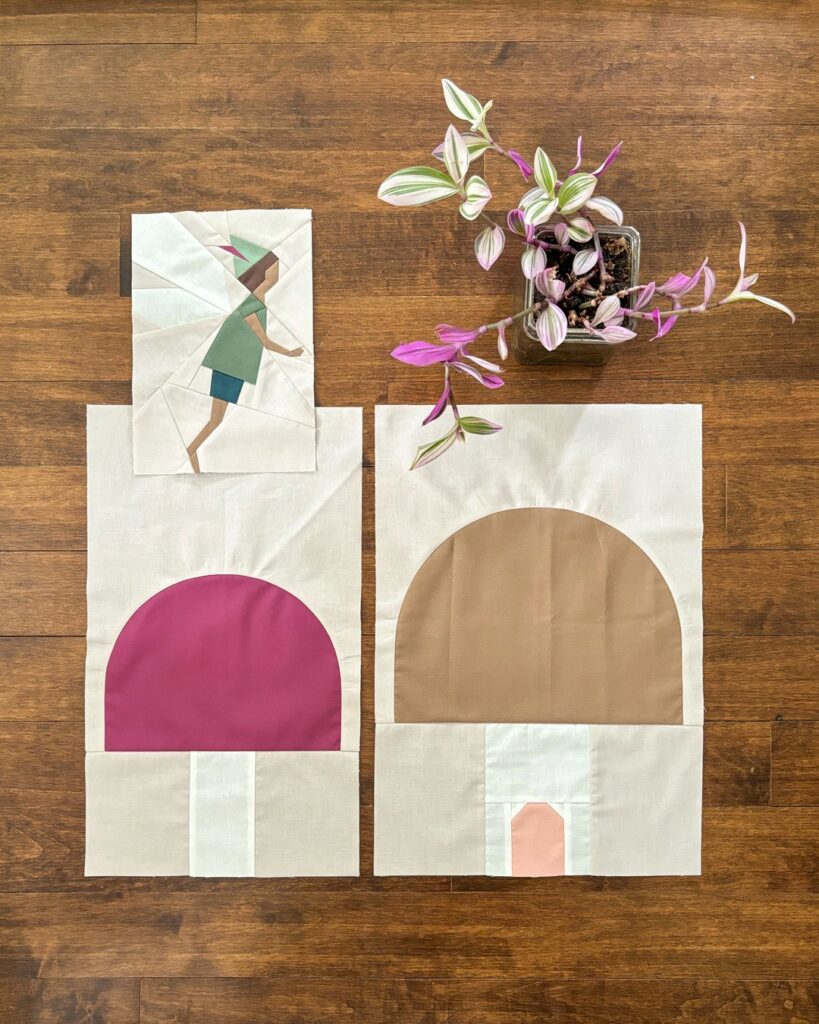
I made a total of 5 mushrooms and decided to turn one of the larger mushrooms into a fairy home by adding a little door. I went with the same door size as in the castle and watchtower blocks below. In order to accommodate this sweet little detail, I slightly increased the width of the mushroom stem to 1″ finished on either side of the door, then added another piece of stem to the top to match the original stem height from the Fungi Friends pattern.
The castle and watchtower
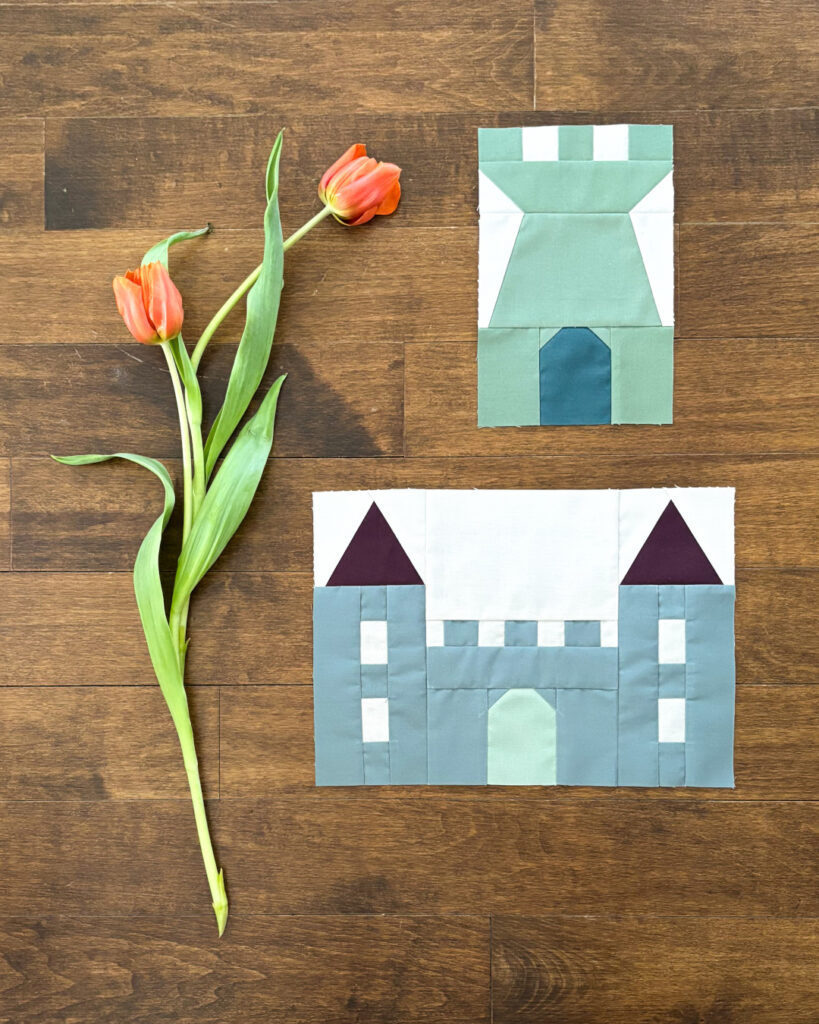
Next, I made one castle and one watchtower block as described in my Little Kingdom pattern, no changes here.
The tulips
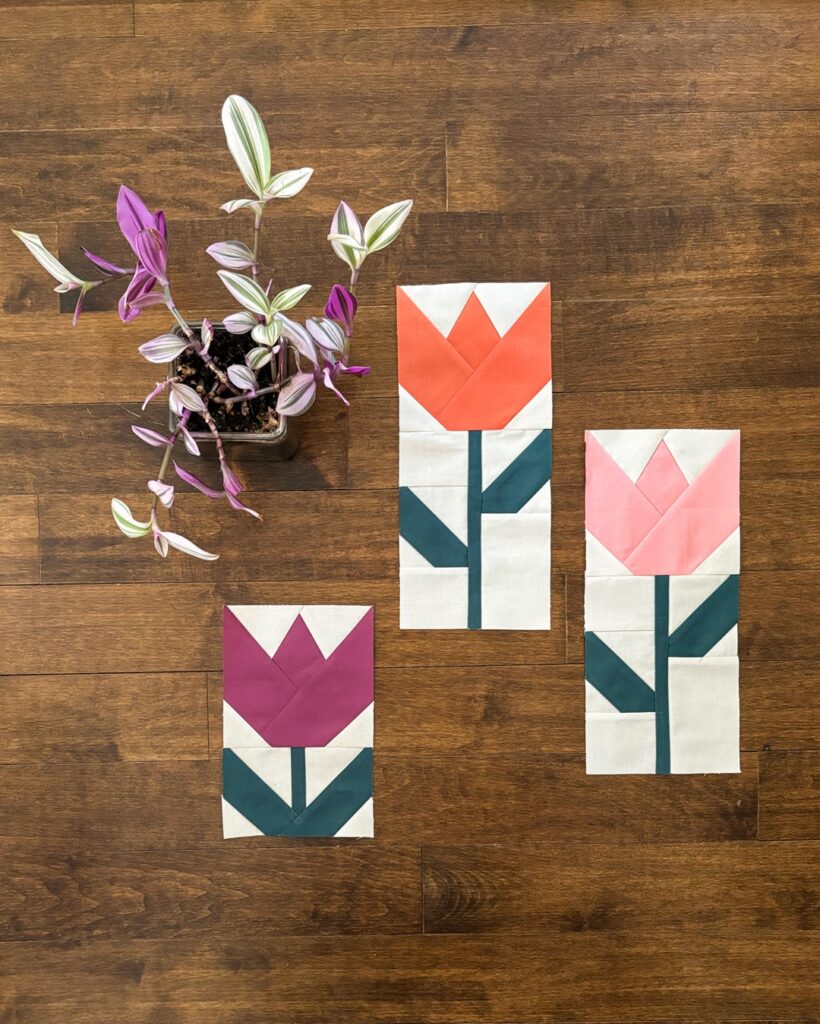
For the flowers, I started with some of the smaller tulip blocks from my Paper Tulips pattern, one with a shorter stem and two with a longer stem. Again, no changes here. Just be careful how many of each piece you need as the pattern is written for a whole tulip quilt, not individual blocks.
The other flowers
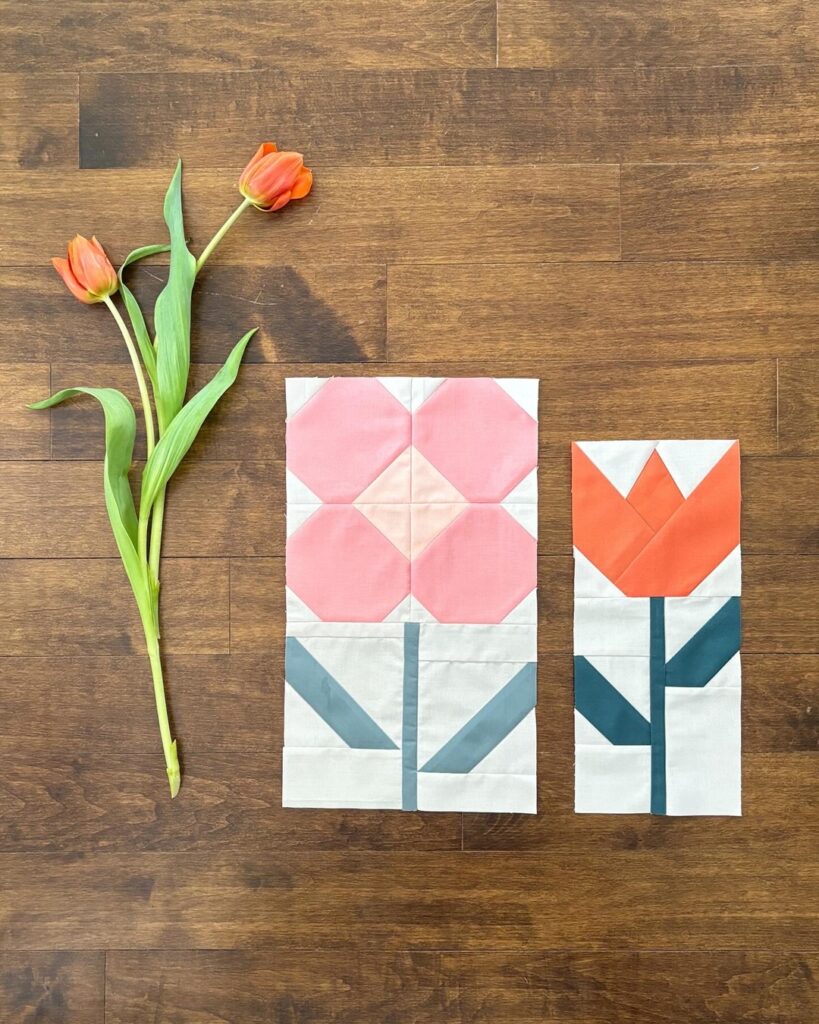
Because I wanted more variety in my flowers, I was looking for other options to add as well. I liked the design and size of the flower heads in my Unicorn Garden/Vintage Bloom patterns, but decided to substitute the original leaf block by a unit with a real flower stem.
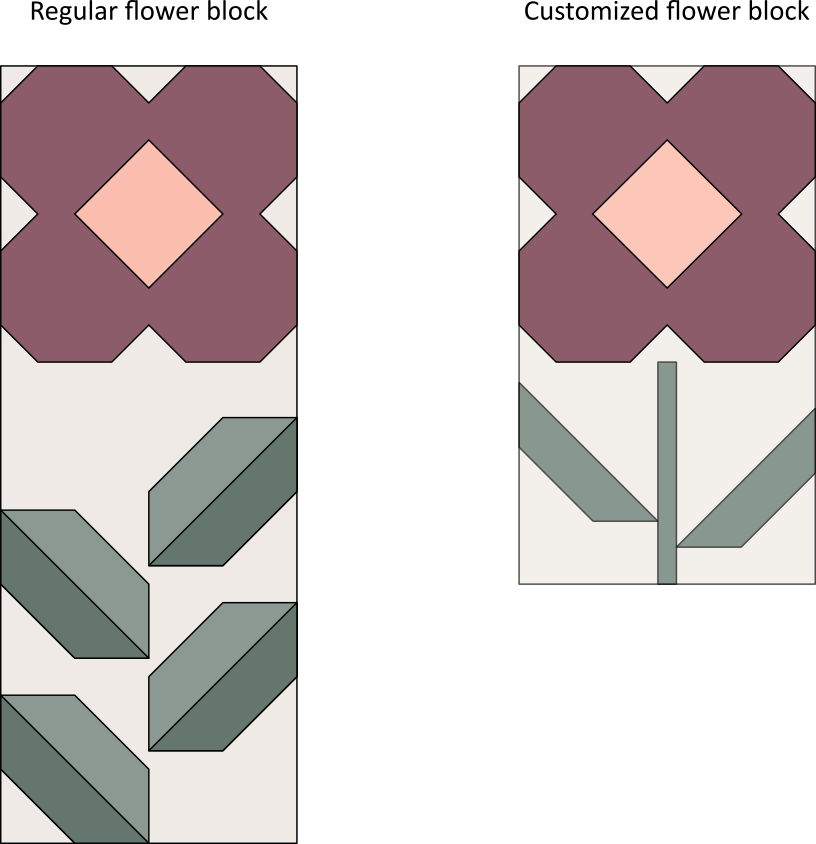
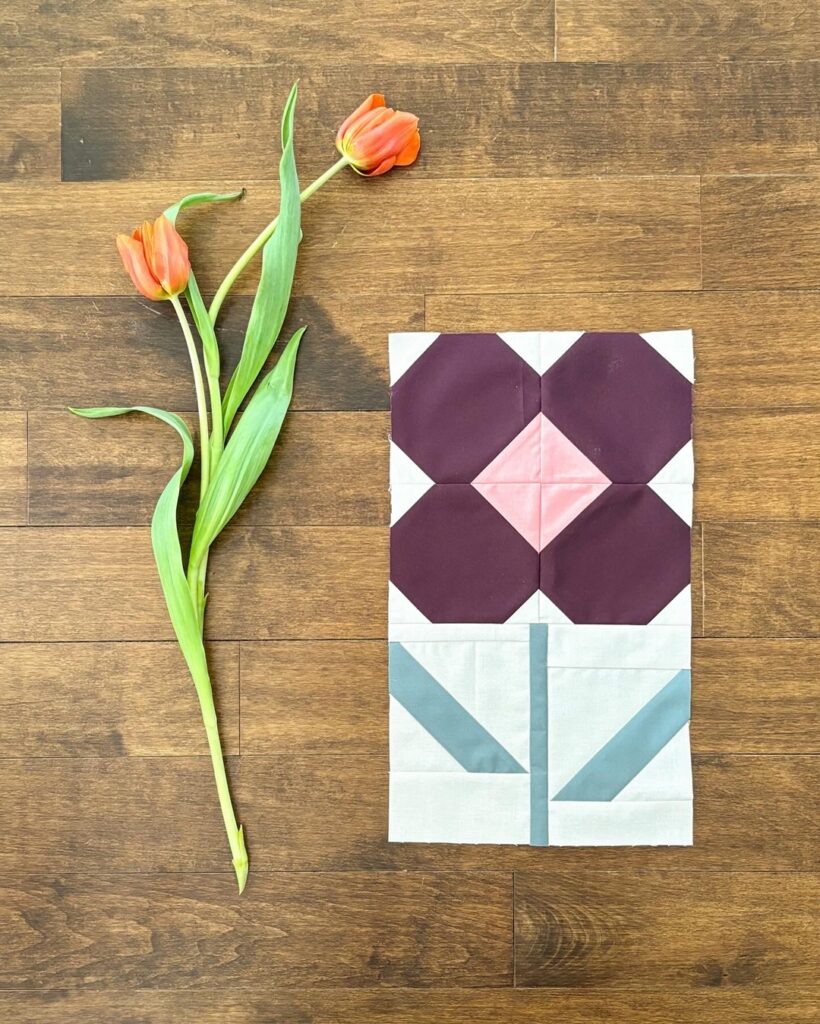
Here are the details for the customized stem unit if you want to make your own:
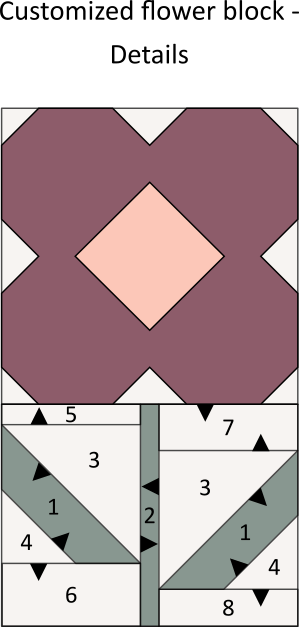
- Make a flower head unit according to the Unicorn Garden or Vintage Bloom pattern.
- Prepare the following pieces for the stem unit:

- Make the stem unit**:
- Using your 1 and 3 pieces, make two HSTs using the 2-at-a-time method and trim each unit to 4 1/4″ x 4 1/4″.
- Add a 4 piece to the leaf side of your HST units from the previous step via stitch-and-flip.
- Add your 5, 6, 7 and 8 pieces to the top and bottom of your leaf units.
- Sew your leaf units to the left and right of your 2 piece (stem).
- Add your completed stem unit to the bottom of your flower head unit.
** Press your seams according to the following pressing symbols:

And I am really happy with how beautiful the two different flowers look together!
The fairies
As you can see in the mock-up at the top of this blog post, I wanted to place a boy fairy above the castle block and a girl above the frog. With the original block dimensions of the Fairy Folks patterns that would not have been possible with the chosen height of my rows. In both cases, the combined units would have been higher than 18″. So instead, I printed the templates of the smaller fairy sizes at 80% to make blocks that were 9.5″ in height instead of 12″ (finished). That way, the castle block with the fairy boy would form a unit of exactly 18″ in height (unfinished) and I could create a similar unit with the fairy girl and the frog later on.
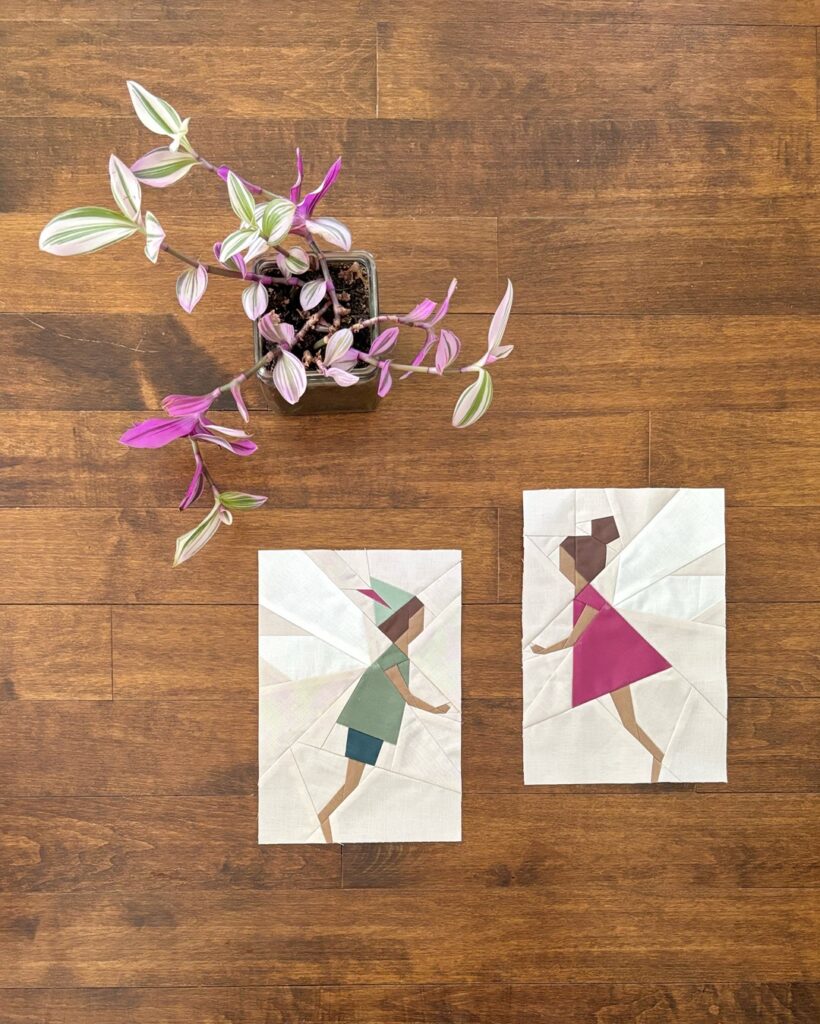
If you are scaling your FPP patterns as well, here are some tips:
- Don’t scale your blocks too small or some of the details in your FPP block might get very tiny and difficult to sew. At 80% I already found the fairies’ hands a bit tedious. I wouldn’t recommend going much smaller than that.
- While your piecing process for each FPP section doesn’t change, be careful when trimming their outer contours! As the printed seam allowance will scale with the rest of the templates, the dashed lines will no longer be at 1/4″. Instead of trimming on the dashed lines, trim 1/4″ outside the solid contours of your segments. When scaling down, this will be outside your dashed lines, when scaling up, this will be inside your dashed lines.
- Carefully assemble your sections using a regular 1/4″ seam.
The robin
My original Little Robin is sitting on a branch (see left image below). The branch didn’t seem to make a lot of sense in my layout though, and I also wanted to lift the robin up a bit so he could see above the watchtower. So I ended up placing him on a set of rocks instead (see right image below).
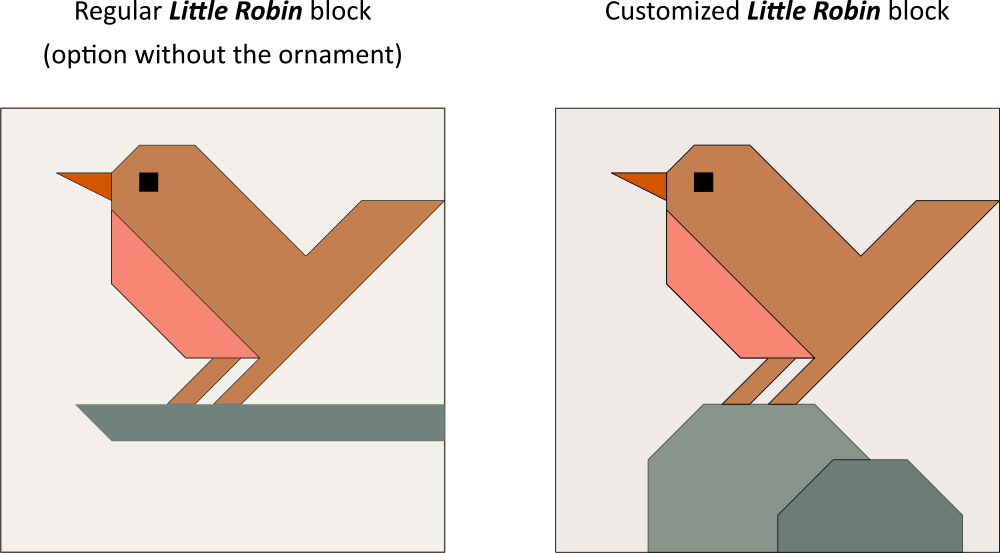
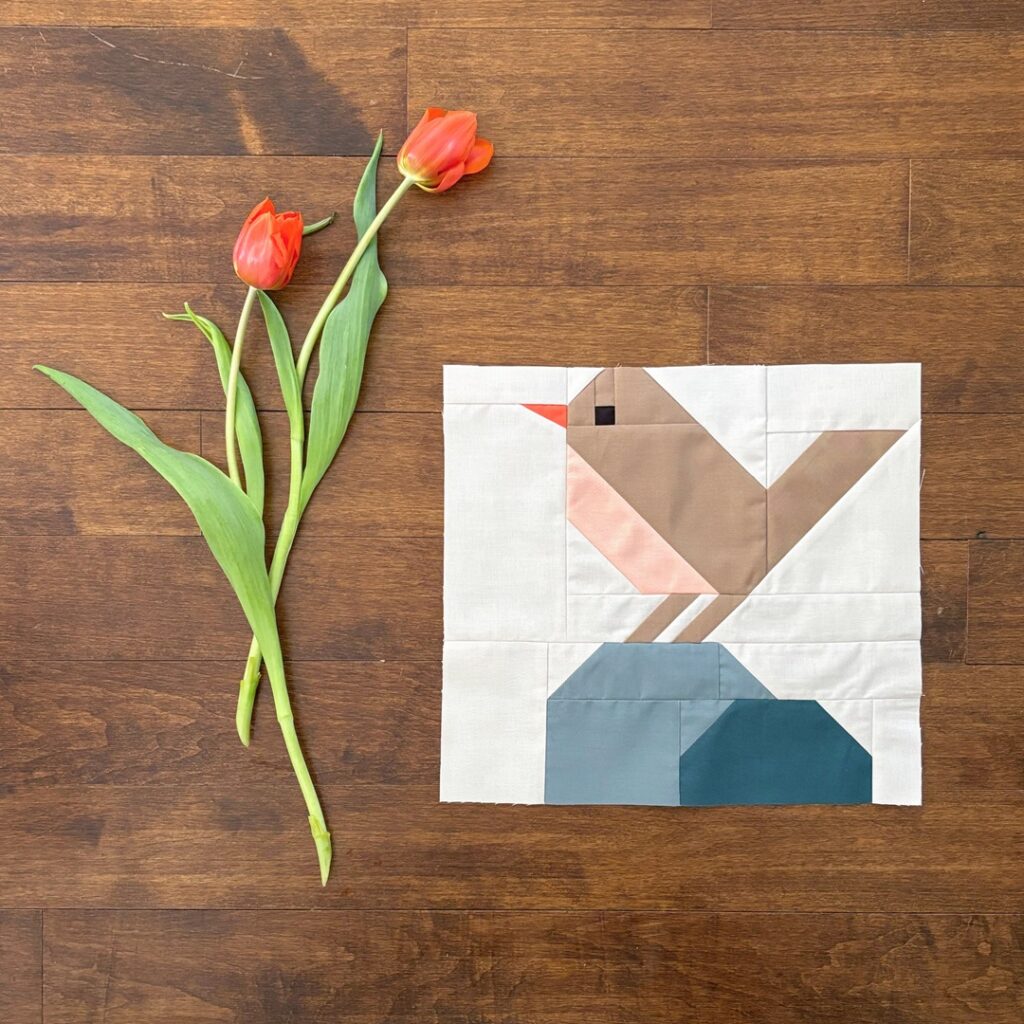
Here are the details and some minimal instructions for the customized rock section, in case you’d like to use this variation of the block for your own projects.
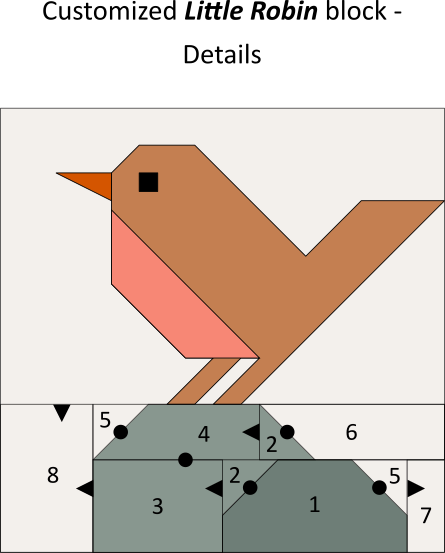
Robin on rocks instructions:
- Make a robin block without an ornament (see Fig. 14 of the Little Robin pattern), skipping the branch unit at the bottom.
- Prepare the following pieces for the rock unit:

- Make the rock unit**:
- Add completed rock unit to the bottom of your robin section.
- Make sub-units [2-1-5], [5-4] and [2-6] via stitch-and-flip.
- Assemble sub-units: 3 + [2-1-5] + 7 and [5-4] + [2-6].
- Sew [5-4-2-6] to the top of [3-2-1-5-7].
- Add 8 to the left.
- Add your completed rock unit to the bottom of your robin section.
** Press your seams according to the following pressing symbols:

The frog
And lastly, I just had to include my friend’s (Gaby of Tomte Studio) FPP frog in my Fairy Meadow quilt. You can find the pattern in her shop. I didn’t make any changes to the frog itself, but eliminated the strip of background fabric at the bottom. This adjustment allowed him to sit level with my other blocks.
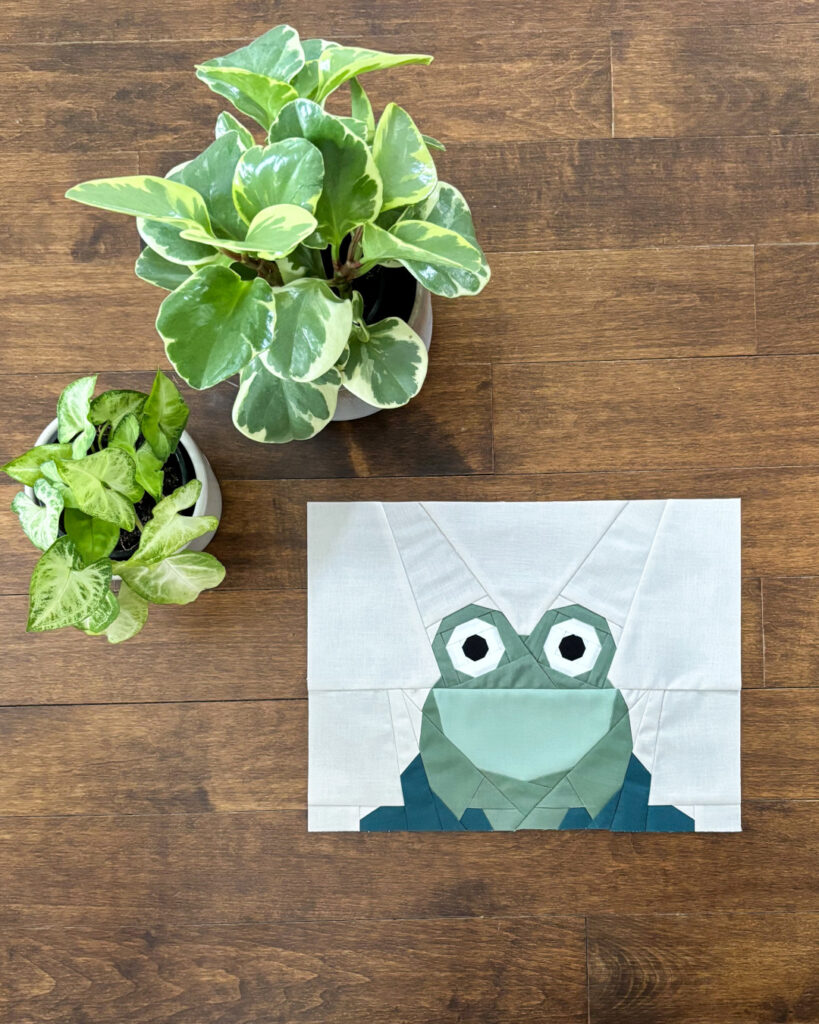
If you like FPP I highly recommend you check out Gaby’s pattern shop. She has a variety of beautiful flower and animal patterns to choose from (and many other designs for all occasions).
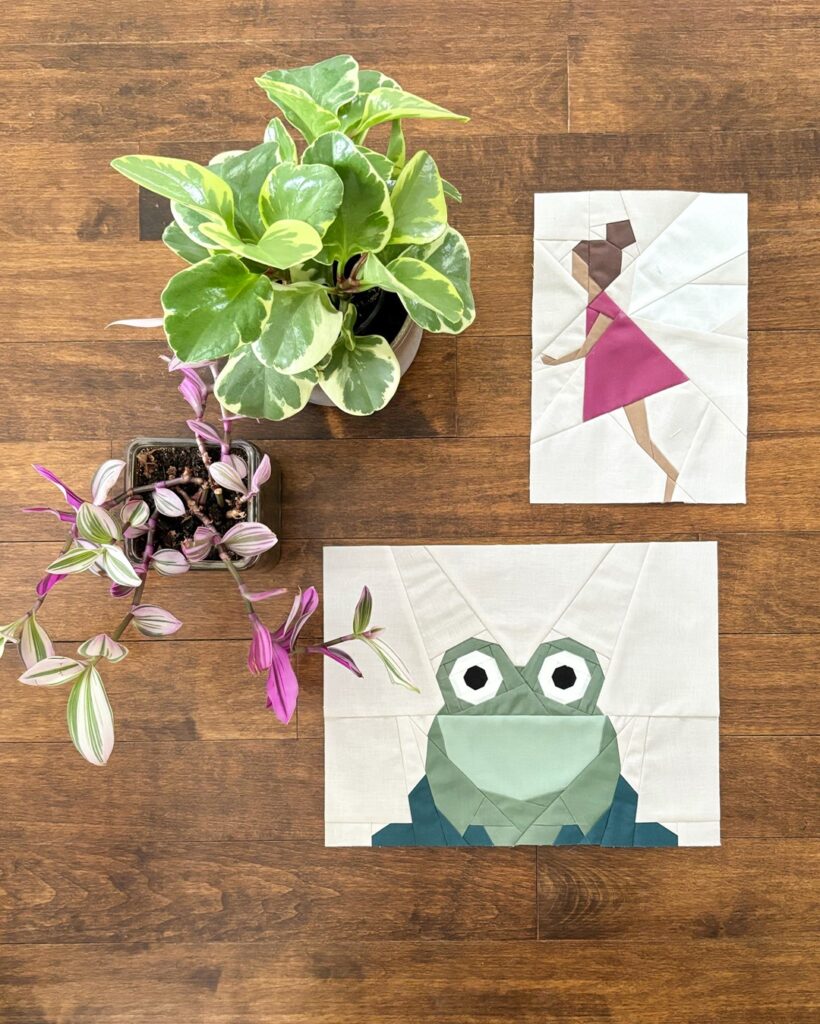
And don’t the frog and fairies work so well together?! I find the true magic tends to happen when the different characters start interacting. That’s how stories are created!
The assembly process
Once I had all my Fairy Meadow quilt blocks stitched up, it was time for some diligent work to assemble them all. Since I was dealing with so many different blocks, I couldn’t just choose one uniform width for all my vertical sashing pieces and somehow magically end up with three rows of blocks of the same length. So instead, I varied the width of the sashing pieces between 1″ and 2″ finished and also filled in the background above the blocks that were less than 18″ in height. I had to trim the top of the frog block a bit, so him and the scaled fairy girl together would be 18″ in height (unfinished), just like the boy fairy and the castle underneath. Similarly, I slightly trimmed the left side of the robin block to make more room for the watchtower.
Overall, it was a slow but steady process. And the 1″ grid on my planning sheet turned out to be extremely helpful in identifying the dimensions of all the required background pieces.
Dimensions: about 55″ x 56″
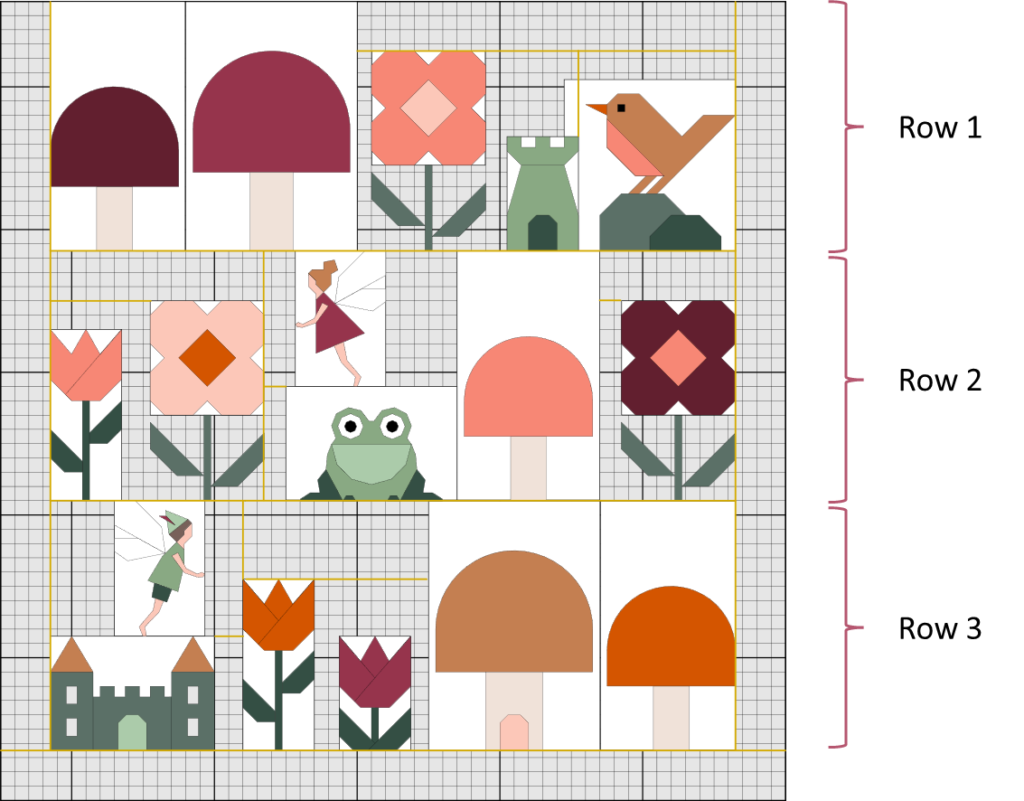
Once I had all these larger sections completed, I first assembled Row 1, then made sure that Row 2 and Row 3 would match in length. Lastly, I joined my rows and added my borders to the sides and bottom.
Wanna make your own Fairy Meadow quilt?
This type of project is ideal of course to work from one’s stash. And I almost did.
But then I didn’t… Here’s why:
I recently curated a 16-piece fat quarter bundle for a give-away. It’s a selection of some of my favourite solid fabrics which I have been using over and over in my recent projects. And since there were a few different pinks, orange, greens, teals and neutrals I thought the palette was just perfect for my Fairy Meadow quilt.
* Please note: The background in the two photos below is NOT the fabric I used in my quilt. It’s a similar-coloured linen curtain.
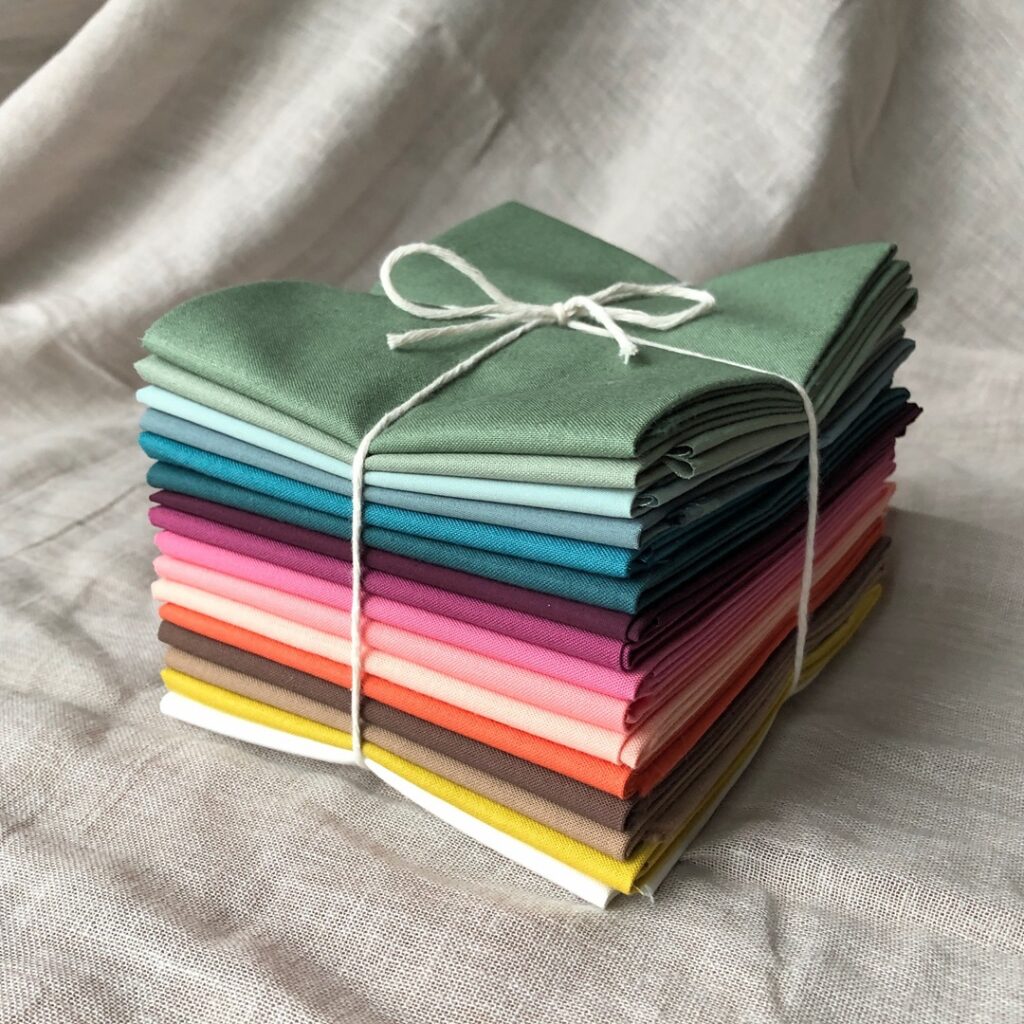
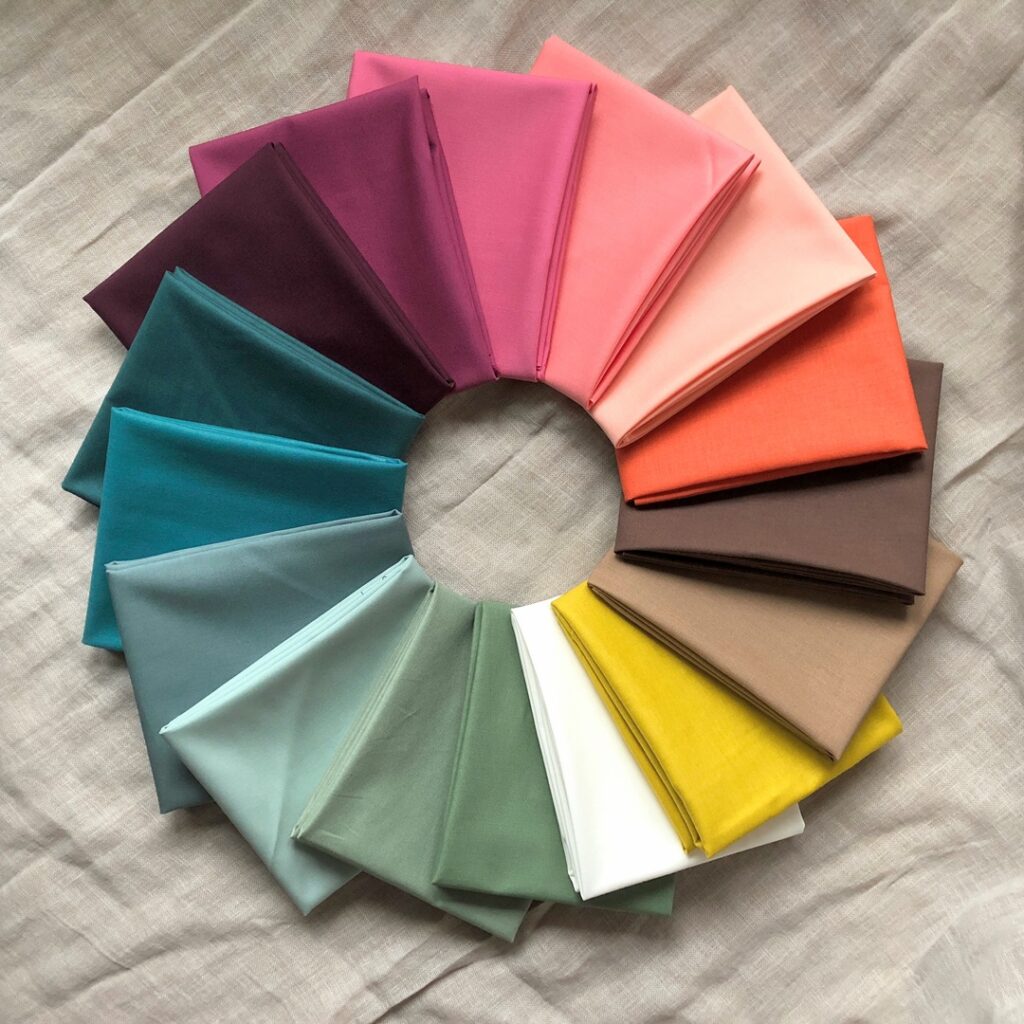
I chose to combine this bundle with a warm grey background, light enough to provide sufficient contrast against all the included colours (see below). Riley Blake Confetti Cotton in Light Grey perfectly met that requirement! I ended up using most, but not all of the colours from the FQ bundle in the presented quilt. For example, I had originally thought of using the yellow fabric for the flower centres and the robin’s beak. But then I decided to go with the orange and pinks instead. Besides the colours I didn’t use at all, I also had left-overs of the colours I used. That means that depending on the blocks you want to include in your quilt, you’ll have some extra fabric options to choose from. How about a sunflower for example, or a butterfly? I can’t wait to see what you come up with!
I ended up using about 2 3/4 yd of background fabric. But due to my detailed planning I was able to cut all my pieces VERY efficiently. To allow for a little more wiggle room and maybe some cutting mistakes, I recommend having about 3 1/2 yd of background fabric at hand when you start your project. If you don’t use it up for your quilt, you can always use it for a matching pillow for example.

My daughter loves this quilt. Is there any way I can purchase the pattern blocks with the additional changes all together?
Hi Katie,
Thank you for the love on this quilt! I made this quilt during a workshop, as an example of how you can combine any quilt blocks or elements from various patterns in a new layout. Unfortunately, I do not have a specific pattern bundle, but all the patterns used and some guidance on how to assemble the quilt top are shared above. Except for the frog, the patterns are all from my shop, and some are a bit modified. Instead of trying to sell you 7 different patterns to make a single quilt, my goal was to inspire people to revisit patterns they already have and go from there. Good luck with your own version!
Your quilt is so cute! I love how you have combined the different patterns to make something unique. I hope your post does inspire people to give it a try! Your description and diagram of the assembly process could really help someone who hasn’t done this sort of thing before.
Thanks Lisa!
Yes, I hope people find this example helpful – not necessarily to make the same quilt, but to see the process and adapt it to their own project.
This is a beautiful quilt. Nicely done. I would definitely purchase the fabric if you were to have 1 pattern for the quilt itself. Buying 8 patterns is not user friendly or cost effective. Nice job. Love your quilt.
Thank you! I hear you. I came up with this quilt idea based on existing patterns, so after the process of pattern writing. But my main objective here is to inspire – maybe you have some patterns in your own collection that would lend themselves to a similar project, whether it’s a garden or animal scene, or some fun objects on a bookshelf.
I really like your quilt its wonderful to like fairies and there little world.
I feel the very same way. Thank You Barb😊
Awe, thank you Barb! We all need to dream a little at times, don’t we? 🙂