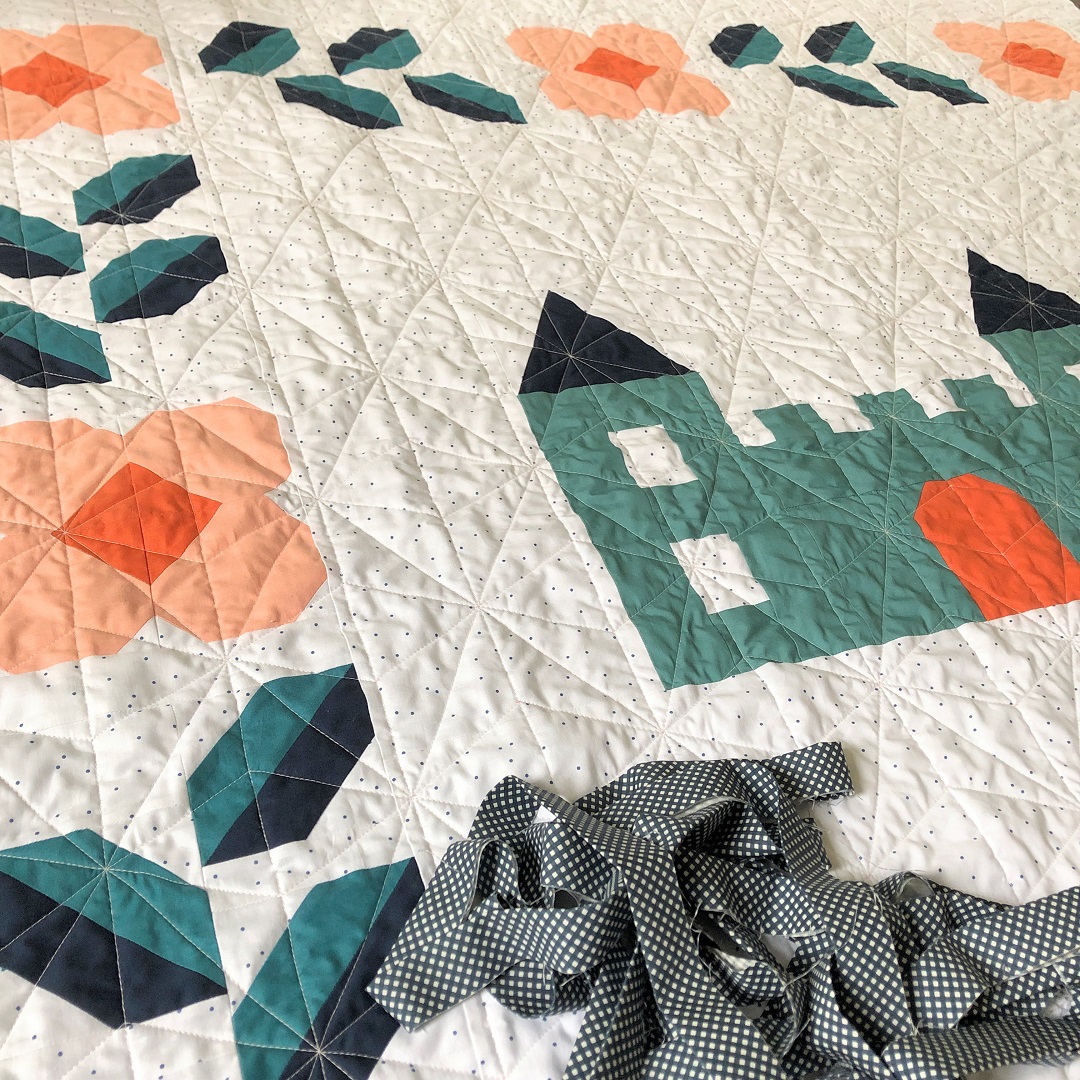
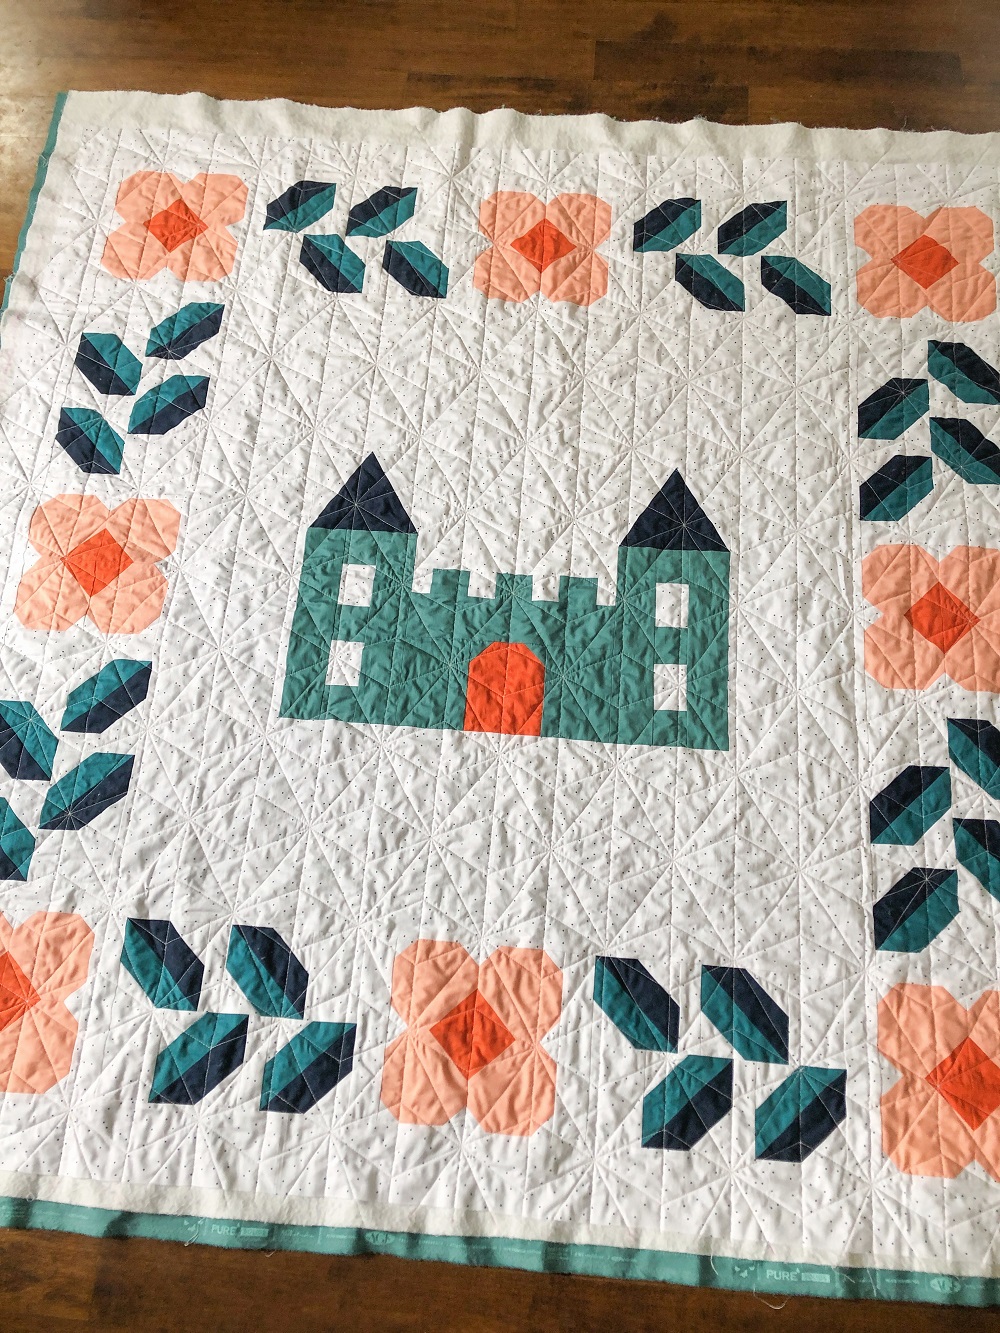
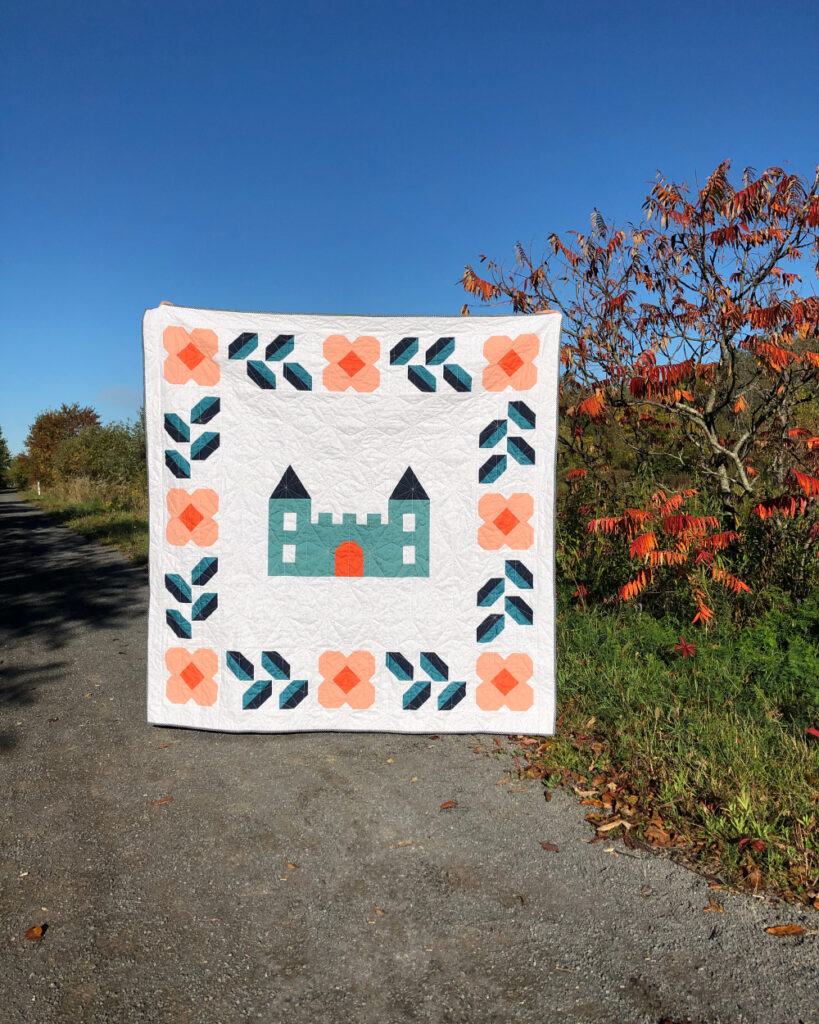
Today I’d like to show you how you can make a quilt fit for Sleeping Beauty herself. Stitch up an enchanted castle, overgrown by thorny roses! Or almost… 🙂
A few notes before we start
- Finished quilt dimensions: 59″ x 59″ (identical to Vintage Bloom in the throw size)
- You will need the following patterns:
- The castle: Little Kingdom (get the pdf or printed booklet)
- The flowers: Vintage Bloom (get the pdf)
Please note: The details for the flower frame can also be found in my Unicorn Garden pattern (get the pdf or printed booklet). Together with the instructions below it should be easy to make the required number of flower and leaf blocks. However, since you won’t be able to use the cutting charts from the pattern I recommend having a little extra background fabric at hand.
- The dimensions of the castle block are doubled as compared to the original Little Kingdom pattern. Please refer to the tables below when cutting your pieces! An enlarged FPP template for the castle roof can be found here:
- Fabric requirements:
Essentially, you will need the same materials as for the Vintage Bloom throw, plus 1 FQ for the castle and some scraps for the roof and door:

Cutting instructions
As mentioned above, the dimensions of the finished castle block are doubled as compared to the regular Little Kingdom pattern. Instead of the dimensions given in the pattern, use the following:
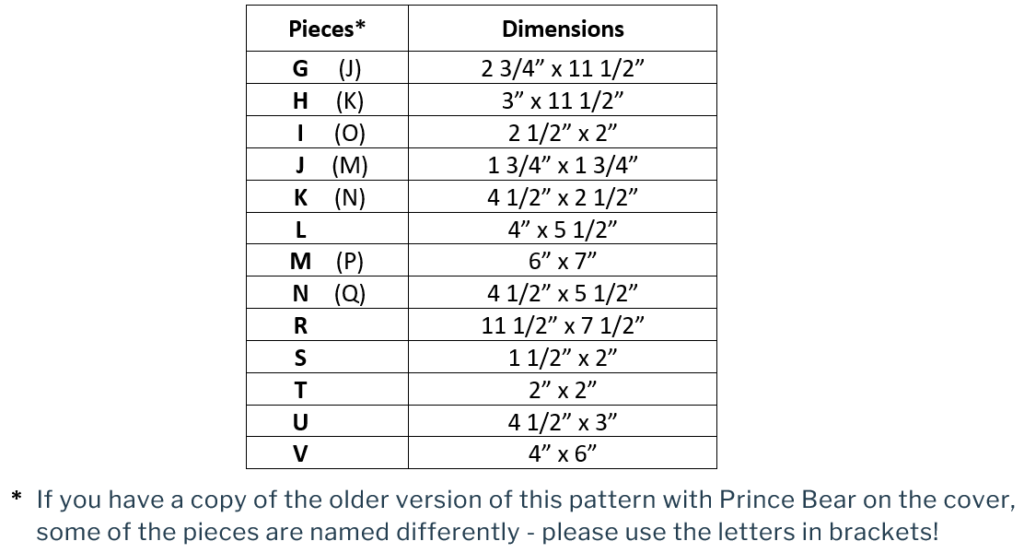
You can get all the pieces required for the castle out of 1 FQ:
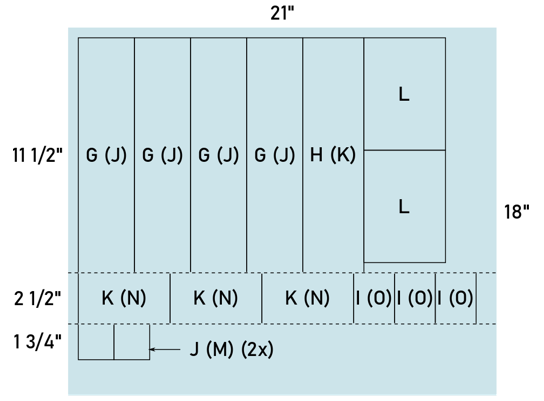
For the background, follow the cutting instructions for the throw size Vintage Bloom quilt, but instead of a K piece, prepare the following background pieces:

Start with cutting your BG1 and BG2 pieces and the background pieces for your castle block (see table above):
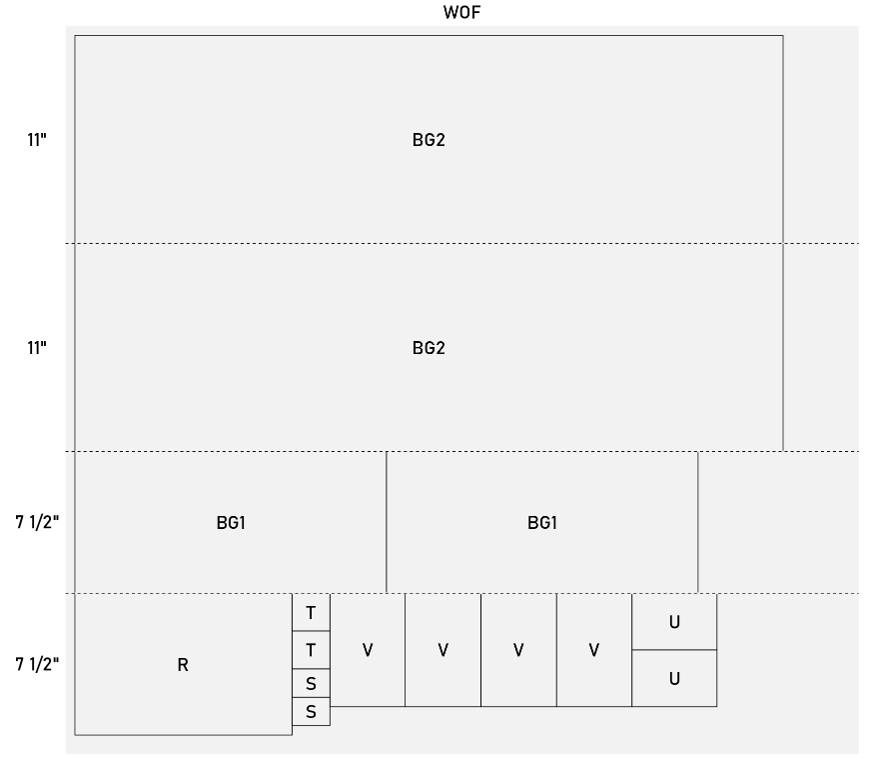
Cut all other background pieces as described for the Vintage Bloom throw, starting with the [3 1/2″ x WOF] strips.
If you are using the Unicorn Garden pattern:
Prepare the following pieces for your flower frame: r (32x), s (32x), t (16x), u (16x), x (64x), y (96x), BB (16x), cc (16x), dd (16x). To speed up your process you can also make the HSTs for the leaf blocks using the 8-at-a-time method.
Piecing your Sleeping Beauty quilt top
Making the castle block
Piece the castle block as described in the Little Kingdom pattern but use the larger pieces as stated above.
Important: During step 13, trim your K–U–K–U–K unit into two 2″ wide units!
Making the flower frame
Piece your flower and leaf blocks as described in Vintage Bloom and assemble the sections shown in Tab. 4 of the pattern.
If you are using the Unicorn Garden pattern:
Make 8 flower blocks and 8 (complete) leaf blocks, using the pieces and dimensions stated in the pattern. Using 6 of your flower blocks and 4 of your leaf blocks, make two of the following sections:

Using your remaining 2 flower blocks and 4 leaf blocks, make two of the following sections:

Assembly of your Sleeping Beauty quilt top
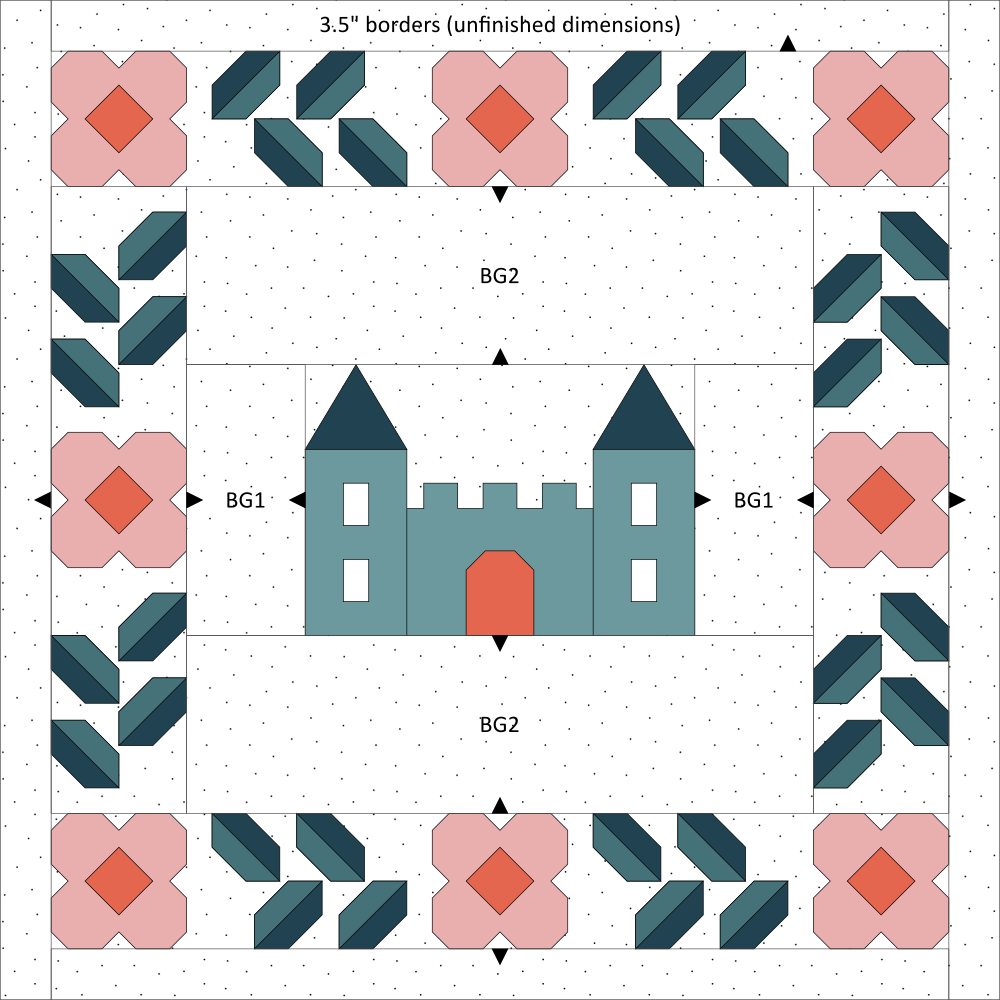
Add your BG1 pieces to the sides of your castle block as shown below, then your BG2 pieces to its top and bottom. Your completed unit should measure 37 1/2″ x 37 1/2″.

Continue with step 12 of the Vintage Bloom pattern, using the castle unit above instead of the plain K piece.
If you are using the Unicorn Garden pattern:
Use the diagram below to assemble your quilt top and add 3.5″ borders all around.
And that’s it.
I hope you enjoyed this tutorial and feel inspired to make your own Sleeping Beauty quilt! If you do, please share your version as I would love to see it! 💛
