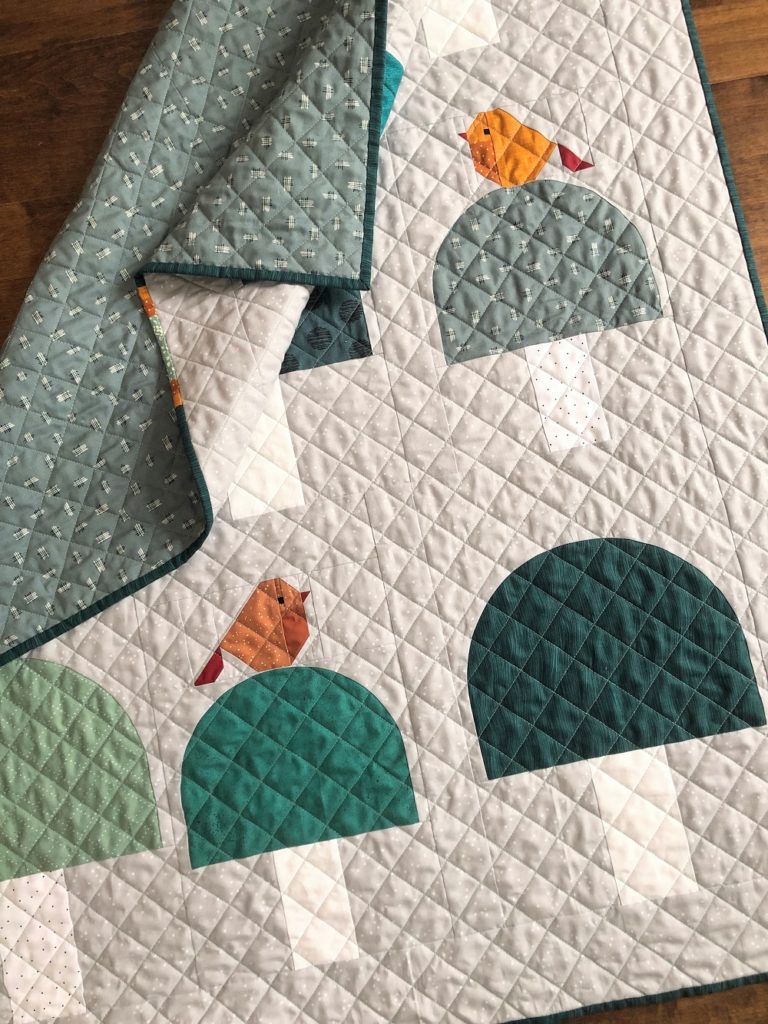
Add a little bird or two to your Fungi Friends mushroom quilt! The Mini FPP Sparrows block by Pen + Paper Patterns has just the perfect dimensions to sit on the smaller mushrooms.
When Lindsey from Pen + Paper Patterns released her mini sparrows block pattern a little over a year ago, I immediately thought of this perfect combination. And conveniently, I had a great reason to turn this idea into action soon after, when I made this sweet baby quilt for my cousin’s baby last December.
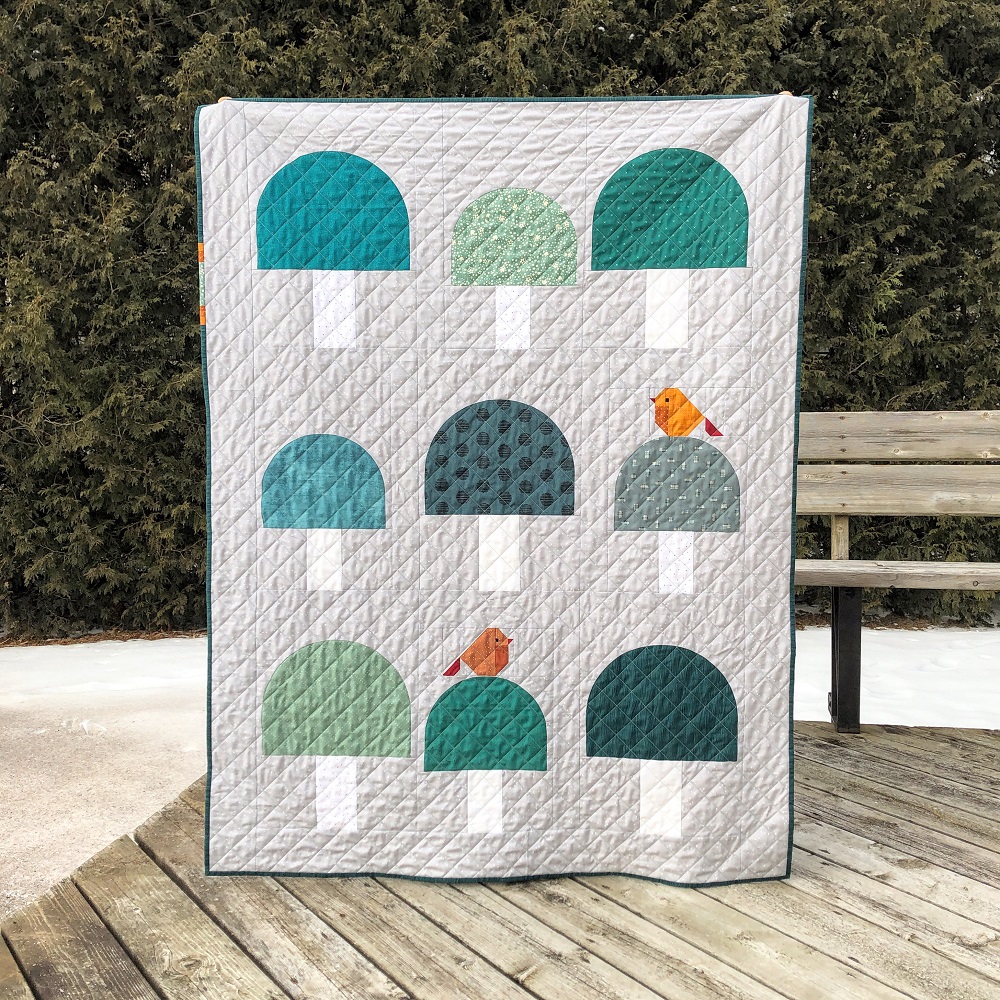
Meanwhile it’s the middle of summer. Instead of snow our backyard is covered with clover and we recently rebuilt our deck. But I finally found a moment to compile my tips and tricks in case you wanted to make your own version. Better late than never, eh?!
A few notes
- The following patterns are used in this tutorial:
- Fungi Friends (get the pdf or printed booklet)
- Mini FPP Sparrows by Pen + Paper Patterns (get the free pattern here).
- The sample used for this tutorial is a crib size Fungi Friends quilt with two added birds. But since the instructions cover how to make the required adjustments on a quilt block level you can easily transfer them to any quilt size.
- For the quilt shown above I used plain mushroom caps (option 1 of the Fungi Friends pattern), but you can also use option 2 (patchwork caps) or option 3 (improv-pieced caps).
- The fabric requirements for the quilt top are basically those of Fungi Friends. Just be sure to have a little extra background fabric at hand and some happy scraps for the birds.
Instructions
Follow the steps below to integrate the sparrow blocks into your Fungi Friends pattern and have your little birdies sit on their mushrooms.
Praparations
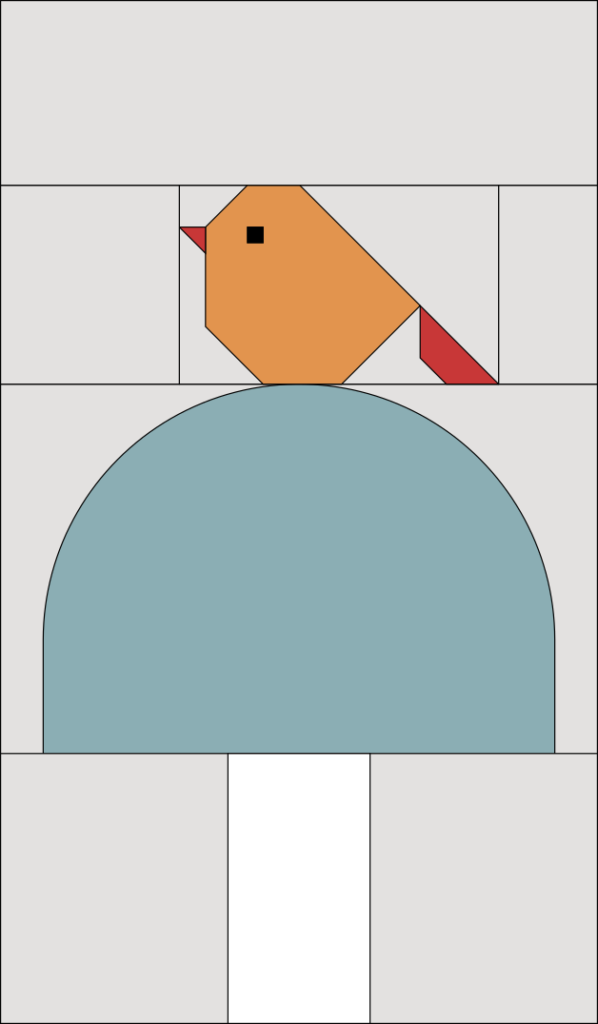
The Fungi Friends quilt pattern includes two sizes of mushroom blocks. There are no changes required to the larger mushroom blocks. For each small mushroom/sparrow combo block though, instead of an E piece, prepare the following set of background pieces:

Making your mushroom and bird quilt blocks
- Make all your regular mushroom caps (small and large) as stated in steps 1 to 16 of the Fungi Friends pattern.
For each of your combined mushroom and bird blocks:
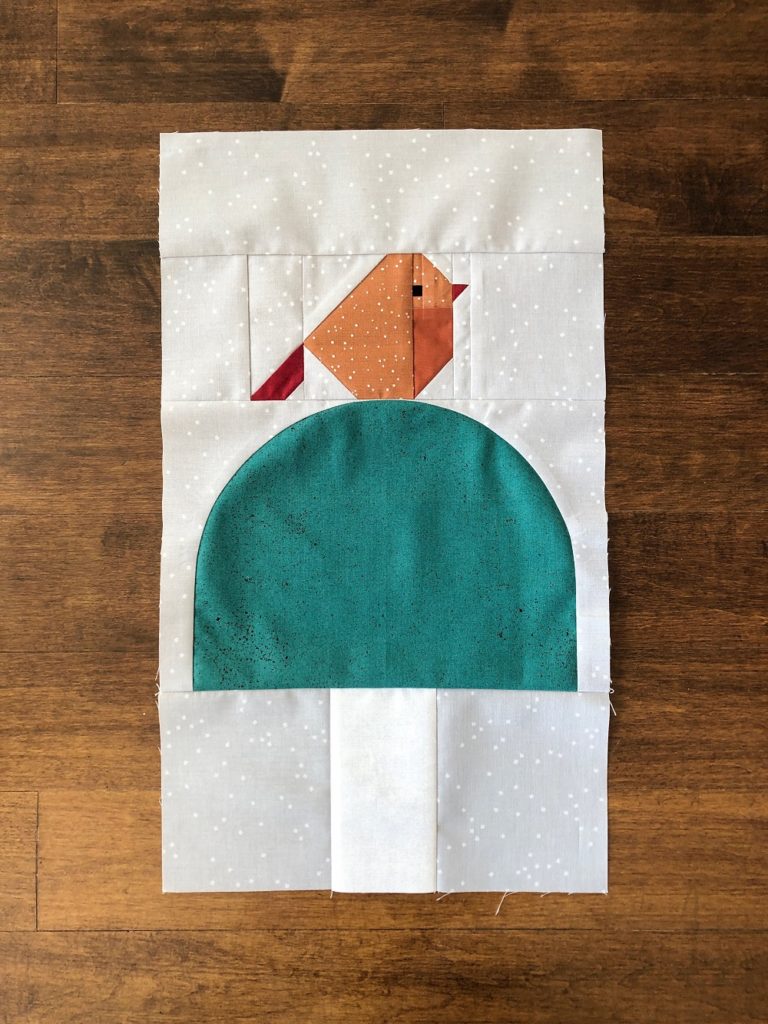
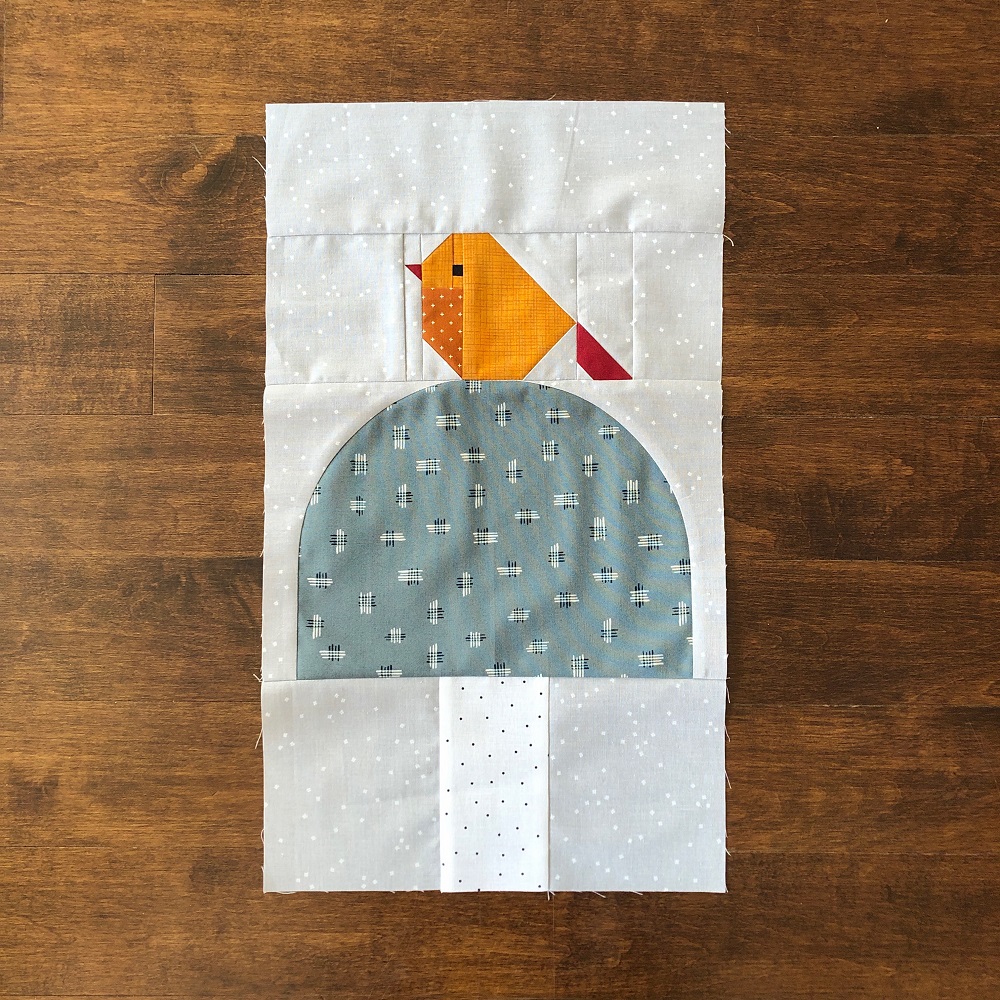
- Using your E* piece instead of an E piece, follow steps 1 to 15 of the Fungi Friends pattern to make the unit shown below. Be sure to orient your E* piece horizontally when cutting your curve, then insert your A piece as described.
- Trim your unit from step 2 horizontally, 1/4″ above the edge of the mushroom cap.

- Make your bird blocks according to the Mini FPP Sparrows pattern.
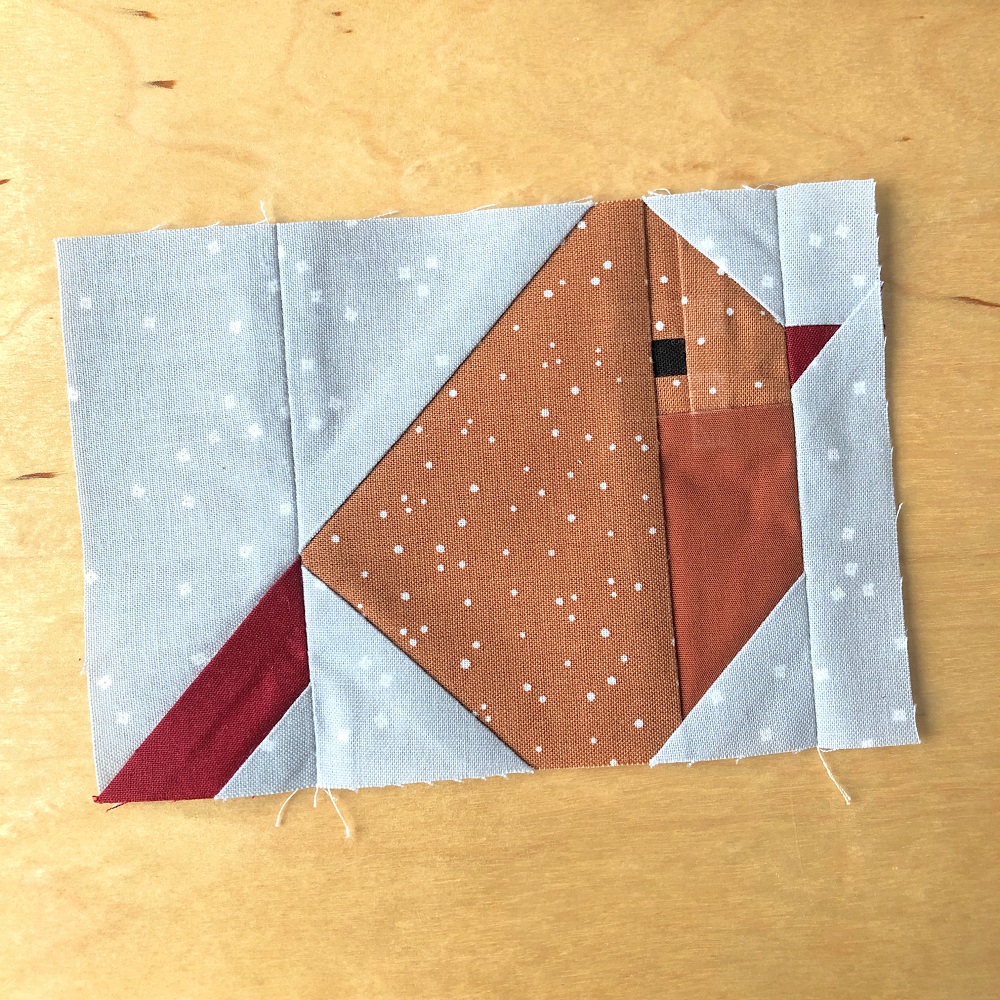
I wanted one of my two birds face to the right and one to the left. Therefore, I printed one of the FPP template sets mirrored. You might also notice that I slightly changed the template to add an additional accent colour for the bird’s belly (similar to the regular sized Sparrows pattern by Pen + Paper Patterns). If you have a little experience with FPP and want to do the same, you might be able to figure out the how-to. Since it is not my pattern, I don’t feel comfortable giving more detailed instructions. I am sorry, but hope you understand!
- RST, sew your BG1 piece to the beak side and your BG2 piece to the tail side of your bird block. Press your seams towards the BG1 and BG2 pieces.
- RST, sew your BG3 piece to the top of your bird unit from step 5 and press your seam towards the BG3 piece.
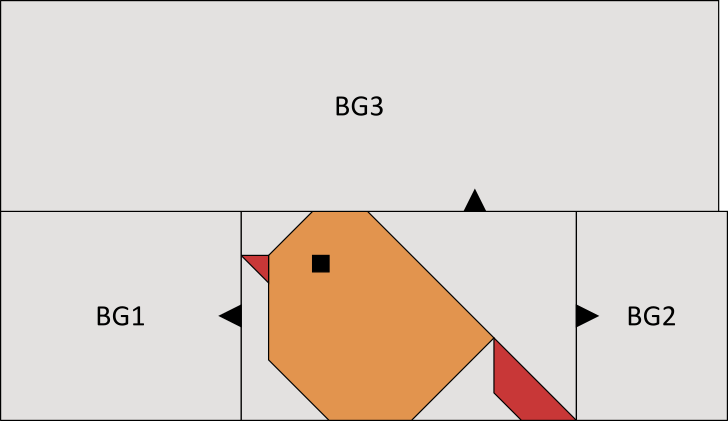
- Mark the centres on both your bird’s belly and the top of your mushroom cap (see asterisk in diagram below). Line up your markings and RST, sew your bird unit to the top of your mushroom cap. Press your seam towards the mushroom cap.
- Trim your unit to 10 1/2″ x 13 1/2″ as described in step 16 of the Fungi Friends pattern.
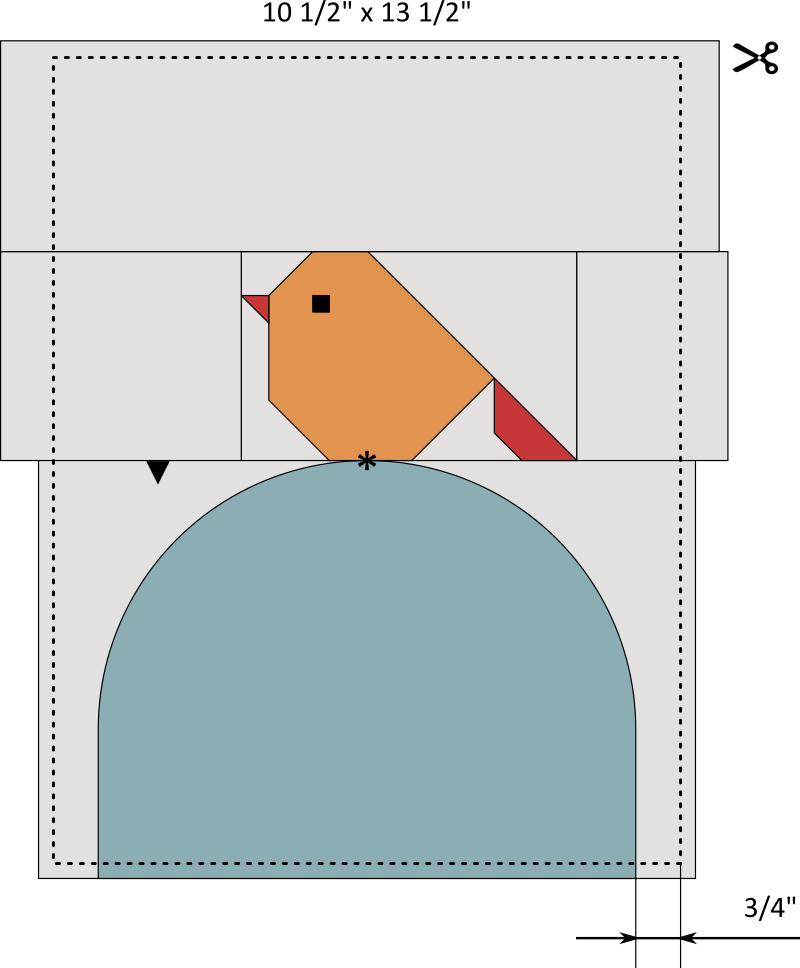
- Make your stem units and assemble your mushroom blocks (small and large, with and without birds) as described in steps 17 to 22 of the Fungi Friends pattern.
Assembling your mushroom and birds quilt top
- Follow steps 23 to 30 to assemble your mushroom and bird quilt top.
A few more details about my version
If you have been following my creations for any amount of time, you probably know my love for solids. For this quilt though, I decided to use a bunch of printed scraps from previous projects. I only purchased the grey background fabric (Riley Blake Blossom in Silver) and the blue/grey backing (Moda Songbook, Tally Toss in Anchored), which I also ended up using for one of the mushroom caps. And I am so happy with how everything turned out! I definitely see more scrappy quilts in my future!
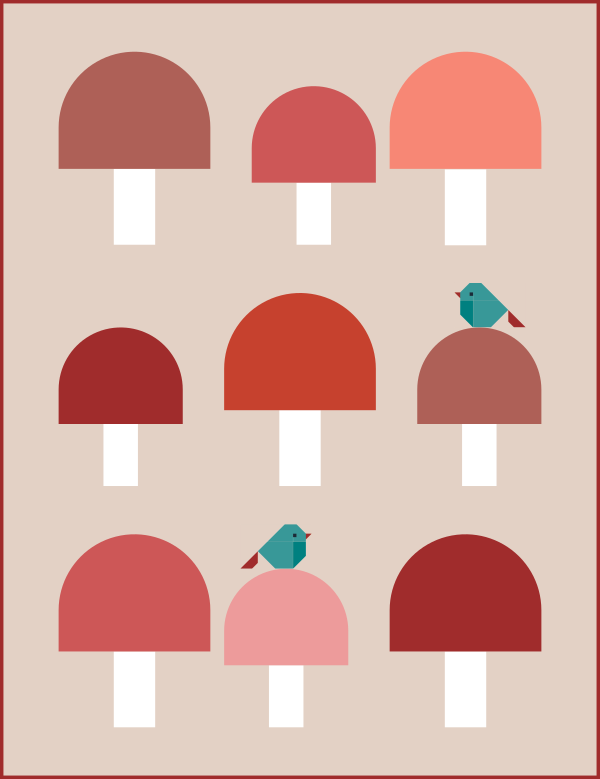
I chose an asymmetric quilt layout with birds sitting on two of my nine mushrooms (here shown in a warm-toned mock-up). Originally, I had planned to make only one bird, but as soon as I finished that block I knew he needed a friend. Even for a larger throw quilt, I like the idea of adding only one or two birds as visual accents. But of course you can adapt that number completely to your own preferences.

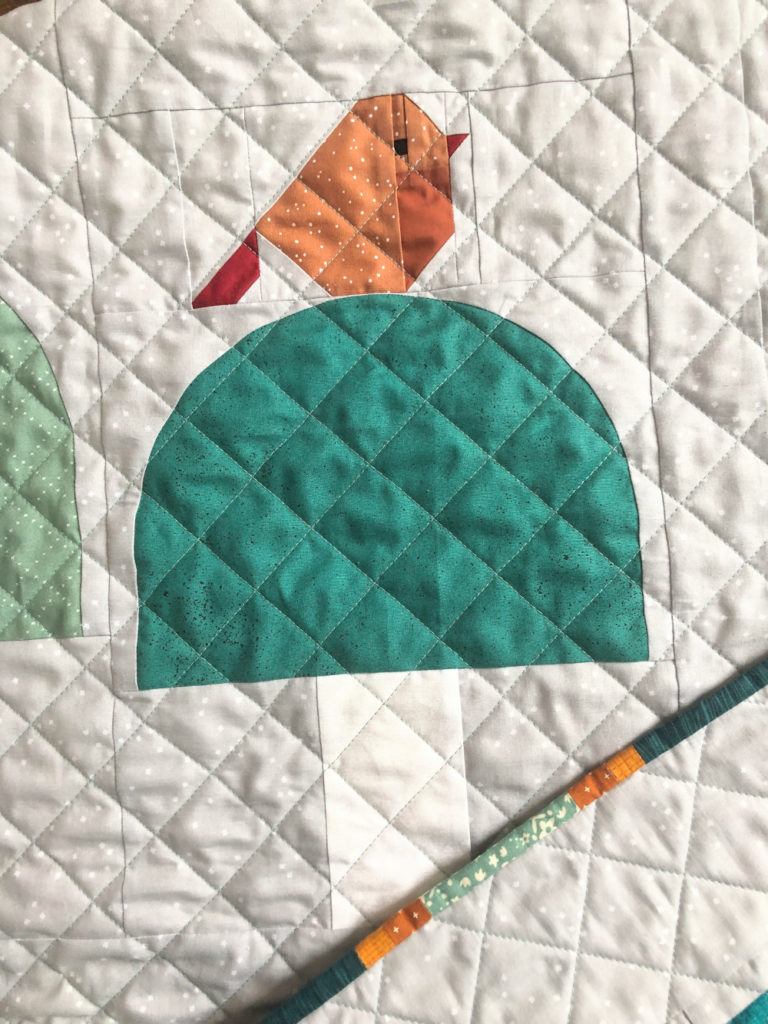
For the quilting I chose a simple diagonal grid. Once again. I often feel adventurous to try out something more exciting, and then I do another grid. It’s just so classic and goes with everything. And it’s quick, of course!
I bound the quilt with the darkest green fabric that I had used for the mushroom caps. I often go for dark bindings as I find they frame the finished quilt so nicely, very much like a picture frame. And of course I incorporated a little striped detail section, using some of the birds’ colours as an accent. I first saw this in one of Nuria’s (my friend from Fabric Stork) quilts and have used this idea a number of times now. It’s just so pretty and sweet!
Ok, now it’s your turn! I can’t wait to see YOUR birds and mushrooms. Or maybe you’ll add some different critters? I’m so curious what you come up with! Please share your creations on social media using the hashtags #FungiFriendsQuilt, thanks!

The link for the adorable birds to accent the Fungi Friends pattern is broken…..could you fix it and/or send me a copy at my email below? Thank you so much! My daughter will love it!
Thanks for letting me know, the link has been updated 🙂
What a cute idea! Love your quilt. xo Melanie
Thank you for your compliments Melanie – as always! 💛