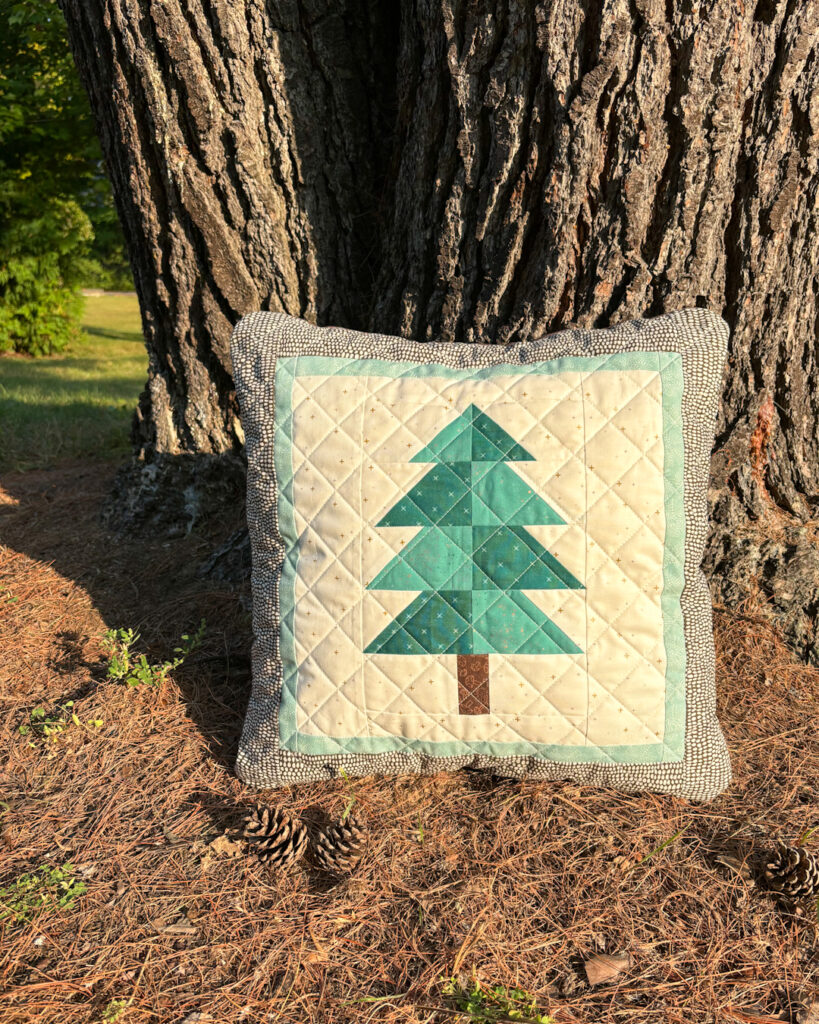
Hey there. If you’re anything like me, you have an unfinished quilt block or two laying around. Maybe it was a test block for a new pattern you’re working on, or a WIP of a different nature. But let’s give it a new chance to live by turning it into a beautiful pillow cover! Look how sweet and cuddly!
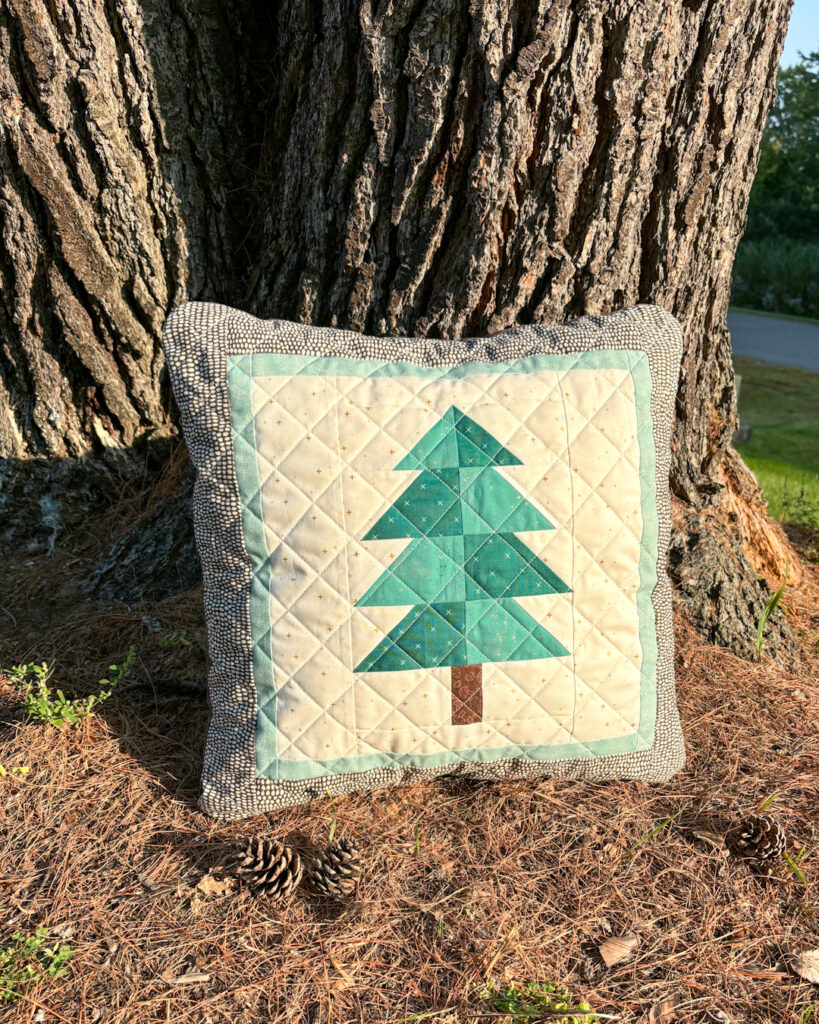
I have made different types of pillow covers in the past. For this tutorial I’m using an exposed zipper on the back of the pillow cover. Firstly, I think it’s one of the fastest and easiest ways to make a pillow cover. And secondly, I find it looks great with both a zipper colour that matches the back of your pillow or provides a fun accent (scroll to the bottom of this blog post to see an example).
Materials and tools you’ll need for your pillow cover
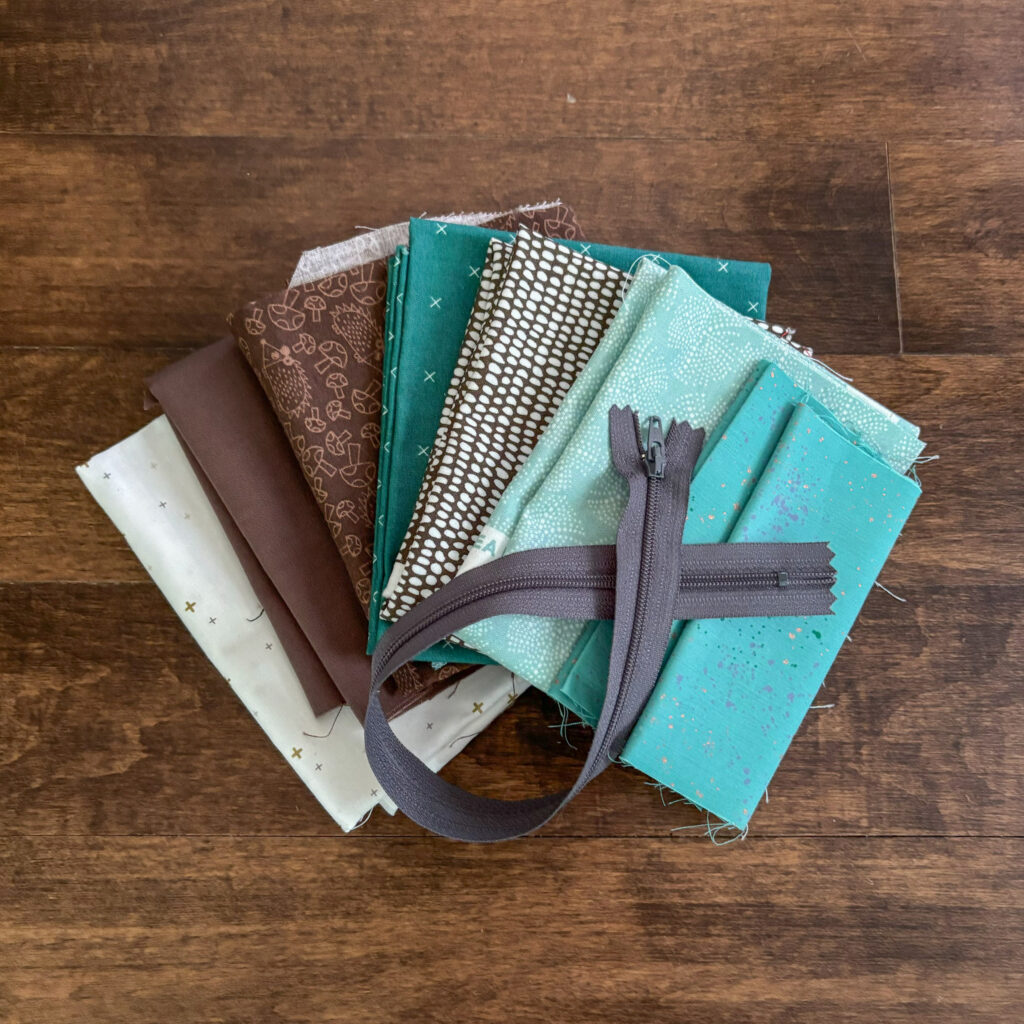
You really only need a few things, but please take a moment to gather the following materials and tools:
- your quilt block
- extra scraps to add borders (unless your block is large enough on its own)
- a zipper (a few inches shorter than the width of your pillow cover)
- fabric for the back of the pillow cover
- tools: a zipper foot, a fabric marker, your regular sewing tools
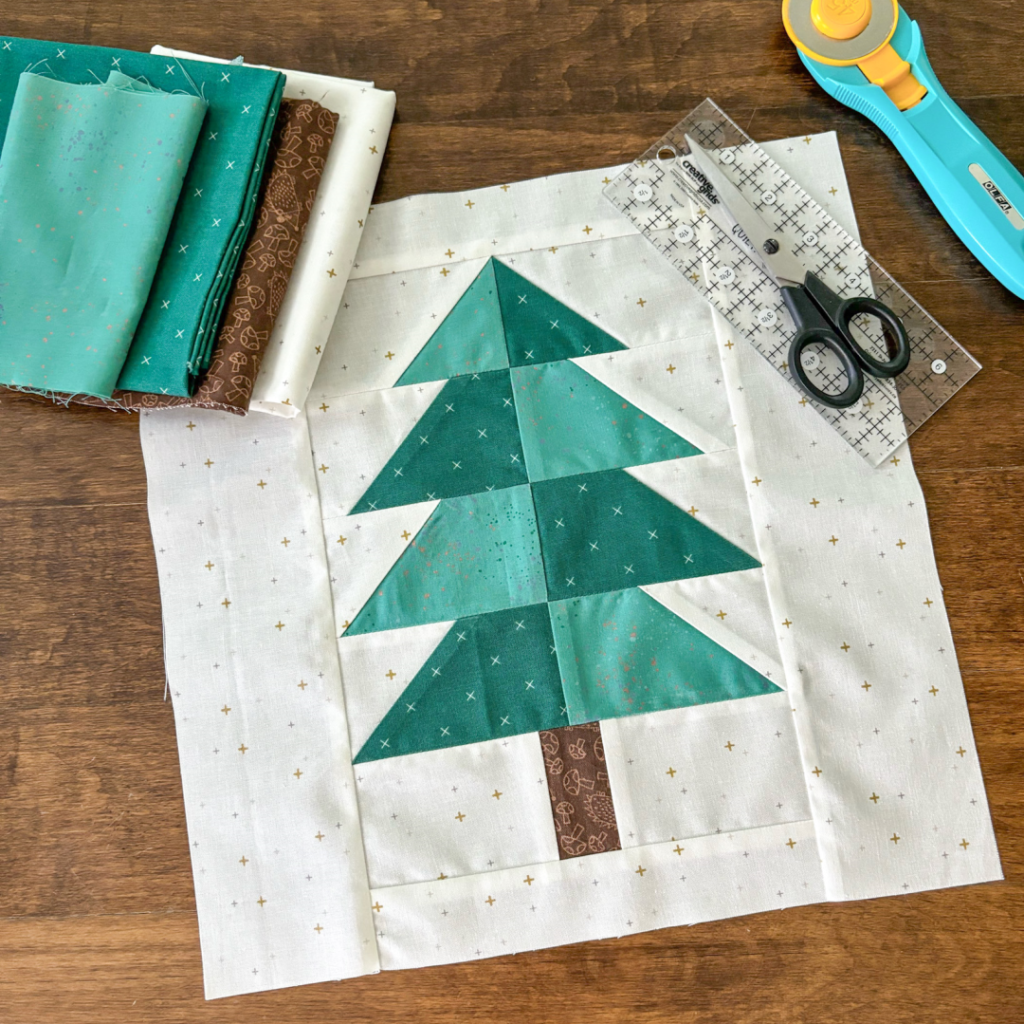
I used this Evergreen block from my recent FPP tutorial. The free pattern and video tutorial can be found here!
Step 1 – Make your front panel
Once you have identified the quilt block you’re going to use, you’ll likely want to increase it to a “normal” pillow cover size.
This all depends on your block, of course, but these are the dimensions of the strips I used to turn my 12 1/2″ x 12 1/2″ unfinished Evergreen block into an 18″ x 18″ finished pillow cover:
| Accent frame: 1 1/4″ x 12 1/2″ (2x) 1 1/4″ x 14″ (2x) | Borders: 3″ x 14″ (2x) 3″ x 19″ (2x) |
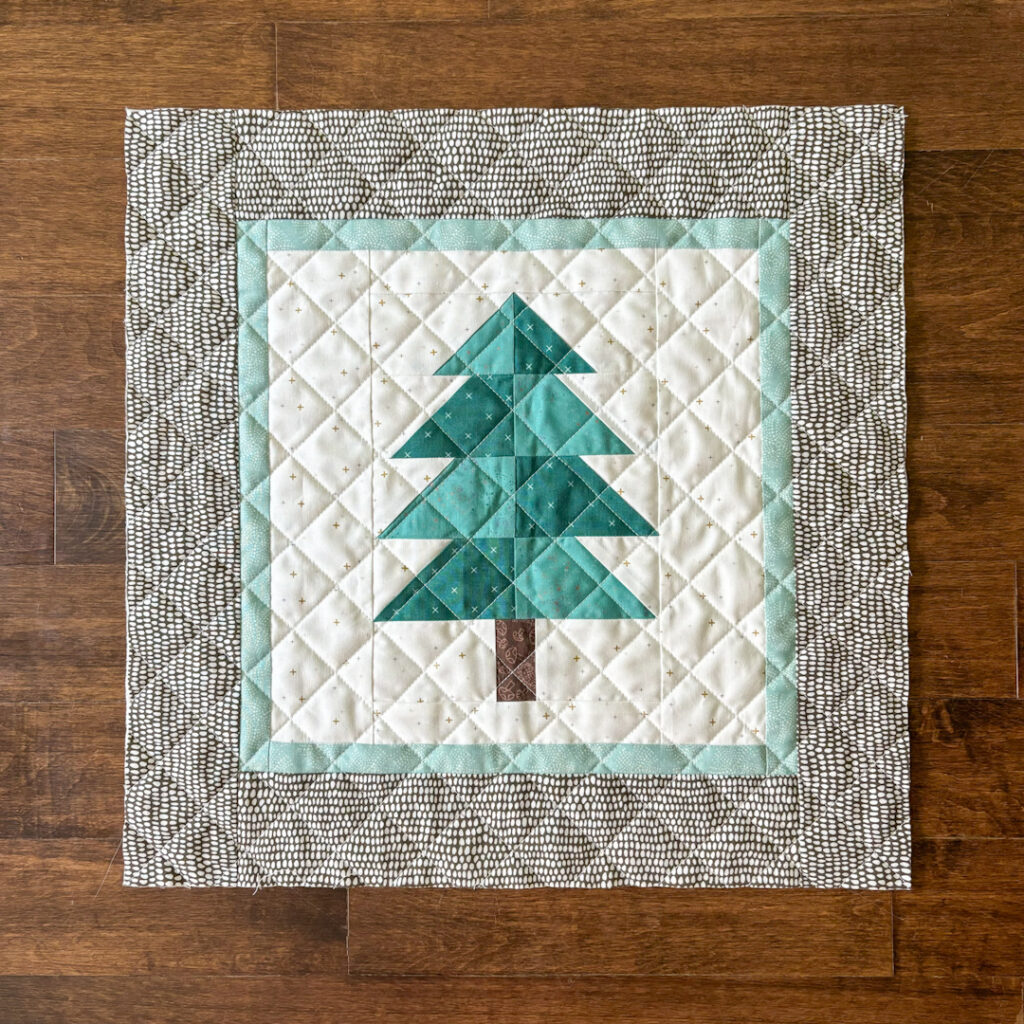
With those strip dimensions, my resulting unfinished front panel measured 19″ x 19″. My grid quilting shrank it by just under 1/2″ in both width and height, so I trimmed it to 18 1/2″ x 18 1/2″ (see below). Here’s my completed (quilted and trimmed) front panel.
Step 2 – Make your back panel
Now let’s make the back panel for our pillow cover!
Firstly, let’s prepare our backing fabric pieces. We’ll want the dimensions of our back panel to match the size of the front panel. To give us some wiggle room while sewing the zipper, we’ll start with pieces that are slightly over-sized.
I hope the formulas below don’t seem overwhelming! Essentially, we’ll cut our large rectangles 1″ wider than our front panel. And to determine their height, we’ll divide the height of our front panel by 2 and add 1″. That’ll give us about 1″ of trimming room in both width and height of our back panel.
The zipper tags on each end of the zipper are sewn while folded in half (you’ll see in the next step). Therefore they need to be about twice as long as you would guess from the graphic below, plus a suggested 2″ for seam allowances and trimming room. And similarly, I suggest to cut them at least 1/2″ wider than your zipper (mine was 1″ wide).
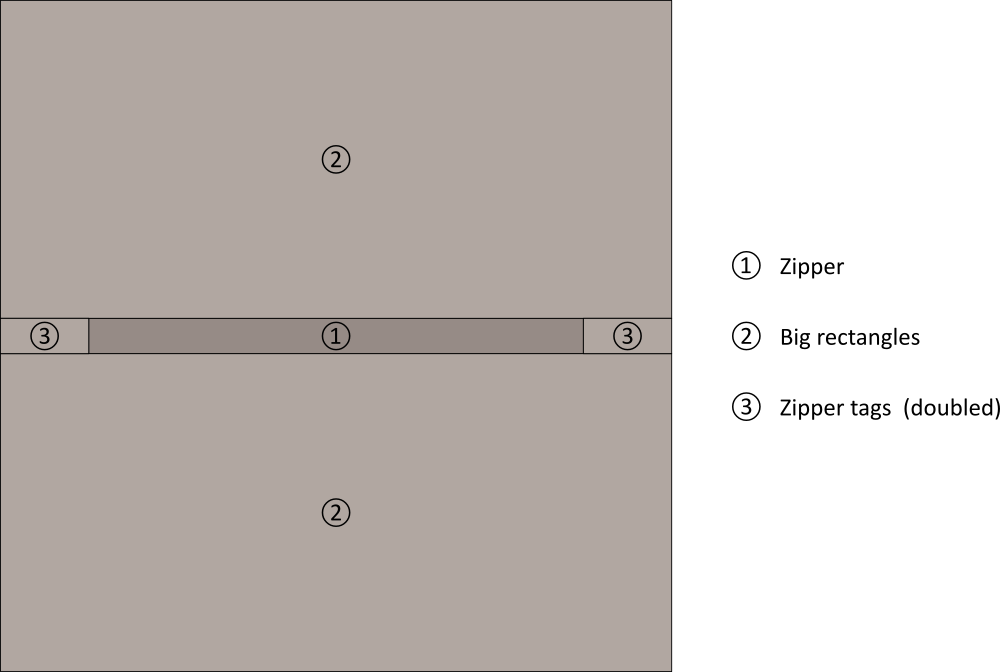
| Big rectangles: Width of front panel + 1″) x (Height of front panel / 2) + 1″ (2x) (in my example: 19 1/2″ x 10 1/4″) | Zipper tags: (Width of zipper + 1/2″) x (Width of front panel – Length of zipper + 2″) (2x) (in my example: 1 1/2″ x 6 1/2″) |
Ok, now that we have our backing pieces ready, let’s build our back panel.
First, we’ll need to make our zipper unit. Fold your first tag strip in half and position the closed end of your zipper in the fold as shown below. Fold the top of your tag down and secure your zipper with a pin. Use your finger nail to identify the position of the zipper’s metal stopper and mark a line just to the right of it.
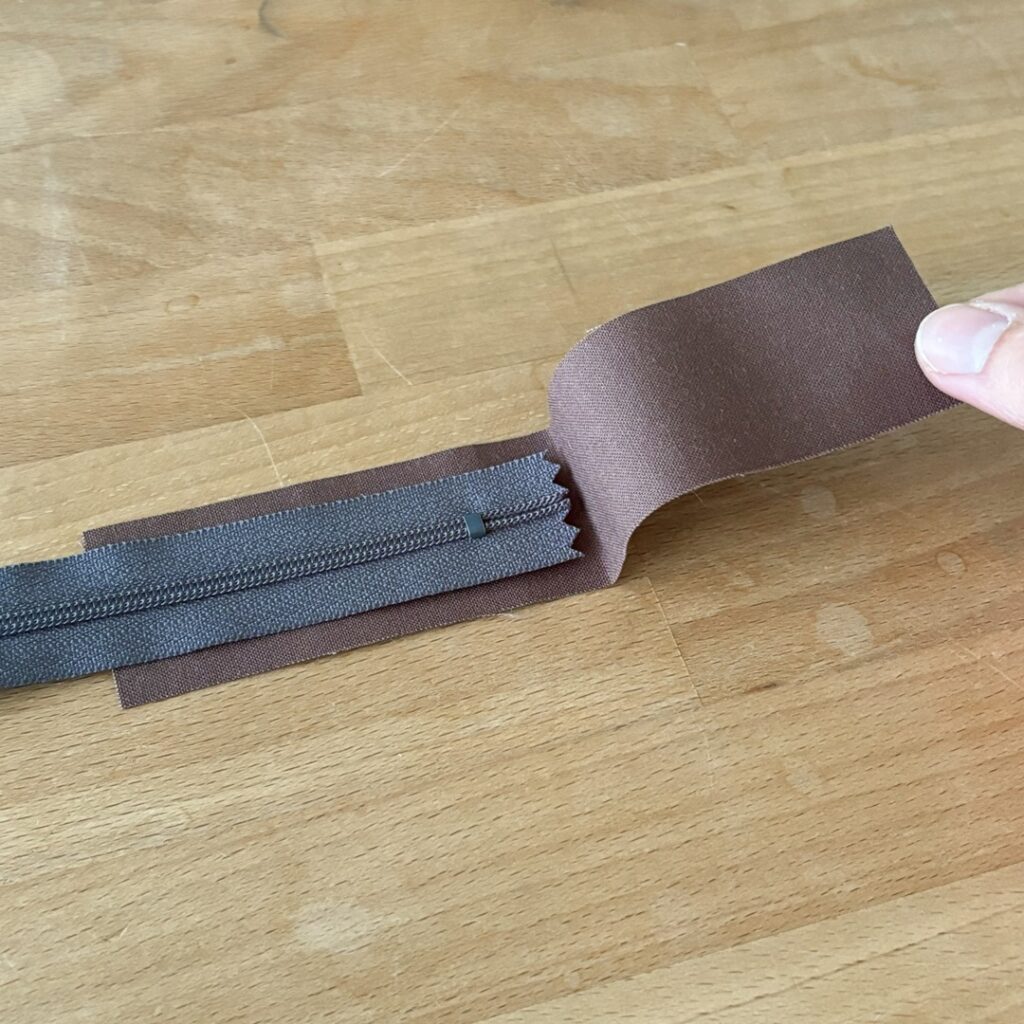
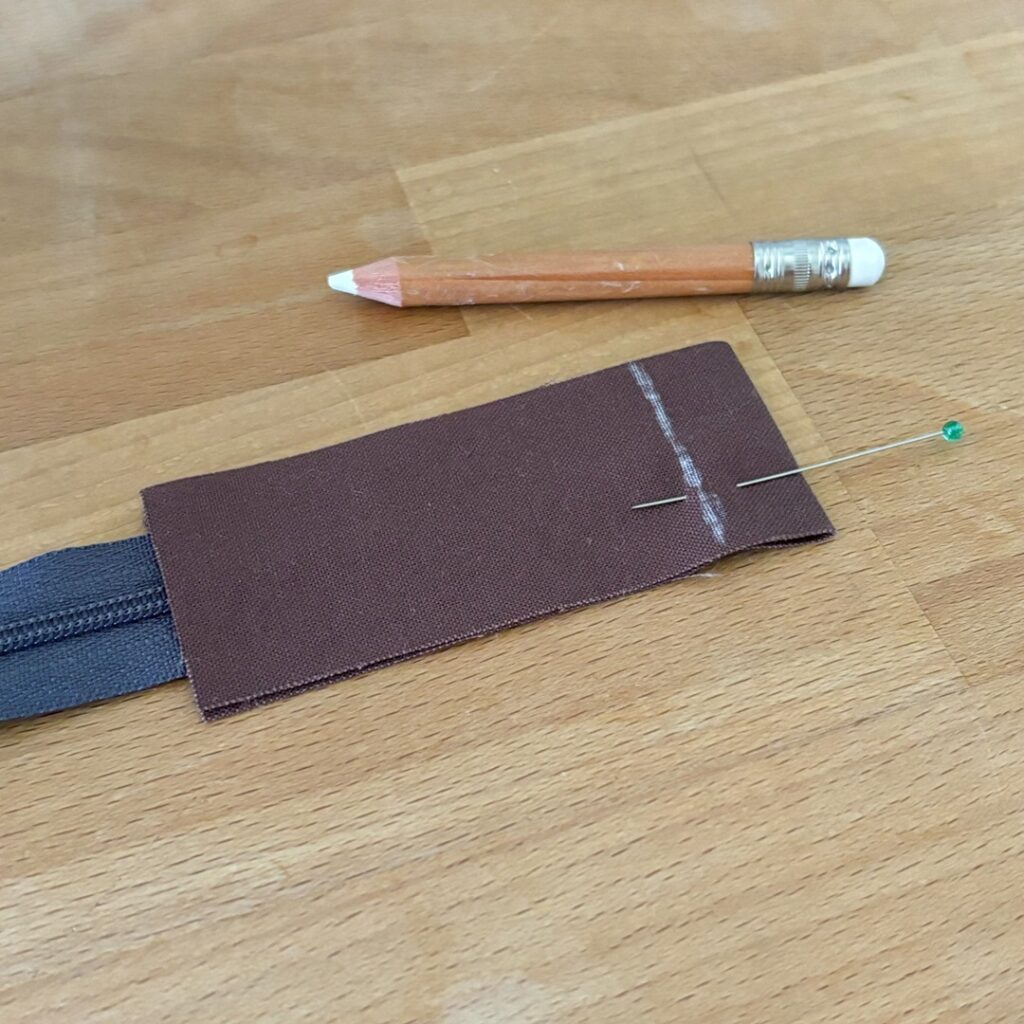
Repeat with the other end of your zipper. Opening the zipper a bit might help keeping its ends straight in the tag. This time, you might need two pins to secure your zipper.
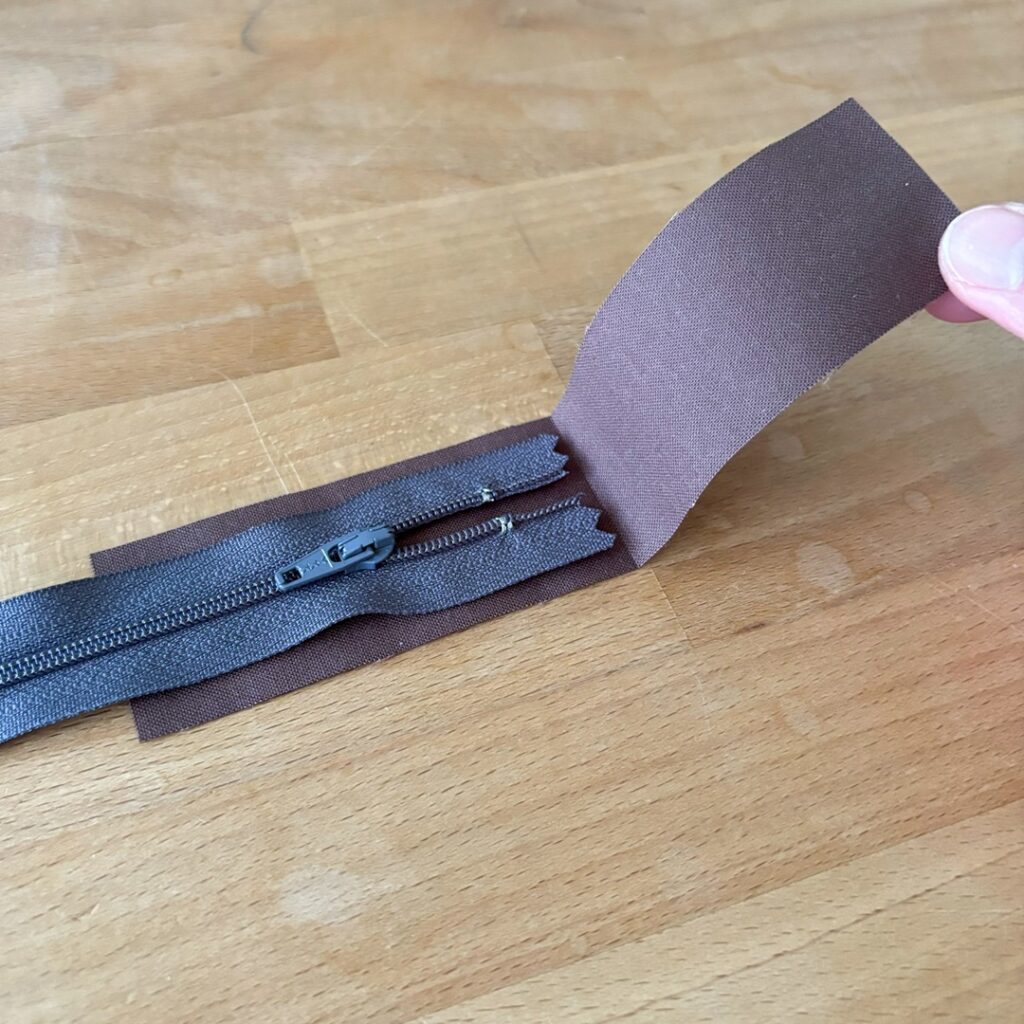
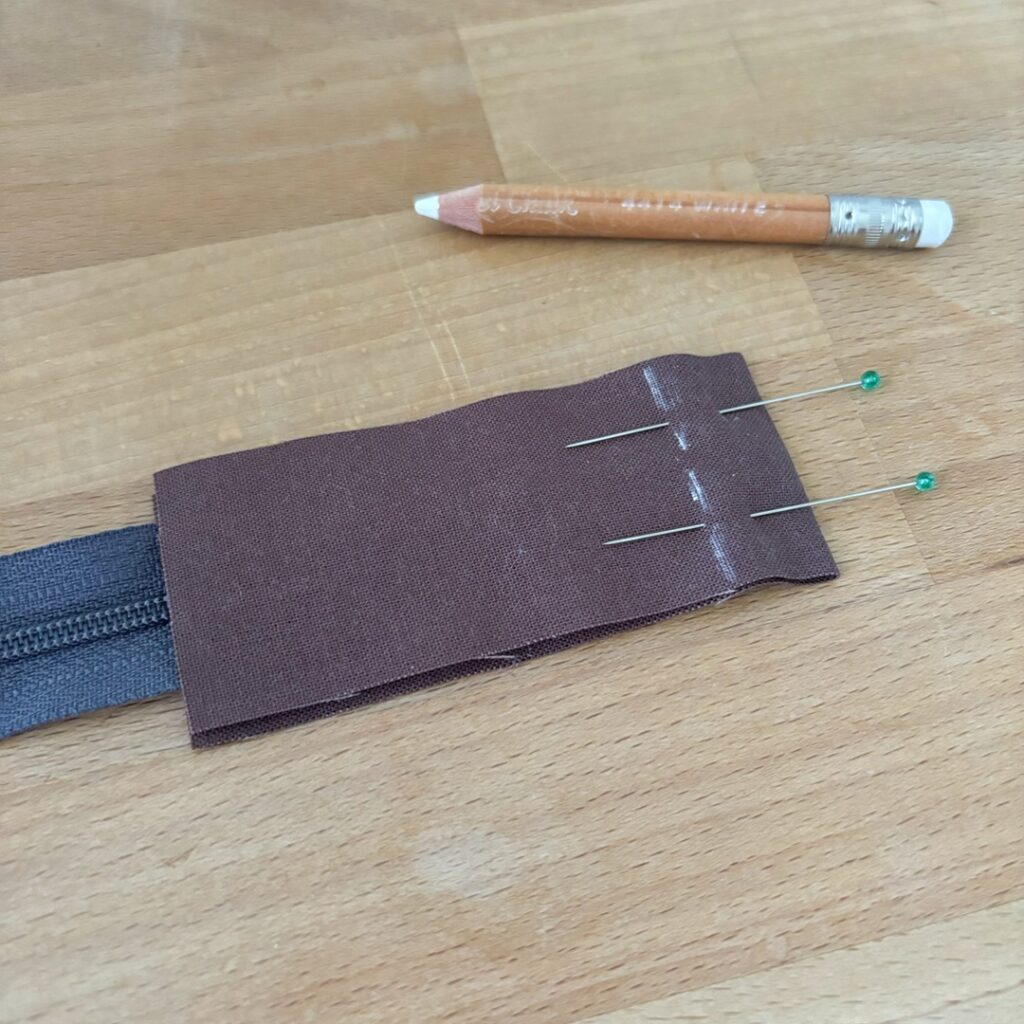
Sew on both marked lines and remove your pins. Fold both ends of your tags along the seam and top stitch along the edge (left image below). Then, trim your tags to the same width as your zipper (right image below).
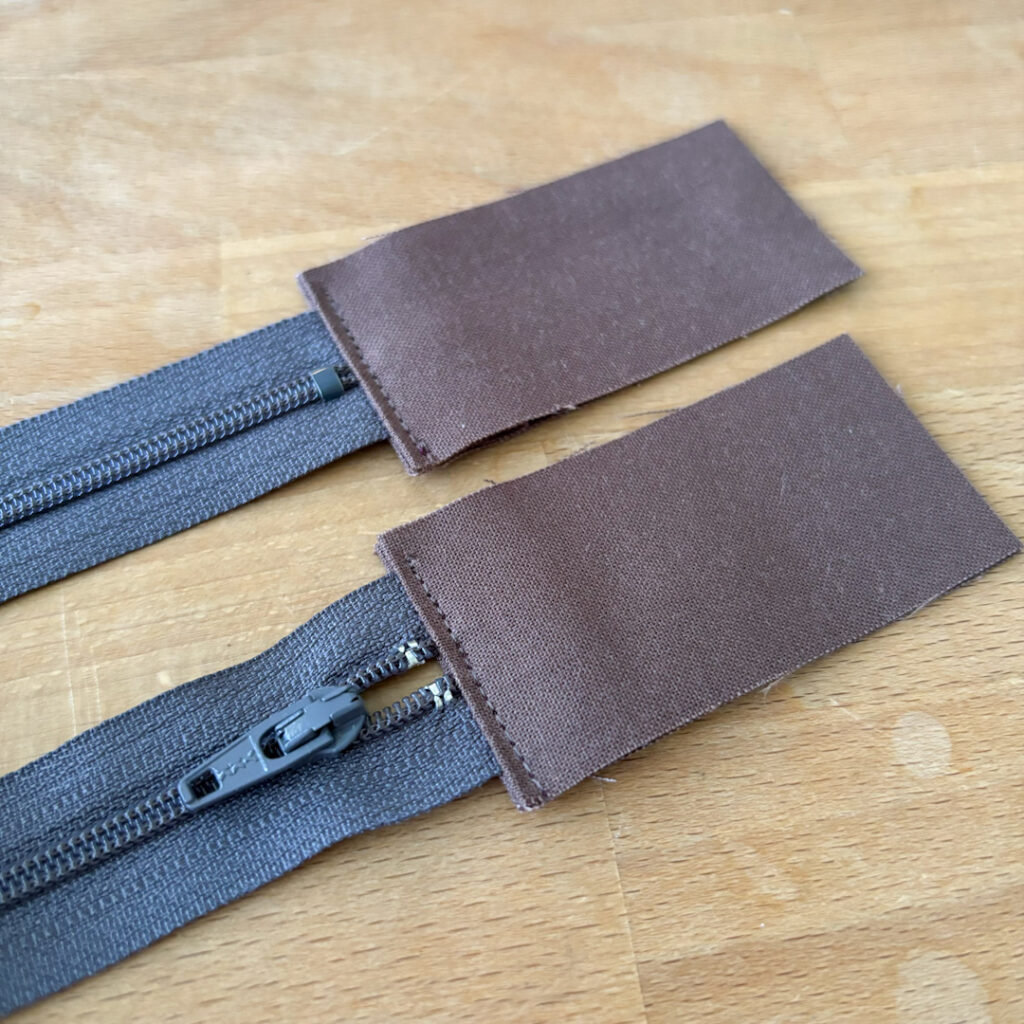
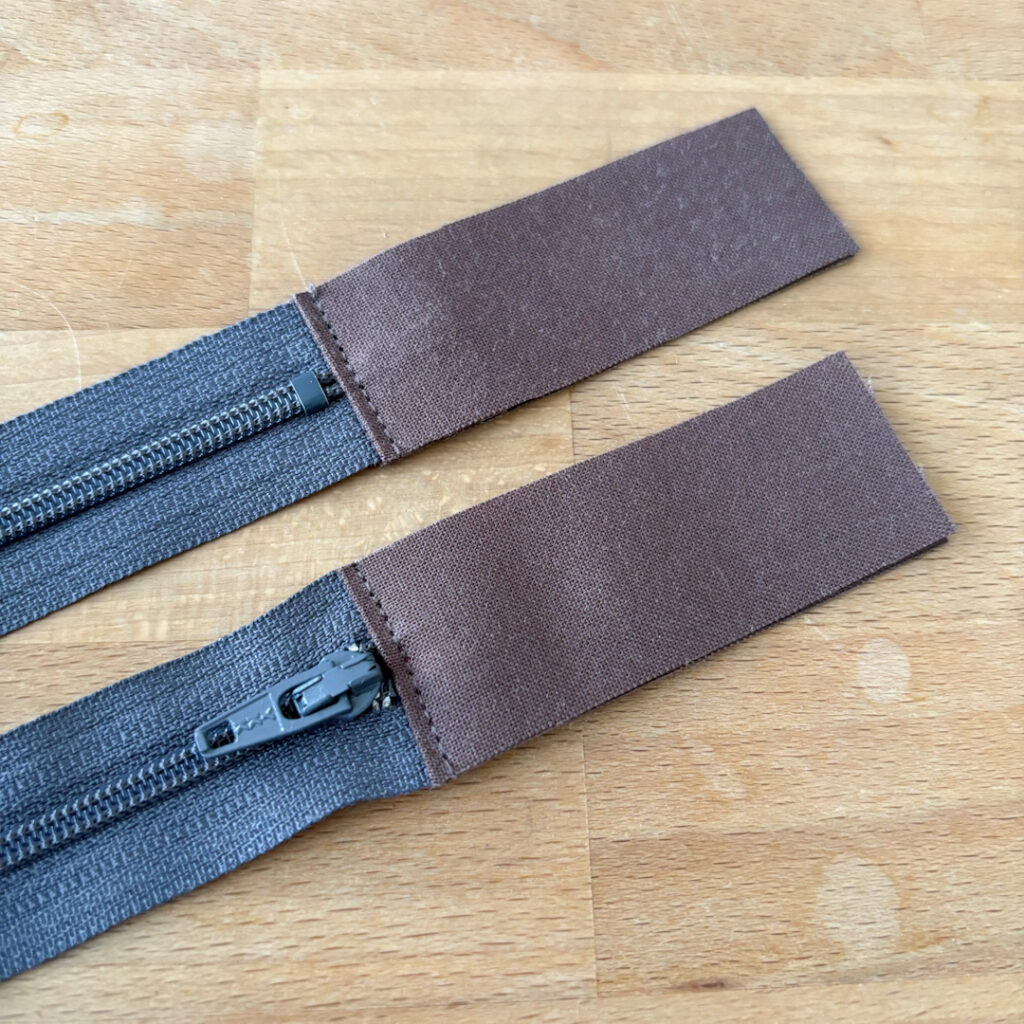
Now to add the big rectangle pieces. Pin your first back rectangle to your zipper unit as shown below (right side down if you’re using a print). Make sure the overhang of the tags are the same on both sides. Using a zipper foot, sew a seam just to the right of your zipper’s teeth. You may have to sew this seam in two sections, unless you can move your zipper slider past your sewing machine foot without interrupting your seam. Once the seam is complete, zigzag the right edge to prevent it from fraying.
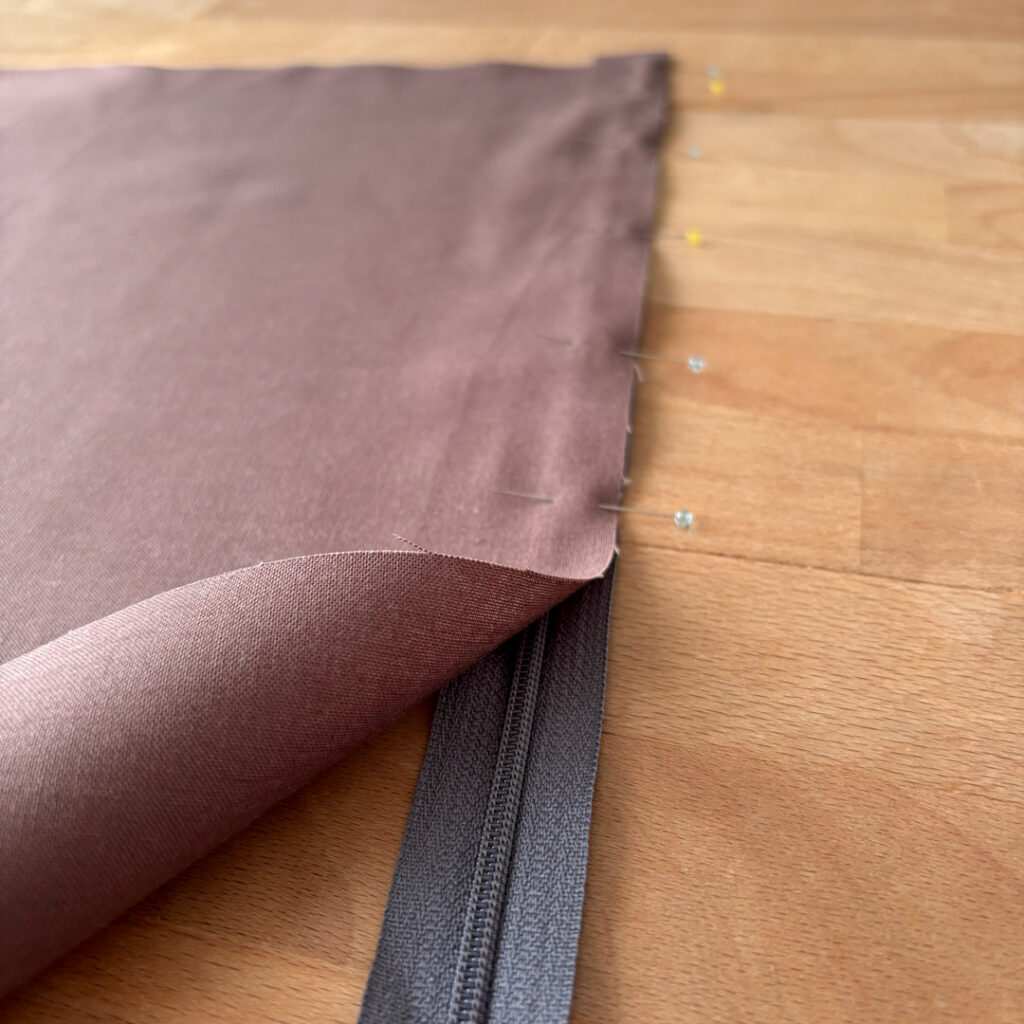
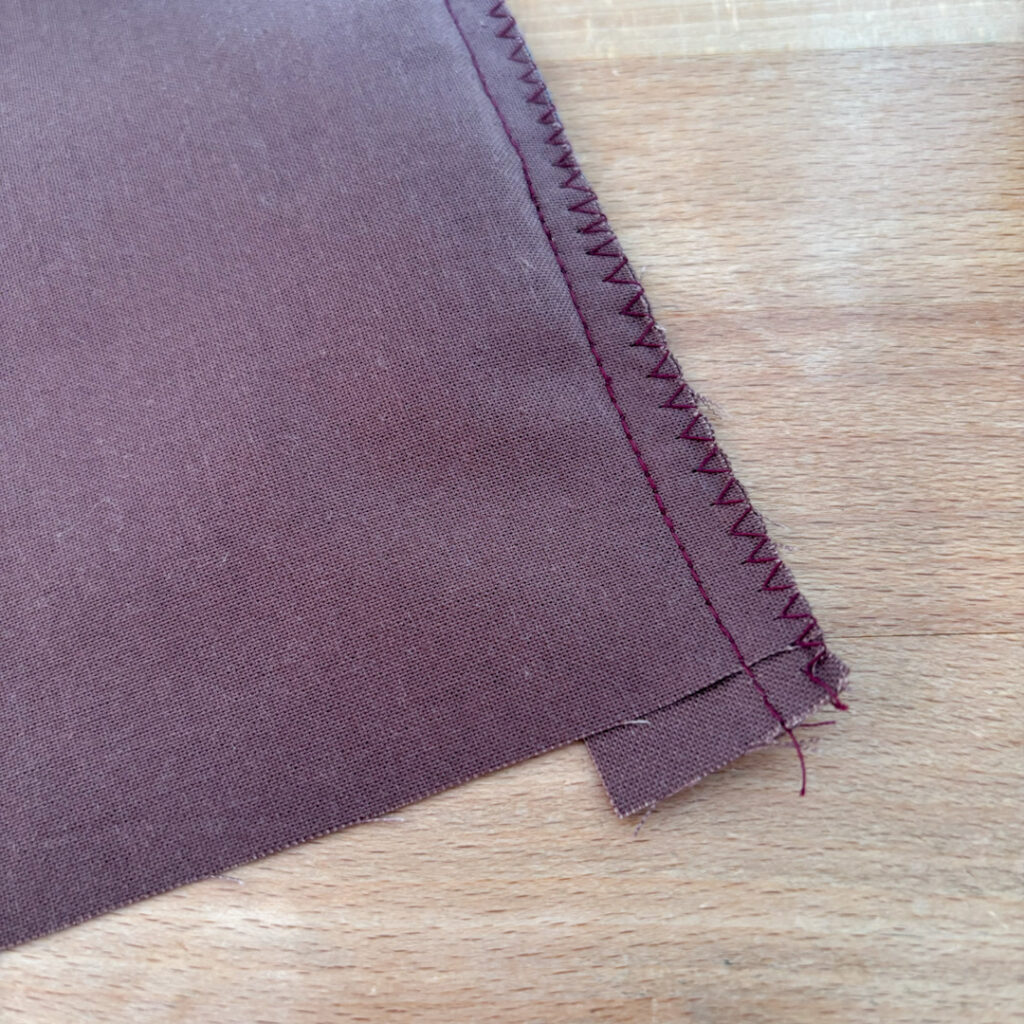
Fold your back rectangle over and top stitch along the edge (first photo below). Then, repeat the same process for the second half of your back panel. Once completed, trim your back panel to the same dimensions as your front panel.
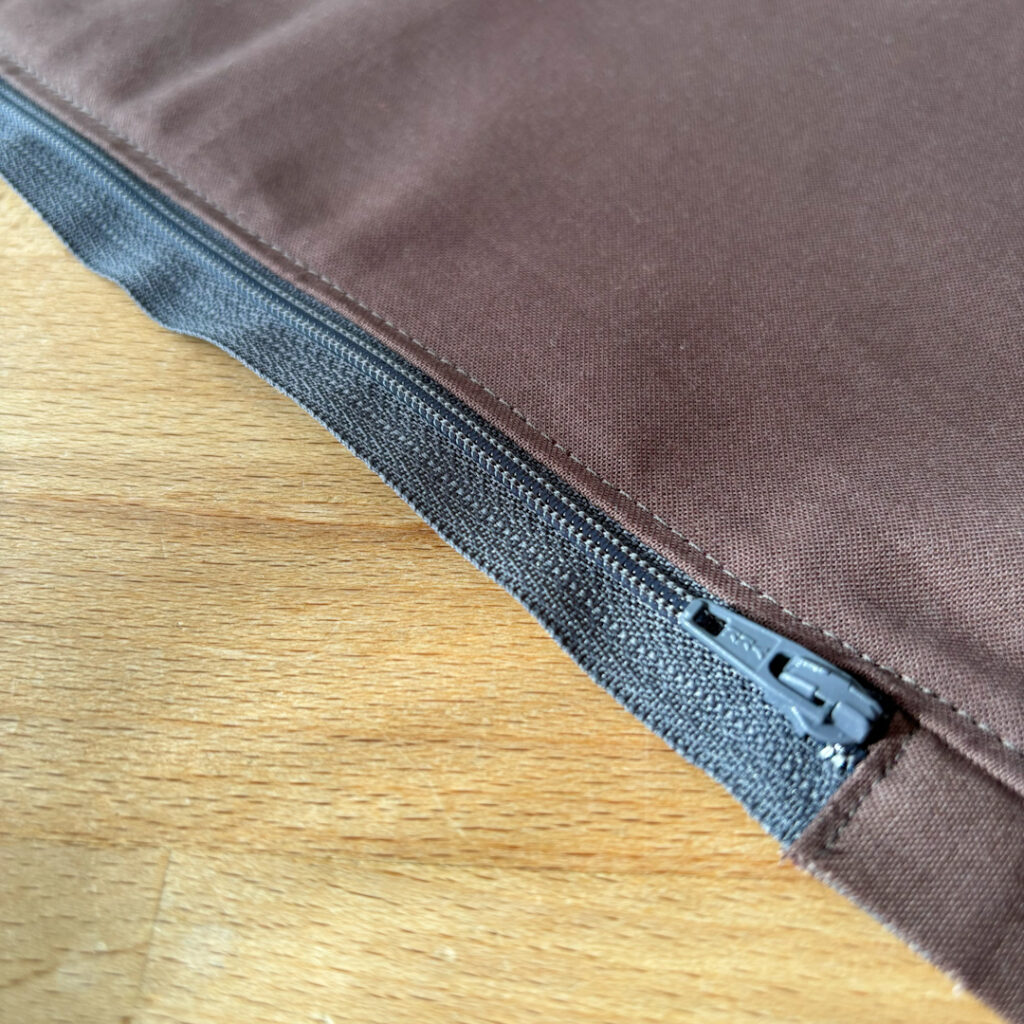
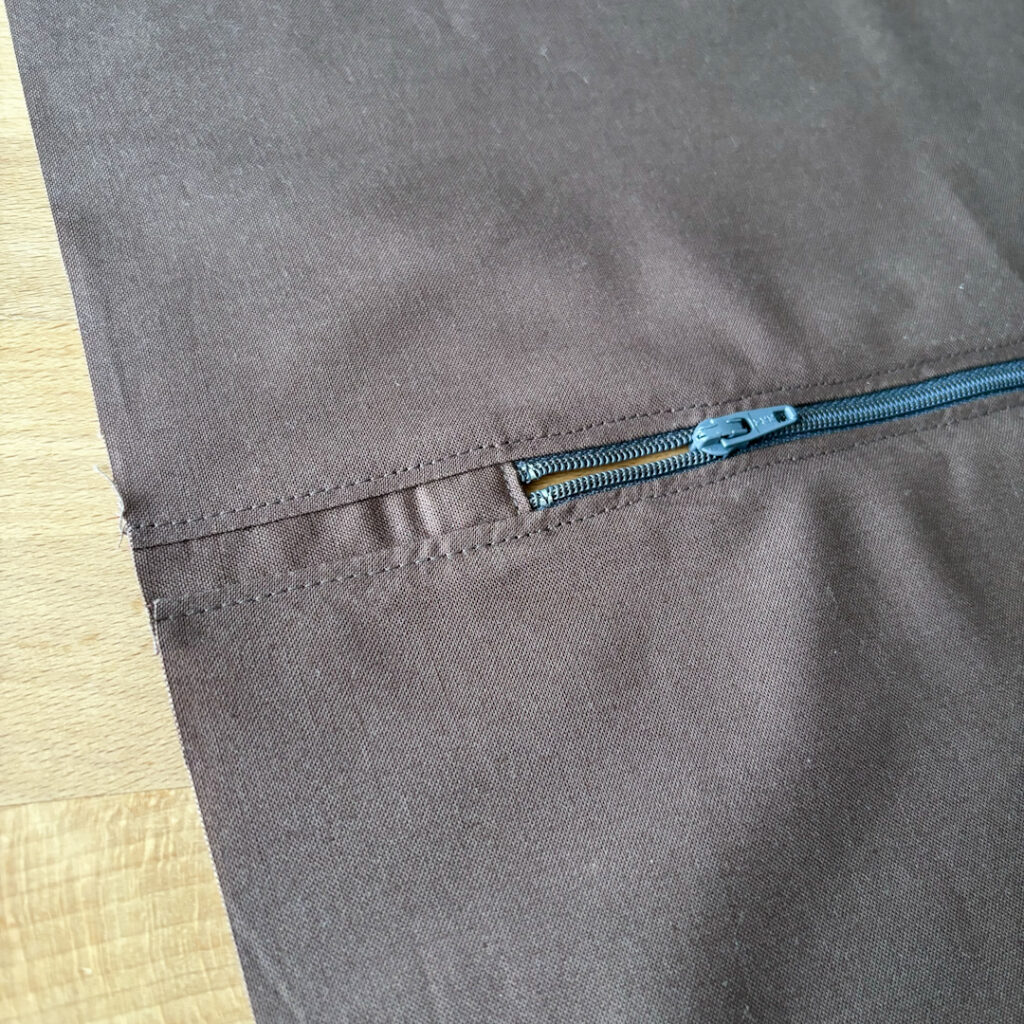
Step 3 – Finish your pillow cover
I decided to round the corners of my pillow cover and therefore marked the radius with the help of an upside-down cup on the back of my back panel (see first photo below). If you prefer pointy corners, you can skip this step. To join your front and back panels, place your back panel on top of your front panel (right sides together) and pin all around. Important: Leave your zipper far enough open to fit a hand through. Otherwise the pillow cover might be hard to flip later! Sew around your sandwich with a 1/4″ seam allowance. Trim the rounded corners, then finish your pillow cover all around with a zigzag stitch (second photo).
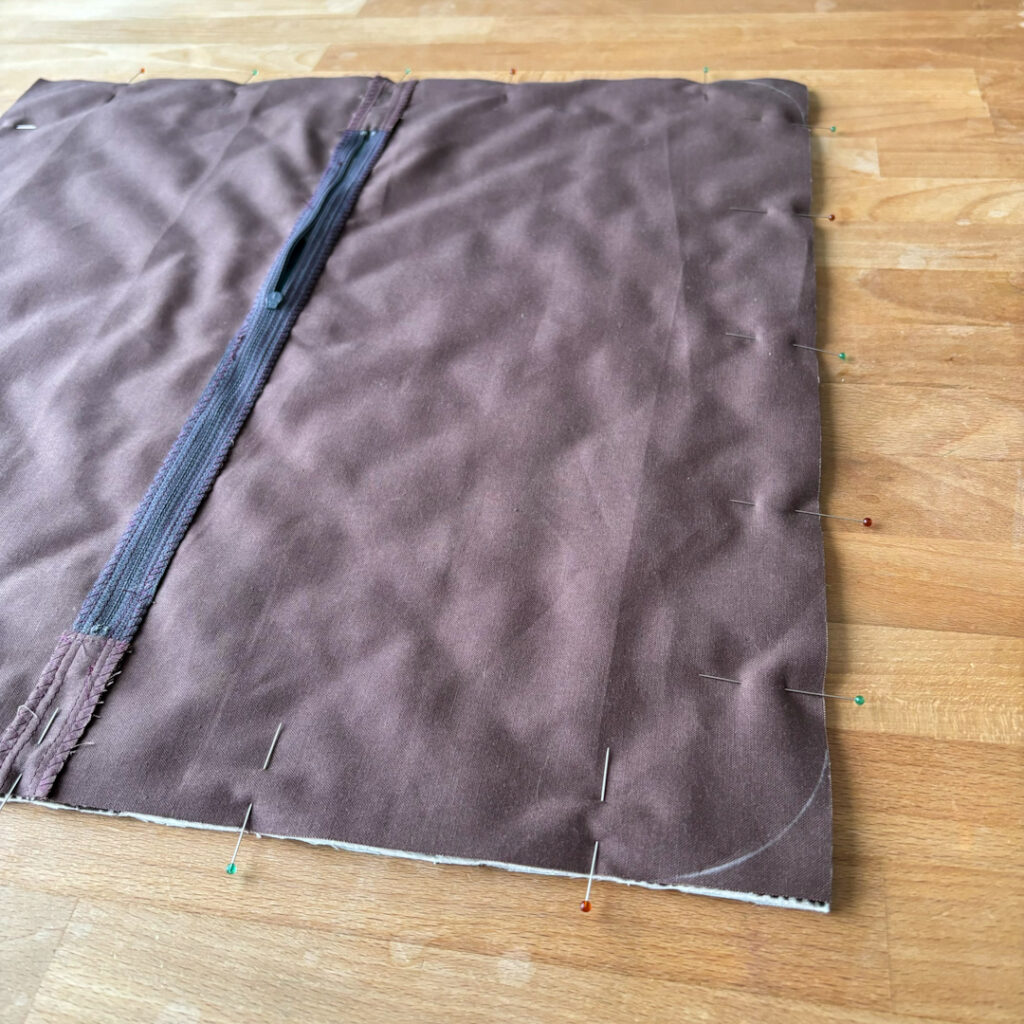
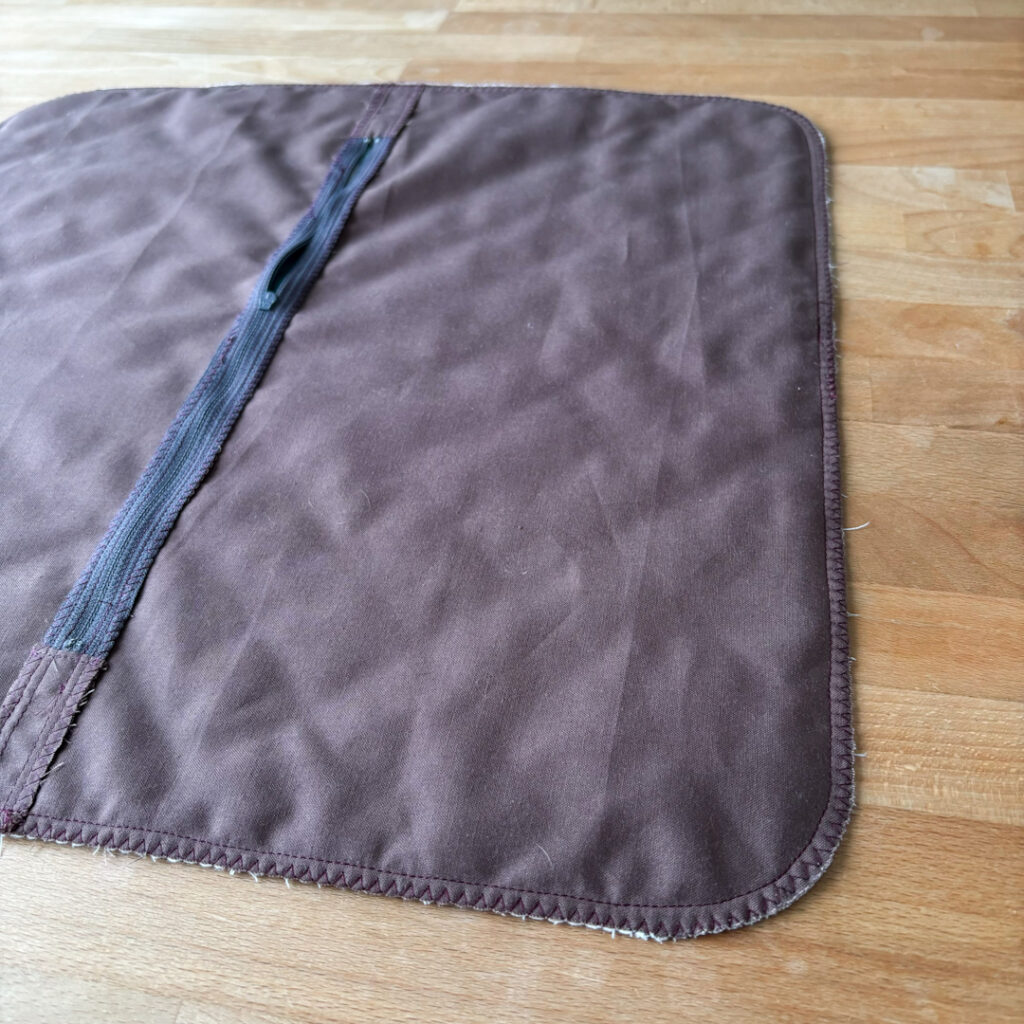
And that’s it!
Flip your pillow cover right-sides-out through the zipper opening and stuff it with a pillow insert. To avoid droopy corners, I like to use inserts that are slightly larger than the pillow cover and therefore went with a 20″ x 20″ insert.
Here’s another pillow cover I made using this type of back panel. In this case I chose to add a pop of colour and went with a contrasting zipper that matched the binding. Isn’t it fun?! To join the front and back panels of this Halloween pillow (get more details and free appliqué templates), I pinned both together wrong-sides-together, then bound them with a regular quilt binding.


You see, lots of variations are possible, just choose what you like best!
Good luck with your own pillow cover!


Just pulling out all the autumn fabric – it goes by so fast in Chicago! We have summer and winter. The castle has lots of possibilities in different colors too – adorable!
Thanks for the tute on the zipper! Good for purse/cosmetic as well !
I’m glad to hear, Joan! Happy stitching!