Tulips are perfectly adorable on their own. But paired with some sweet garden fairies?! Oh my goodness… Let me show you what I mean!
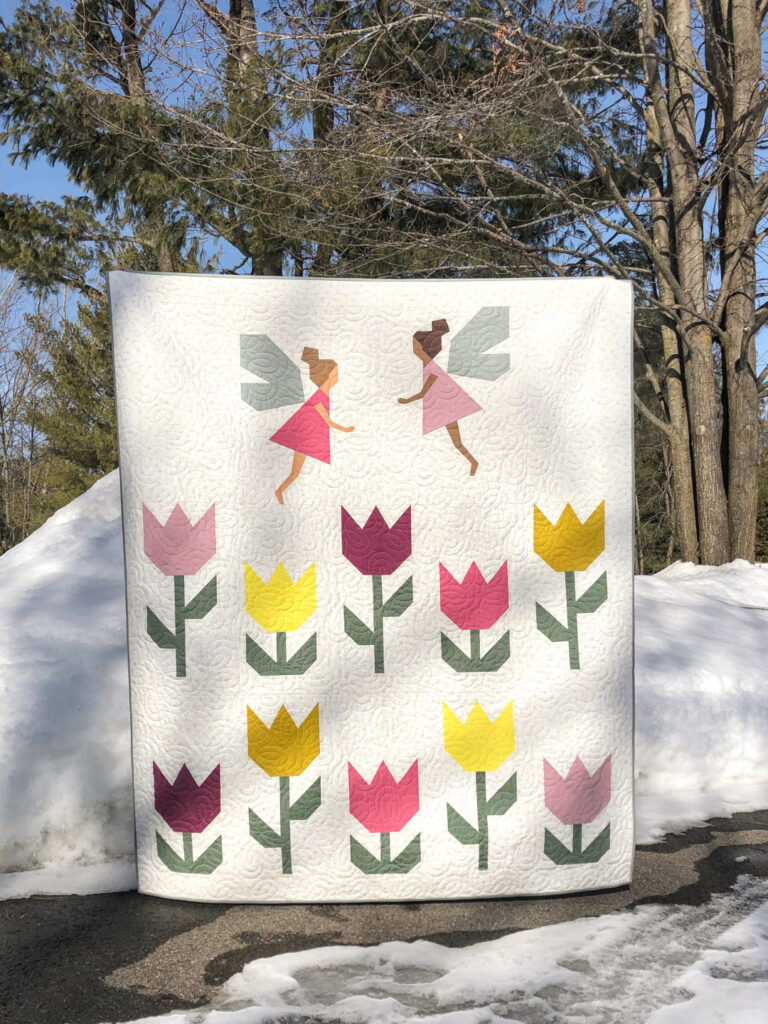
Of course you are not limited to making two girl fairies. The fairy blocks of Fairy Boy work just as well!
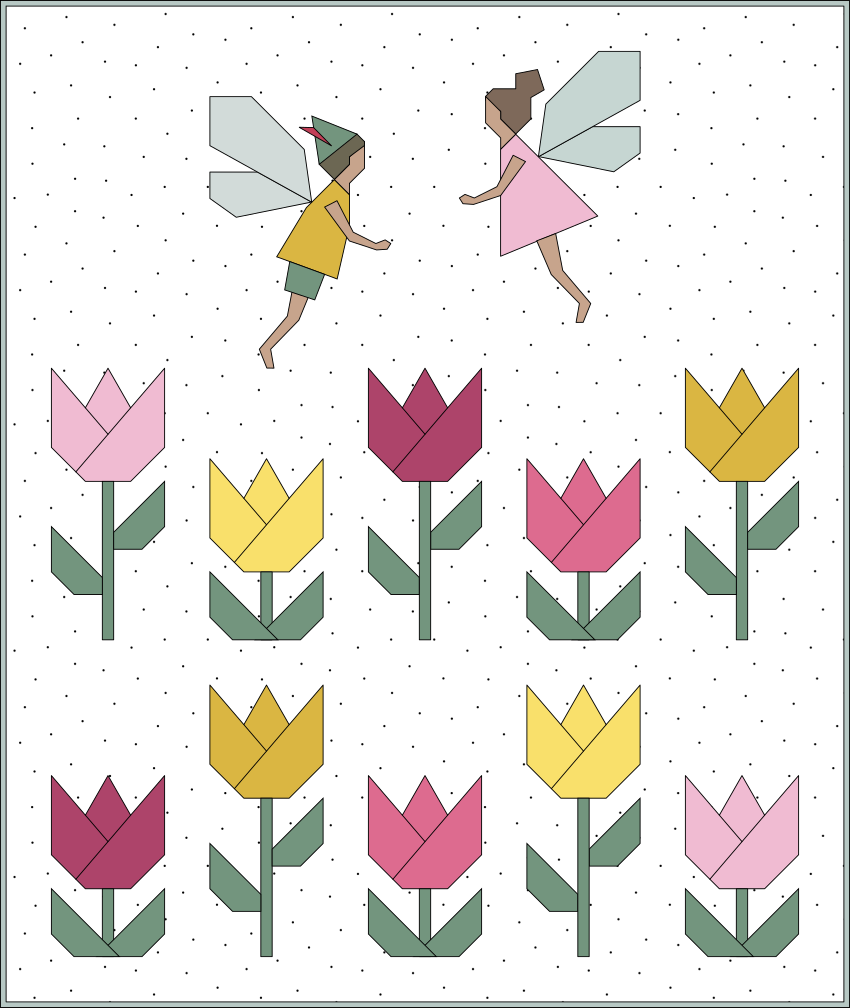
You sure want to make your own version of this sweet combo, don’t you?! Come along, the integration of the tulips and fairy blocks is really straight forward, you’ll see! And you can even choose to make a baby quilt or a throw size as all quilt blocks come in two sizes. Yay!
A few notes before we start
Essentially, the layout of this quilt was created by replacing the top row of tulips from the baby quilt / throw size of Paper Tulips with the two fairies from Fairy Sisters. Here are a few more details:
- Finished quilt size: 37″ x 44″ or 56″ x 66″
(identical to Paper Tulips in the baby quilt or throw size) - You will need the following patterns:
- Fairy Sisters (get the pdf or printed booklet) and/or Fairy Boy (get the pdf);
Both patterns are also available as a bundle: Fairy Folks (get the pdf) - Paper Tulips (get the pdf or printed booklet)
- Fairy Sisters (get the pdf or printed booklet) and/or Fairy Boy (get the pdf);
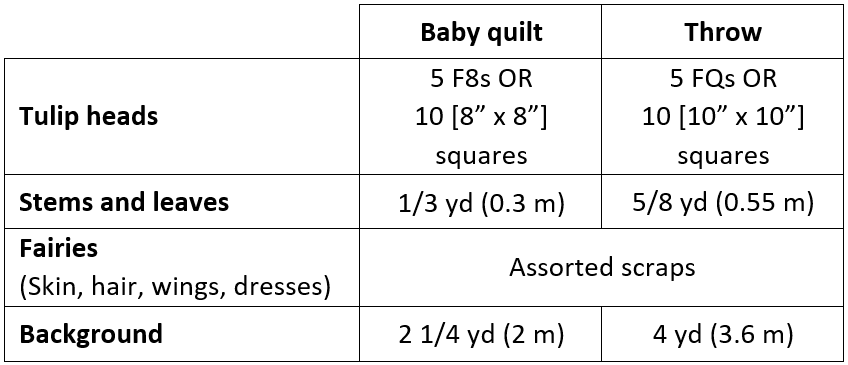
- Fabric requirements:
Cutting instructions
- From the Fairy Sisters pattern: cut all pieces, except C and D.
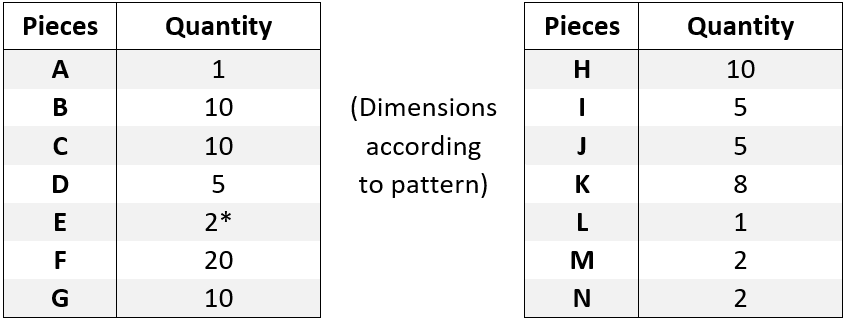
- From the Paper Tulips pattern, cut and prepare the following pieces (please note: due to the differing quantities, you will not be able to use the cutting charts):
- In addition to the above, cut 2 BG pieces:

Piecing your quilt top
Making the fairy section
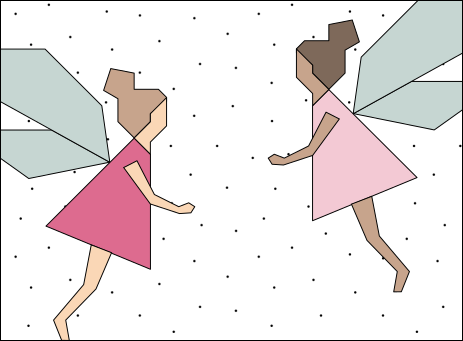
- Using your assorted scraps, your off-cuts and remaining background fabric, follow steps 1-6 of the Fairy Sisters pattern to make the unit shown below.
Important: Use the larger fairy templates for the throw, the smaller templates for the baby quilt. Instead of the right-facing fairy girl you can use the same-sized block from Fairy Boy.
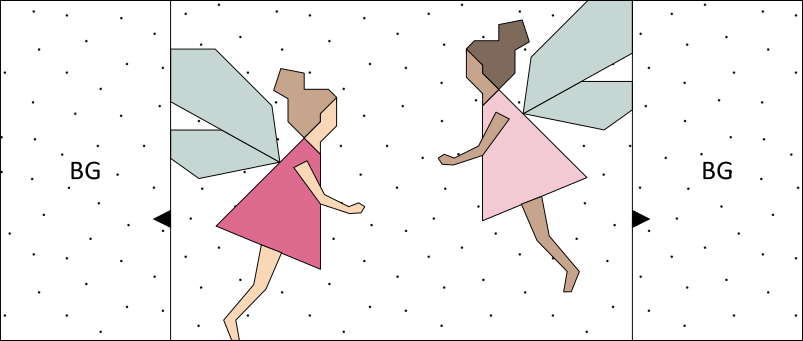
- RST, sew your BG pieces to the left and right of your unit from step 1 and press your seams towards the BG pieces.
Piecing the tulips and assembling your quilt top
- Make 5 smaller and 5 taller tulip blocks as described in the Paper Tulips pattern. Use each of your F8s/FQs to make two tulip heads OR each of your 8″ x 8″/10″ x 10″ squares to make one tulip head.
Important: Use the larger tulip head templates for the throw, the smaller templates for the baby quilt.
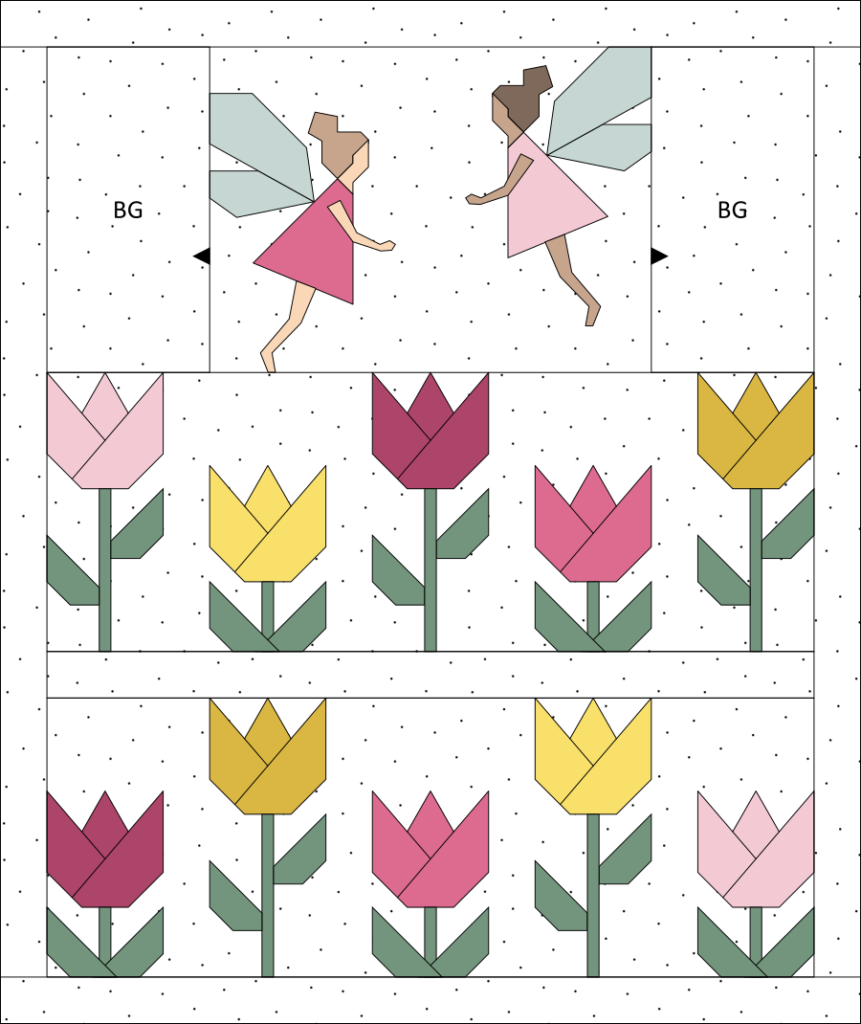
(Please note: you will only need 5 E–A–E units, but you can use your off-cuts when piecing the FPP sections or to sub-cut your F pieces.) - Sew your tulip blocks and your K pieces together in rows to create the two tulip sections outlined in the diagram below.
- Assemble your quilt top according to Fig. 13 of the Paper Tulips pattern, using your fairy unit from step 2 instead of the top row of tulips of the original pattern and the upper L strip.
- Finish (baste, quilt and bind) as desired.
And that’s it! I hope you love this new quilty adventure brewed up in my Pattern Blender!
If you’re making your own version of this tulips and fairies quilt, I’d love it if you shared it using the hashtags #PaperTulipsQuilt, #FairySistersQuilt and/or #ABPatternBlender, so I can see and admire them.
